3www.mastercool.com
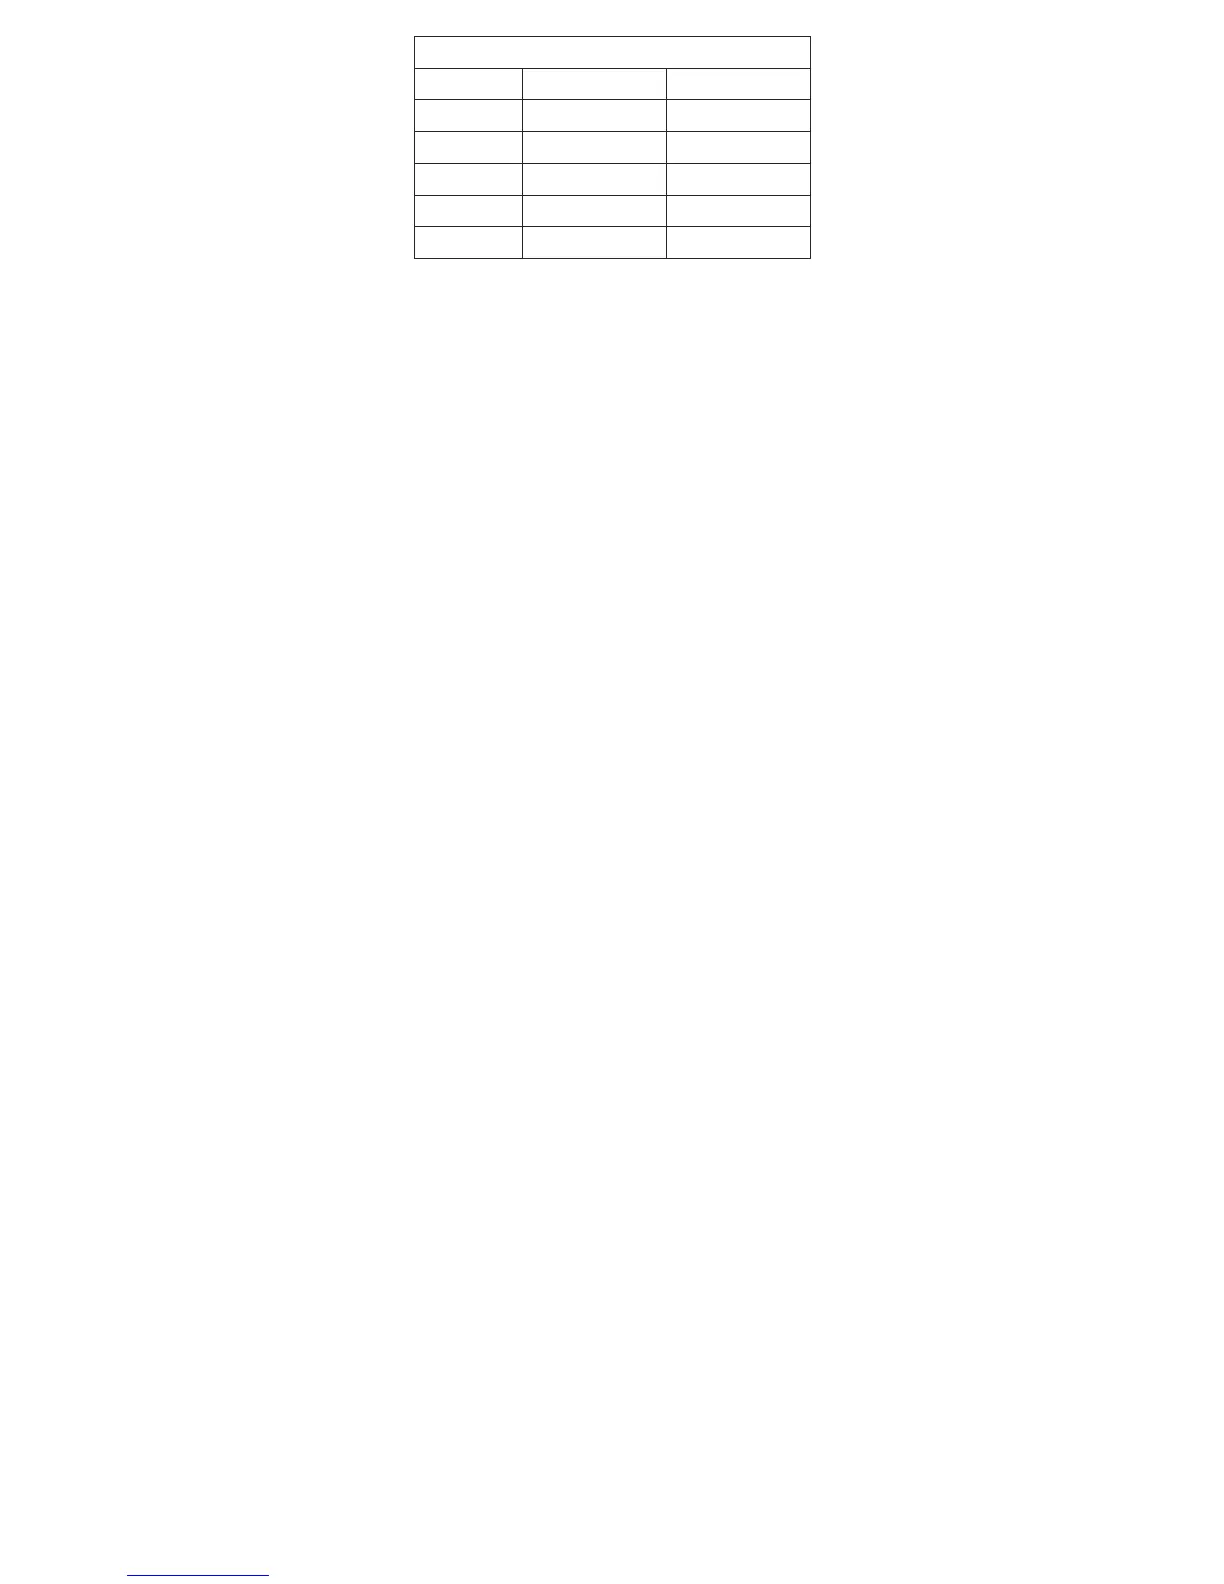
Testing Range of Systems
R134a 260 - 320 psi 18 - 22 bar
R404A 405 - 465 psi 28 - 32 bar
R404C 405 - 465 psi 28 - 32 bar
R507 405 - 465 psi 28 - 32 bar
R22 405 - 465 psi 28 - 32 bar
R410A 550 - 610 psi 38 - 42 bar
• Open the output control valve (4) and open the ball valve (9) on the
leak testing gauge assembly for the nitrogen to flow into the system.
(If using a manifold, open the output control valve (4) and the low side
valve (13) on the manifold.)
• Make sure the required pressure is available on both gauges. (You may
need to turn the T handle (6) on the regulator to adjust to the required
pressure.)
• Once the pressure is equalized (make sure the black needle is aligned
with the red marker on the leak testing gauge assembly) close the ball
valve connection (9).
(If using a manifold, close the low side valve (13) on the manifold
making note of the pressure when the valve is closed.)
• Close the output control valve (4) on the regulator
• Disassemble the yelllow charging hose (11) from the regulator and
leave the system for a period of time (time is based on the size of the
system.)
• After some time, look at the gauge, if there is a leak in the system the
pressure will have dropped from the original settting.
REGULATOR REMOVAL
• Turn the cylinder valve off.
• Relieve the pressure on the regulator by opening the output control
valve (4). Both gauges should read zero.
• Slowly loosen the cylinder connection. There may still be some
pressure between the regulator and cylinder.
• Completely remove the regulator.
• Clean and store the regulator in its box to prevent damage.
 Loading...