2
service hose (red) to the discharge side of the compressor. Make sure the couplers are securely
snapped.
3. If using manual couplers, move the plunger down within the coupler by turning the knob clockwise in
order to open the port valves and start refrigerant flow.
IMPORTANT NOTES
• A system that has been opened or one that is found to be excessively low on refrigerant pressure as a
result of a leak, must be fully evacuated by means of recycling and deep vacuum.
• A system that has been evacuated must be repaired, leak tested and evacuated again to 29” Hg.
before charging.
• If charging on the liquid or high side, use only the high side valve on the manifold gauge set. Make sure
the low side valve is closed.
• After charging, test the system by turning on the engine and running the A/C with both valves closed
on the manifold.
• After testing, disconnect the couplers from the system and make sure to use a recovery/recycling
machine to evacuate any refrigerant remaining in the hoses.
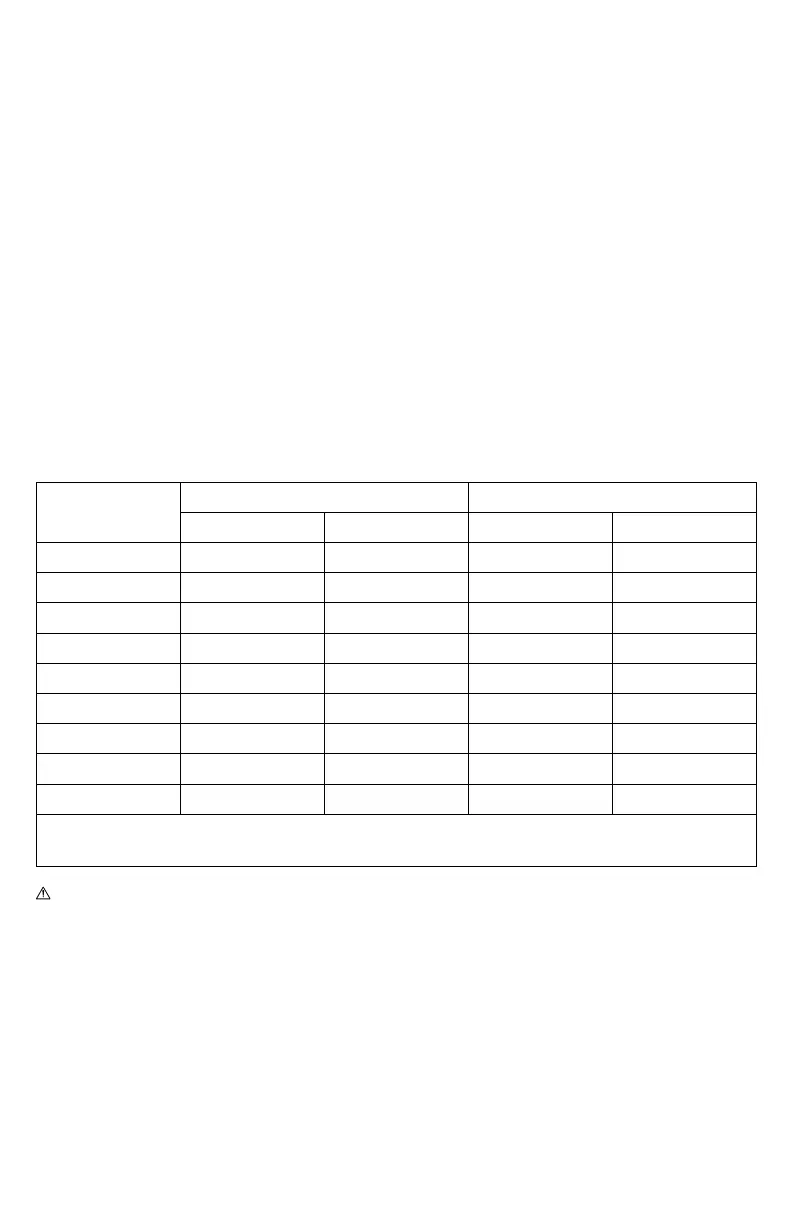
TEMPERATURE PRESSURE CHART
Ambient
Temperature (˚F)
Low Side Gauge (PSI) High Side Gauge (PSI)
R134a R1234yf R134a R1234yf
65˚ 25-35 22-32 135-155 128-142
70˚ 30-40 27-38 145-160 140-155
75˚ 35-45 33-43 150-170 148-166
80˚ 40-45 40-45 175-210 175-210
85˚ 45-55 46-56 225-250 227-253
90˚ 45-55 46-56 250-270 255-275
95˚ 50-55 53-57 275-300 280-310
100˚ 50-55 53-57 315-325 325-342
105˚ 50-55 53-57 340-345 350-360
* This chart should be used as a reference only please contact the
vehicle manufacturer for exact information
WARNING: This product can expose you to chemicals including Di (2-ethylhexyl) phthalate, lead and
lead compounds, which are known to the State of California to cause cancer and birth defects or other
reproductive harm. For more information go to www.P65Warnings.ca.gov
 Loading...