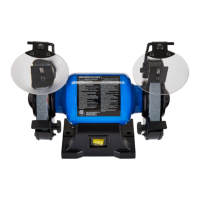
model no. 055-3521-2 | contact us 1-800-689-9928
Service on these tools should only be performed by an authorized, qualified
technician.
Motor will not start.
Motor will not
start-fuses or circuit
breakers tripping or
blowing.
Motor overheats.
Motor stalls
(resulting in blown
fuses or tripped
circuit).
Machine slows when
operating.
Wavy condition on
surface of workpiece.
16
17
TROUBLESHOOTING
TROUBLESHOOTING
SYMPTOM PROBABLE CAUSE
PROBABLE CAUSE
CORRECTIVE ACTION
1. Low voltage.
2. Open circuit in motor or loose
connections.
3. Blown fuse or breaker.
1. Check power source for proper voltage.
2. Inspect all lead connections on motor for
loose or open connections.
( Send for servicing. )
3. Change fuse or reset breaker.
( Send for servicing. )
1. Short circuit in line, cord or
plug.
2. Short circuit in motor or loose
connections.
3. Incorrect fuses or circuit
breakers in power line.
1. Motor overloaded.
2. Extension cord too long and of
insufficient gauge (weight).
1. Short circuit in motor or loose
connections.
2. Low voltage.
3. Incorrect fuses or circuit
breakers in power line.
4. Motor overload.
1. Feed rate too great.
1. Machine vibrating.
2. Workpiece not being held
firmly.
3. Wheel face uneven.
4. Wheel is too hard.
1. Inspect cord or plug for damaged
insulation and shorted wires.
2. Inspect all connections on motor for loose
or shorted terminals and/or worn insulation.
3. Install correct fuses or circuit breakers or
switch tool to an appropriately sized circuit.
1. Reduce load on motor.
2. Utilize an extension cord of appropriate
gauge and length or plug tool directly into
outlet.
1. Inspect connections on motor for loose or
shorted terminals or worn insulation.
( Send for servicing. )
2. Correct low voltage conditions (for example:
improper extension cord length and/or
gauge).
3. Install correct fuses or circuit breakers or
plug tool into an appropriate circuit, matched
to an appropriate fuse or breaker.
4. Reduce the load on the motor.
1. Reduce the rate at which the workpiece is
fed into the working area of the tool
(grinding wheel).
1. Ensure machine is securely mounted on a
solid surface.
2. Use a holding device to firmly retain the
workpiece.
3. Dress the grinding wheel.
4. Use softer wheel, or reduce the feed rate.
Lines on surface of
workpiece.
Burning spots or
cracks in the
workpiece.
Wheel dulls quickly,
grit falls off.
Wheel clogs and
workpiece shows
burn marks.
SYMPTOM PROBABLE CAUSE CORRECTIVE ACTION
1. Impurity on surface of wheel.
2. Workpiece not being held
tightly.
1. Improper type of grinding
wheel.
2. Improper feed rate.
3. Coolant required.
1. Feed rate is too aggressive.
2. Wheel is soft.
3. Wheel diameter too small.
4. Bad wheel dressing.
5. Defective wheel bonding.
1. Wheel is too hard.
2. Feed rate is too slow.
3. Bad wheel dressing.
4. Coolant required.
1. Dress the grinding wheel.
2. Use a holding device to more firmly retain
the workpiece.
1. Try wheels with softer bond or coarser grit.
2. Slow down the rate at which the workpiece
is fed into the wheel.
3. Introduce coolant.
1. Decrease feed rate of workpiece into
grinding wheel.
2. Select a grinding wheel with a harder bond
of material.
3. Replace wheel.
4. Dress the wheel.
5. DO NOT USE – return wheel to point of
purchase.
1. Select a grinding wheel with a softer bond
of material.
2. Increase the feed rate of the workpiece into
the grinding wheel.
3. Dress the wheel.
4. Introduce coolant.

 Loading...