54
Place a mat or a piece of cardboard on the
oor so that the parts do not get scratched or
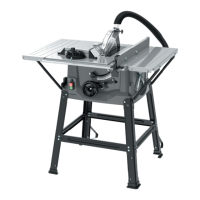
Lay out all the loose parts as sho gure
4. Check that all the parts are present and
that there is no sign of transport damage.
If possible, save the packaging throughout
• Make sure that the saw is not plugged
into the mains power before you
• Check that the saw blade is correctly
adjusted so that it does not protrude
above the surface of the saw bench.
• Use the ring spanners provided to
assemble or carry out maintenance on
Do not tighten the bolts fully until all the
Place the circular bench saw upside down on
Position the bench extensions (8) so that
they are aligned with the sides of the saw
Attach the bench extensions (8) to the saw
bench (1) using cross-braces (21c) and bolts
Attach 2 supports (21a/21b) to each bench
extension (8) and cross-brace (21c) using
S gures 6, 6.1, 7 and 7.1.
Lay out all the parts of the frame to get an
overview of how to assemble it.
Wait to fully tighten the bolts until all the
parts of the frame have been assembled.
Screw a leg (16) securely to each corner of
the circular bench saw using 2 bolts (19).
Note that the supports (21a/21b) must be
rmly screwed to the legs.
Attach a rubber foot (16a) to the end of each
Screw the short cross-braces (18) and the
long cross-braces (17) securely to the legs
(16) using bolts (19) and nuts (20). The long
cross brac tted parallel to the
sides of the circular bench saw.
Tighten all bolts and nuts.
Attach the anti-tip mechanisms (16b) to the
rear legs (16) using bolts (19) and nuts (20) so
that they point backwards and will prevent
the bench from tipping backwards.
At least 2 people are needed to lift the saw
and turn it over so that it is standing on its
Fitting the cleaver blade
Position the saw blade vertical (0°) and raise
it as much as possible by turning the hand
Loosen the countersunk screw (23) using a
screwdriver and lift the bench inlay (2) up.
There must be at least 3-5 mm between the
saw blade (3) and the cleaver blade (6).
Loosen the assembly screw (24).
Raise or lower the cleaver blade (6)
Retighten the assembly screw (24) and
If the bench inlay is worn down, it must be