Dry seal option
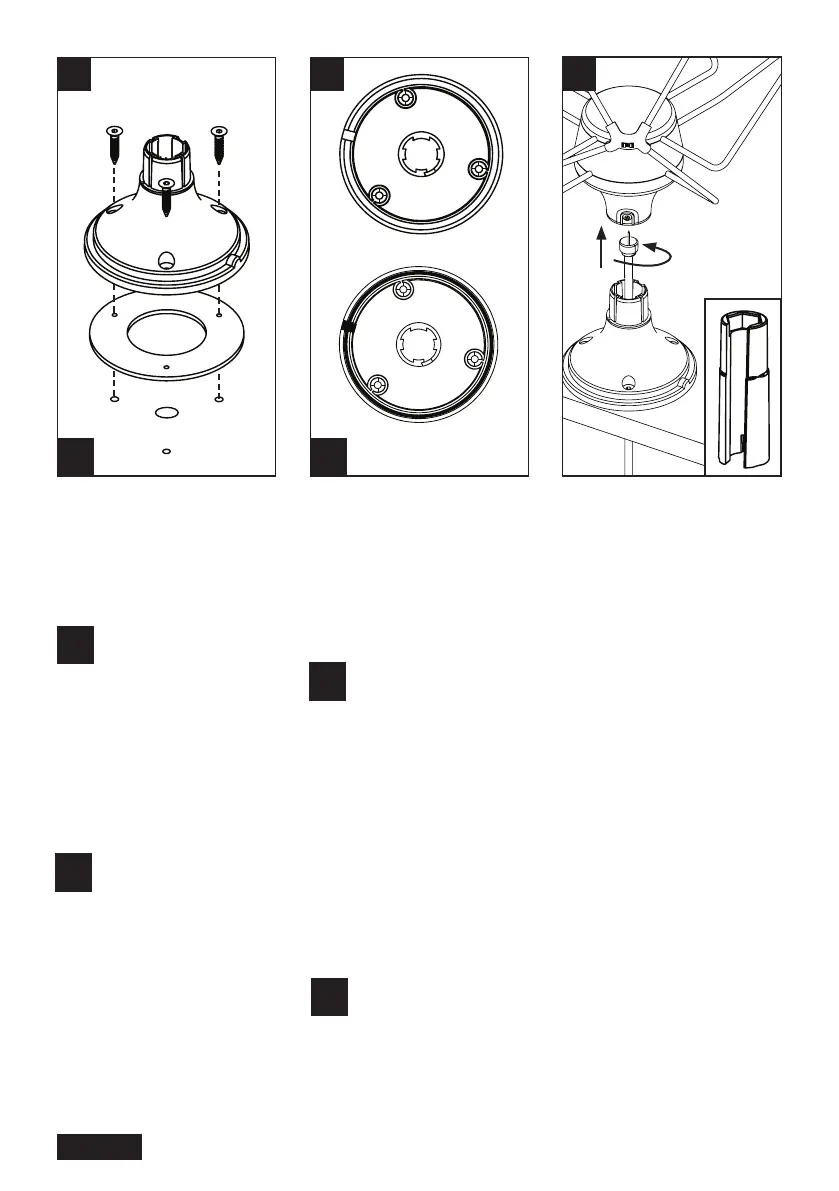
Offer the Sealing Gasket (D) onto
the Aerial Base (B). Secure to roof
surface using Base Mounting Screws
(E) to create a watertight seal.
Ensure arrow on base is
facing towards the front
of the vehicle.
3a
3b
Option d’étanchéité humide
Autrement, un adhésif silicone
peut être utilisé à la place du joint
d’étanchéité (D) en appliquant un
trait uniforme sur la zone en
surbrillance. Fixer ensuite à la
surface avec des vis (E).
La flèche sur la base doit
être tournée vers l’avant
du véhicule.
Essuyer l’excès de mastic avec un
chiffon, assurant que le joint est
étanche.
4
Guide coaxial cable (I) through
Base (B) and connect to Head Unit
using the F Connector Tool (C).
Faire passer le câble coaxial (I) à
travers la base (B) et connecter à
l’unité principale en utilisant l’outil
connecteur F (C).
With Silicone Seleant
Avec adhésif silicone
Without/Sans
!
!
! !
Option de joint d’étanchéité
Placer le joint d’étanchéité (D) sur
la base de l’antenne (B). Fixer à la
surface du toit avec les vis de
montage (E) pour créer un joint
étanche.
La flèche sur la base doit
être tournée vers l’avant
du véhicule.
!
Wet seal option
Alternatively a Silicone adhesive
can be utilised in place of the
Sealing Gasket (D) by applying a
consistent bead to the highlighted
area. Then secure to surface using
screws (E).
Ensure arrow on base is
facing towards the front
of the vehicle.
Wipe away excess sealant with a
cloth, ensuring a watertight seal
has been achieved.
!
Page 6
 Loading...