DASHBOARD REMOVAL/INSTALLATION
1. Disconnect the negative battery cable.
2. Remove the following parts:
a. Console (See CONSOLE REMOVAL/INSTALLATION .)
b. Glove compartment (See GLOVE COMPARTMENT REMOVAL/INSTALLATION .)
c. Side panels (See SIDE PANEL REMOVAL/INSTALLATION .)
d. Lower panel (See LOWER PANEL REMOVAL/INSTALLATION .)
e. Column cover (See COLUMN COVER REMOVAL/INSTALLATION .)
f. Steering shaft installation nuts (See STEERING WHEEL AND COLUMN
REMOVAL/INSTALLATION .)
g. A-pillar trim (See A-PILLAR TRIM REMOVAL/INSTALLATION .)
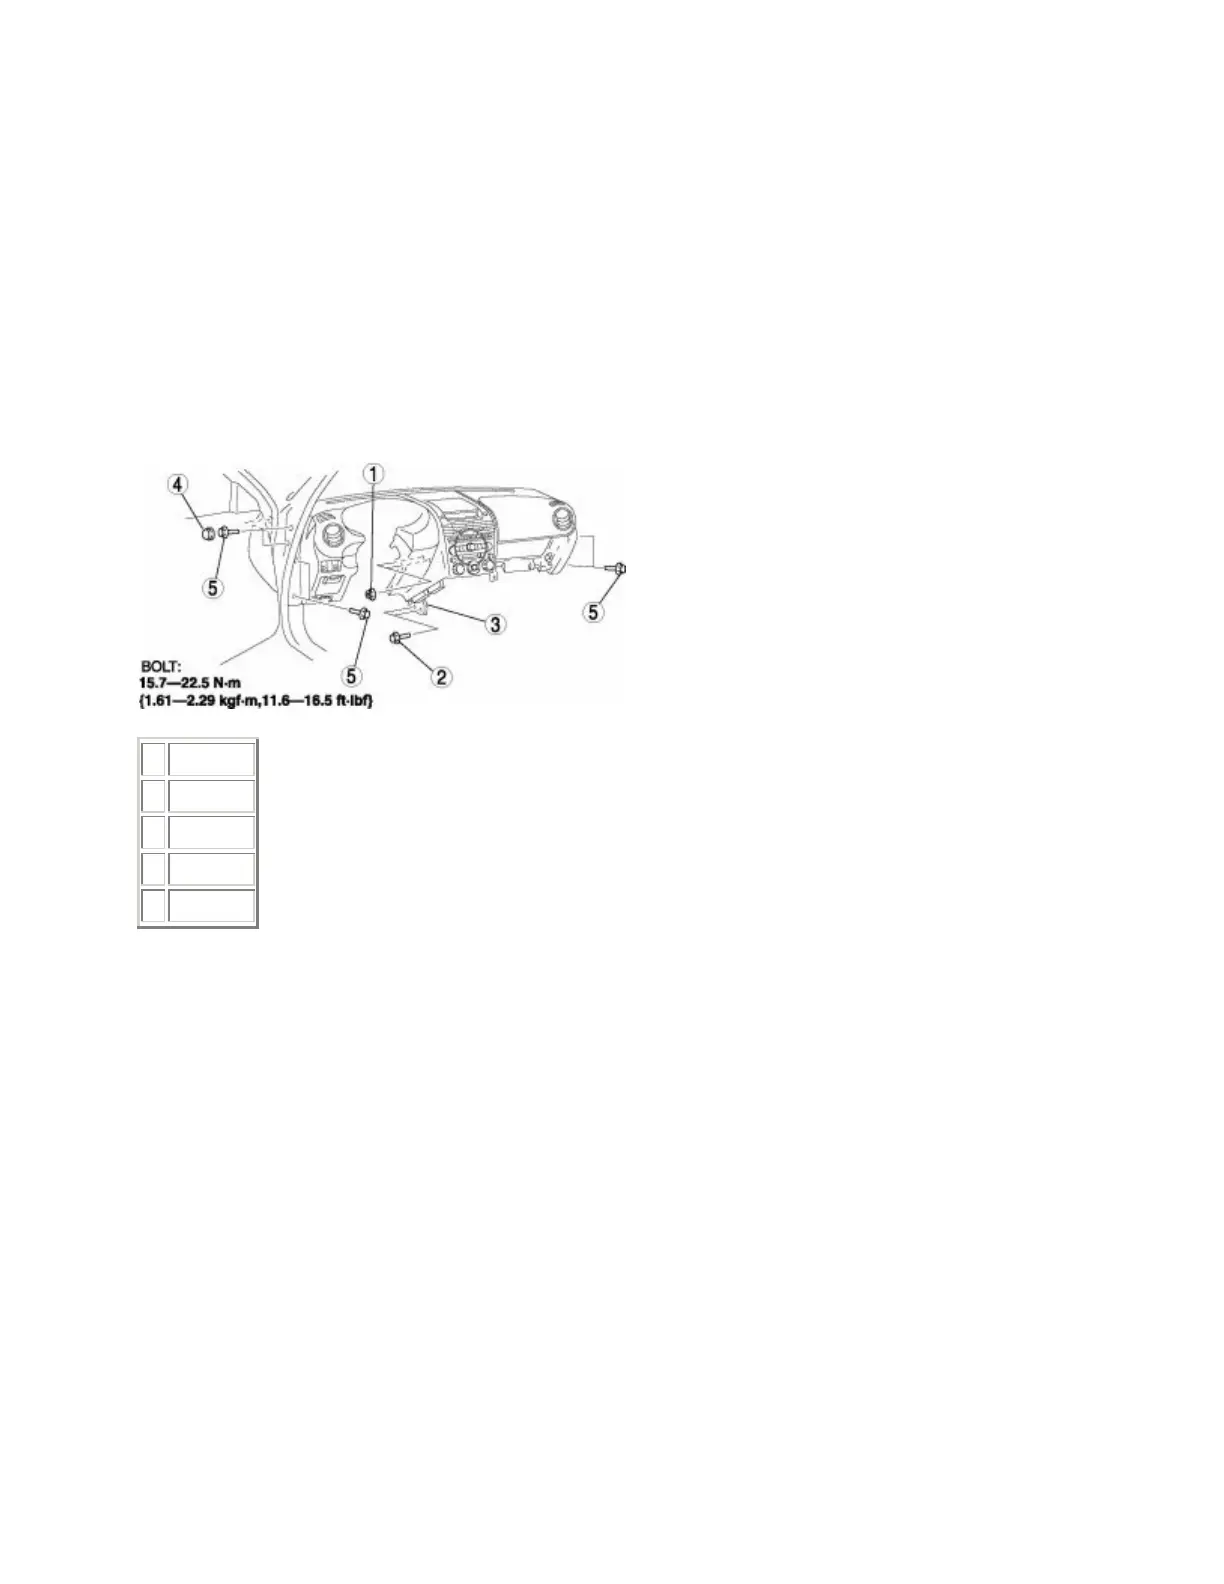
3. Remove in the order indicated in the table.
1 Nut
2 Bolt A
3 Bracket
4 Cap
5 Bolt B
WARNING:
• Removing the dashboard without supporting it can be dangerous. The dashboard may fall and
injure you. Always perform the following procedure with at least another person.
4. Remove the dashboard.
5. Take the dashboard off from the front driver-side door opening.
6. Install in the reverse order of removal.
DASHBOARD DISASSEMBLY/ASSEMBLY
1. Remove the following parts:
a. Center panel module (See CENTER PANEL MODULE REMOVAL/INSTALLATION .)
b. Passenger-side air bag module (See PASSENGER-SIDE AIR BAG MODULE
REMOVAL/INSTALLATION .)
c. Instrument cluster (See INSTRUMENT CLUSTER REMOVAL/INSTALLATION )
d. A/C unit (See A/C UNIT REMOVAL/INSTALLATION .)
e. Blower unit (See BLOWER UNIT REMOVAL/INSTALLATION .)
2. Disassemble in the order indicated in the table.
3. Assemble in the reverse order of disassembly.