Installation of Plant Stands
It is very important to know what row width will be used before installing the
plant stands on multi-row transplanters. Follow the chart below.
42" Row Spacing - All Wide Plant Boxes
41" to 36" Row Spacing - Narrow Plant Boxes Inside
35" to 24" Row Spacing - One Wide Inside & Two Wide Outside
23" to 21" Row Spacing - One Narrow Inside & Two Wide Outside
Less than 21" Row Spacing - Wide Outside Plant Boxes Only
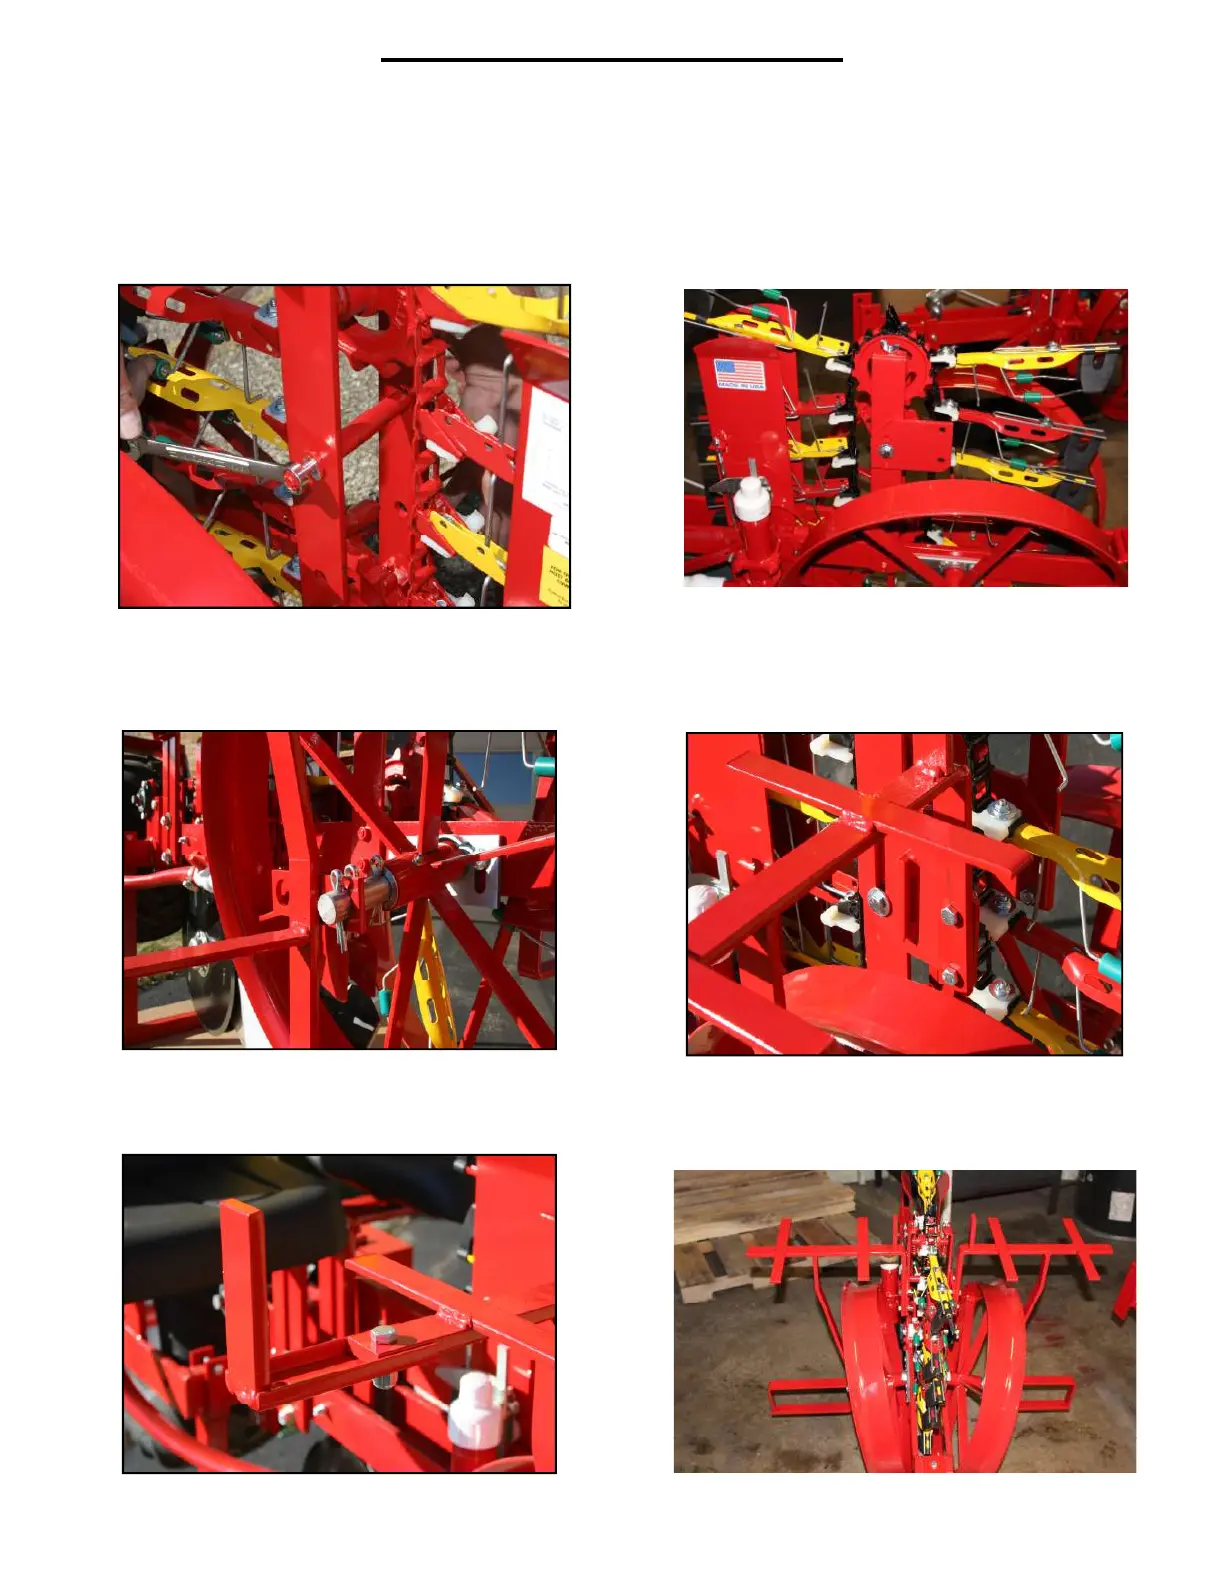
3. Slide plant stand onto the packing wheel
axle and insert cotter key. Bend cotter
key ends to keep in place.
1. Remove the long bolt between the uprights
by the pocket chain. Do not lose the spacer
between the uprights. Remove the outside
cotter key in each axle.
4. Use two 3/8 x 1" hex head bolts and two
3/8" nuts to attach plant stand frame to the
slotted mounting bracket.
2. Install the slotted mounting plates on
both sides of the planter using the long
bolt just removed. Do not tighten until
the plant stand is fully assembled.
5. Attach the width adjustment plate with either the inside or outside hole depending on if you are
using the wide (standard) plant boxes or the narrow with 3/8 x 1" hex head bolt and nut.



 To Next Page