68
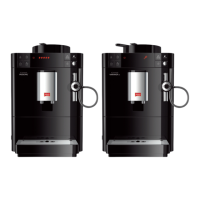
6 Press and hold the red button on the handle of the brewing unit
(Fig. B, no. 1) and turn the handle clockwise to the stop (approximately
75°).
7 Use the handle to pull the brewing unit out of the appliance.
→ The standby symbol and the symbol for cleaning will ash
alternately, as long as the brewing unit is out of the machine.
Caution!
Danger of damaging the brewing unit
– During the cleaning programme, only remove the brewing unit when
instructed to do so.
8 Leave the brewing unit as it is (do not move or twist the components of
the brewing unit).
9 Thoroughly rinse off the entire brewing unit from all sides under running
water.
10 Let the brewing unit drip dry.
11 Place a cleaning tab in the brewing unit (Fig. C).
12 Reinsert the brewing unit into the appliance and turn the handle of the
brewing unit anti-clockwise to the stop to lock.
→ Phase 1 is completed.
Phase 2
During Phase 2, two bean symbols are shown on the display.
→ The symbol for cleaning continues to ash; the standby symbol goes
out. The symbol for the water tank illuminates.
13 Insert the four catches of the cover in the back of the appliance and
swing the cover to the left until it engages.
14 Open up the ap of the water tank (Fig. A, no. 7) and pull the water tank
up and out of the appliance. Fill the water tank to the max. mark with
fresh tap water and reinsert it.
15 Push the outlet (Fig. A no. 2) all the way down.
Heft_Lattea_EU_2_3.indd 68 09.04.2014 14:04:23
 Loading...