The symbols (2) indicate whether the fully automatic
operation by the weekly planner is activated or deacti-
vated for the corresponding parameter.
The field next to the symbols determines the base setting
of the parameter, for example, for “switching on/off”, if
the base setting of the machine is principally “on” and
switch-off times are specified, or “off” and switch-on
times are specified.
2. Press a row (5) to view the events set for the
parameter in question.
͵ The check mark at the bottom right closes the dis-
play of the events for the corresponding parame-
ter.
3. Press a weekday(6) to display the selected weekday
in 24hours.
͵ When pressing a time of day, you can zoom in on
the timeline further and out again.
͵ With the buttons “<” and “>” you can scroll the
timeline.
͵ Press the title(4) to return to the previous display.
9 The weekly planner has been viewed.
5�8 Locking product dispensing
You can lock product dispensing temporarily.
1. Hold the manager chip key on the contact area at the
front of the machine (see chapter5.1.4 on page10).
2. On the display, press the “Unit” button.
3. On the display, press the “Lock product selection”
button.
9 Product dispensing has been locked.
To activate product dispensing again, hold one of the chip
keys on the contact surface at the front of the machine
(see chapter5.1.4 on page10).
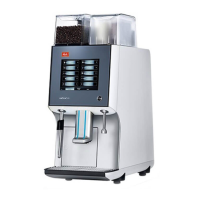
5�9 System messages
5�9�1 Messages in self-service operation
In self-service operation, system messages are indicated
by a notice symbol.
Espresso
***
Cappuccino
**
Café Crème
1
Fig. 16: System messages
You can view the system messages by pressing the
symbol(1).
5�9�2 Messages in waiter operation
In waiter operation, system messages are displayed, for
example, if a product material has run out (e.g., “Bean
container empty”), directly on the display.
A notice symbol to the right of the lower bar will then
refer you to any system messages that have not been
rectified. You can view the system messages by pressing
the symbol.
Operation
17
39663 • 20220101
5
 Loading...