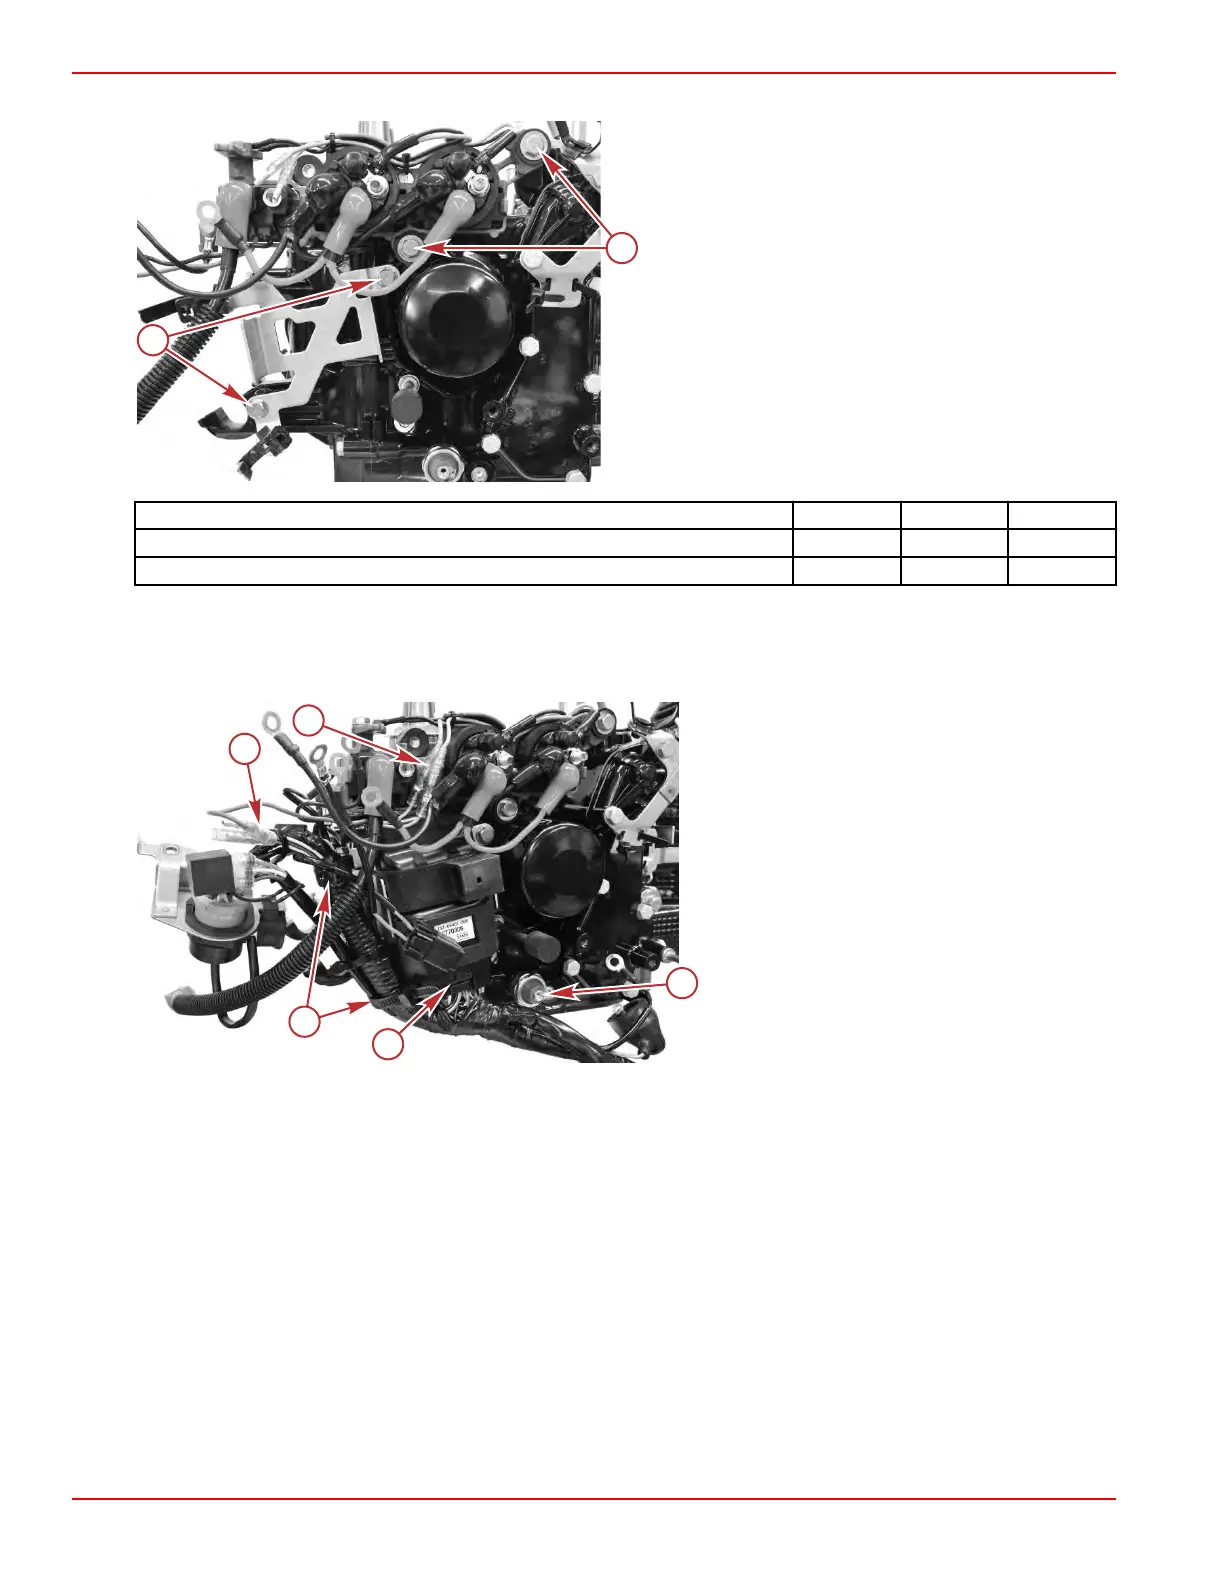
3. Install the ECM bracket, using two screws with washers. Tighten the screws to the specified torque.
a - ECM bracket screws (2)
b - Relay/solenoid bracket screws (2 + 1 to be installed
later)
Description Nm lb‑in. lb‑ft
Tilt relay/start solenoid bracket screws 6.0 53.1 –
ECM bracket screws 6.0 53.1 –
4. Install the ECM onto its bracket, and connect the ECM to the engine harness.
5. Secure the engine harness to the ECM bracket, using the two reusable cable ties.
6. Power tilt models: Connect the pink, light blue, and green bullet connectors from the tilt relays and start solenoid to the
engine harness.
a - ECM connector
b - Reusable cable ties
c - Start solenoid green bullet connector
d - Power tilt pink and light blue bullet
connectors
e - Oil pressure switch
7. Insert the black fuse housing into the pocket on the ECM rubber mount.
8.
Connect the ground terminal to the engine block, using a single screw. Tighten the screw to the specified torque.
9. Connect the oil pressure switch ring terminal to the switch, using a single screw. Tighten the screw to the specified torque,
and cover the switch with the rubber boot.
10. Slide the yellow fuse housing onto the thermostat cover electrical bracket.
11. Connect the engine harness 2‑pin connector to the engine coolant temperature (ECT) sensor.
Cylinder Block/Crankcase
Page 4A-32 © 2018 Mercury Marine 90-8M0125265 eng NOVEMBER 2017
 Loading...


