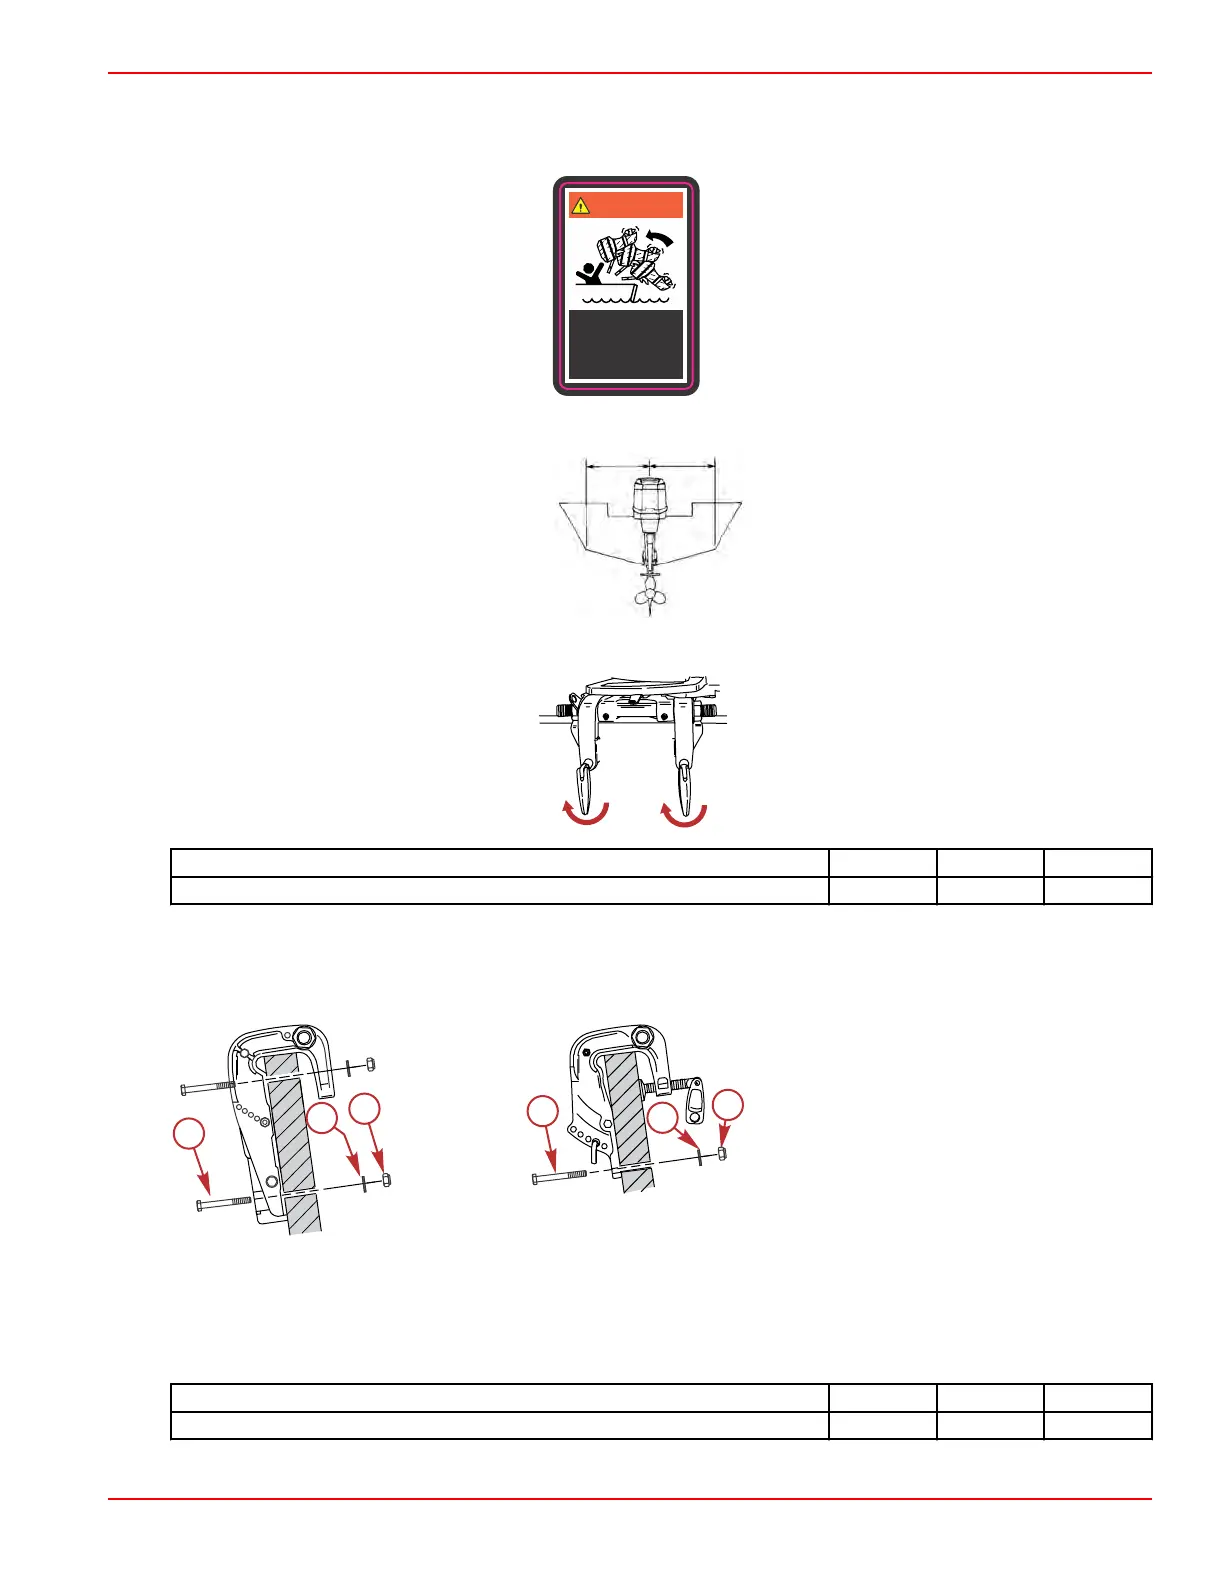
This product must be secured to the transom with the required mounting hardware. If the outboard strikes an underwater
object, the required mounting hardware prevents the outboard from propelling off the transom. A decal on the swivel bracket
reminds the installer of the potential hazard.
Avoid serious injury
or death. Secure
engine to transom
with bolts.
WARNING
37-896853-007
52375
1. Place the outboard on the centerline of the transom.
2. Tighten the transom bracket clamp screws to the specified torque.
Description Nm lb‑in. lb‑ft
Transom bracket clamp screws 13.5 120 –
3. To prevent a loss of the outboard, secure the outboard to the transom with the supplied mounting hardware. Use a 7.9 mm
(5/16 in.) drill bit to bore the holes into the transom. Use the transom bracket mounting holes for the alignment guide.
Secure the bolts with flat washers and locknuts. Apply marine waterproofing sealer in the holes and around the bolts to
make the installation water tight. Tighten the bolts to the specified torque.
Power tilt models Manual tilt models
a - Power tilt models have four bolts, manual tilt models have two bolts
b - Power tilt models have four washers, manual tilt models have two washers
c - Power tilt models have four nuts, manual tilt models have two nuts
Description Nm lb‑in. lb‑ft
Transom bracket mounting bolts—all models 13.5 120 –
Outboard Installation
90-8M0125265 eng NOVEMBER 2017 © 2018 Mercury Marine Page 1D-3
 Loading...


