For technical questions, please call 1-888-866-5797.Item 58180 22h
Installation
WARNING! TO PREVENT SERIOUS INJURY:
Make sure air supply is off and release all
residual air in system before installing.
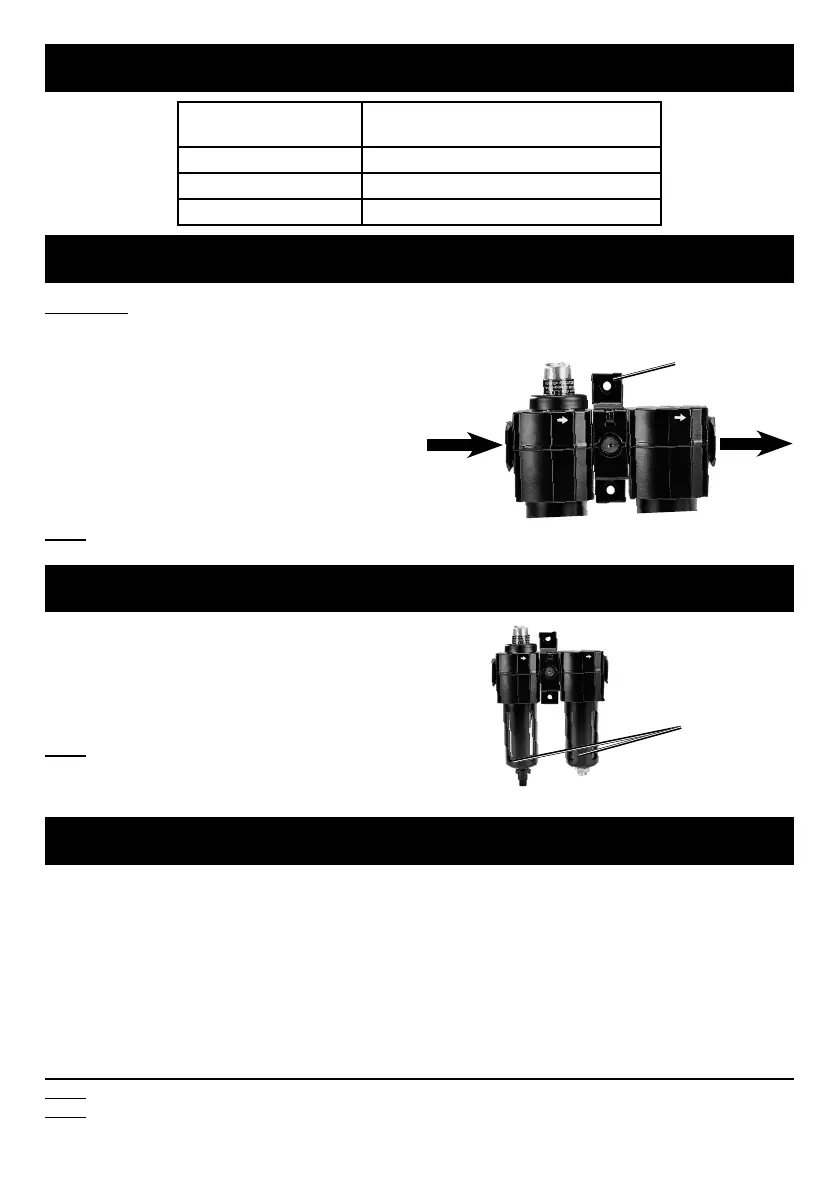
1. Securely mount tool in vertical position.
Air flow direction must follow the
arrows on the body of the tool.
2. System piping should be 3/8″ minimum.
Avoid using unnecessary fittings and
couplings that restrict the flow of air.
Note: Make sure Connector is fitted
correctly between the Dryer and Filter.
3. Connect air supply to Inlet Port.
Connect air tool to Outlet Port.
Inlet Outlet
Connector
Operating Instructions
1. To fill Dryer with desiccant, twist and pull
Bowl downwards to remove from unit.
2. Fill Bowl with desiccant. Do not fill center
tubing inside bowl with desiccant.
Note: Desiccant will be blue when dry
and turn pink as it absorbs water.
3. Replace Bowl and twist to lock in place.
Bowl
Maintenance
BEFORE EACH USE, inspect the general
condition of the tool. Check for:
• loose fittings
• cracked or deformed o‑rings
• damaged pressure gauge or hose
• any other condition that may
affect its safe operation.
1. Twist Bowl and pull downwards to
remove. Remove filter and clean
as necessary. Reinstall Bowl.
2. Twist Bowl and pull downwards to
remove. Remove pink desiccant.
Dehydrate desiccant for reuse or replace
with new desiccant. Reinstall Bowl.
Record Serial Number Here:
Note: If product has no serial number, record month and year of purchase instead.
Note: Reference UPC 193175433909.
Specifications
Flow
65 CFM Max. at 100 PSI (Filter)
20 CFM Max. at 100 PSI (Dryer)
Max. Pressure 250 PSI
Filtration 5 Microns
Inlet and Outlet Size 3/8″ NPT
 Loading...