Bolt Nut Size Gr. Gr. Gr.
2 5 8
1/4 - 20 4 - 5
5/16 - 18 9 - 11
3/8 - 16 17 - 20 26 - 29
7/16 - 14 42 - 46 60 - 66
1/2 -13 64 - 72 90 - 100
5/8 - 11 127 - 141 179 - 198
TORQUE CHART FOOT
NOTE:
THIS MOUNTING CARTON CAN BE USED WITH
THE MDII OR EZ MOUNT PLUS CLF CARTONS.
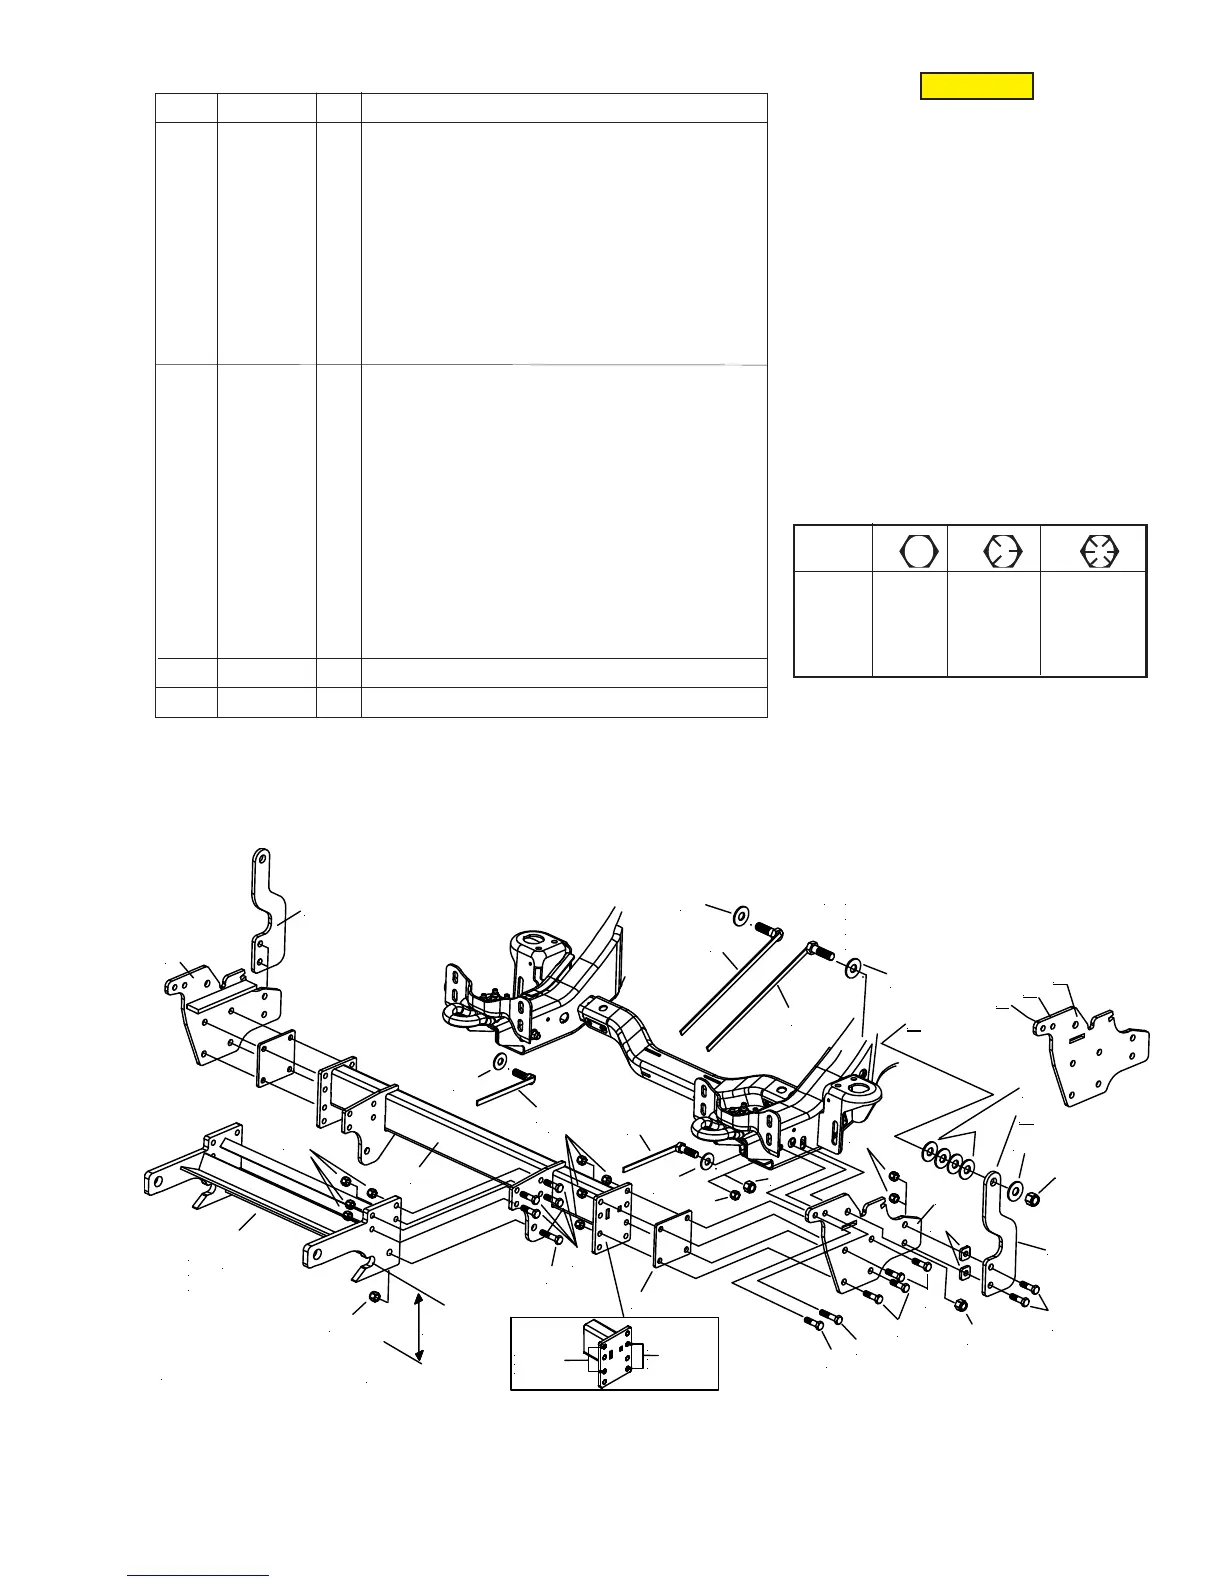
ITEM PART NO. QTY. DESCRIPTION
17195 1 MOUNTING CARTON
1 18985 1 • R.H. Side Assembly
2 18986 1 • L.H. Side Assembly
3 19807 1 • Rear Brace Weldment
4 18987 2 • Strap
5 19821 2 • Handle Bolt (16") 3/4-10 x 2-1/4" Gr.5
6 19823 2 • Handle Bolt (8") 5/8-11 x 2" Gr.5
7 19995 2 • Spacer 1/4"
08135 1 • Hardware Bag
8 20096 18 •• Bolt H 1/2-13 x 1-3/4” Gr. 5
9 20141 4 •• Bolt H 5/8-11 x 2” Gr. 5
10 20307 22 •• Locknut ESNA 1/2-13
11 20309 6 •• Locknut ESNA 5/8-11
12 20310 2 •• Locknut ESNA 3/4-10
13 20357 2 •• Flatwasher 5/8”
14 20359 12 •• Flatwasher 3/4"
15 11291 4 •• Spacer
16 20097 4 •• Bolt H 1/2-13 x 2" Gr. 5
* 19370 1 Universal Clevis (Part of Plus CLF Carton)
** 11770 1 Universal Clevis (Part of MDII CLF Carton)
PARTS LIST
Parts indented are included in the carton, bag or assembly under which
they are indented.
CAUTION: To avoid harm to vehicles
electrical system always disconnect battery
before begining installation.
DO NOT BURN holes or WELD vehicle frame.
This may cause frame failure.
IMPORTANT
After first use, retighten all mounting bolt
connections to specified torque. All mounting
bolt connections to be checked periodically
for tightness.
Locknuts are furnished DO NOT tighten bolts
and nuts until installation is complete (unless
otherwise specified), then be sure to tighten
all attaching parts per specified torque chart.
CAUTION
SPRING CODE "V"
5,200 lb.
Front g.a.w.r.
SPRING CODE "x"
6,000 lb.
Front g.a.w.r.
*
Clevis Frame
packed in CLF
Carton
11-1/4"
GROUND
FIGURE 1
**
Add spacer Flatwashers (15) as needed
until Strap (4) clears the stabilizer bar.
Due to vehicle frame variances, the quantity
of spacer Flatwashers required may vary.
1
2
3
4
5
6
7
8
9
10
11
12
13
14
A
B
C
D
4
5
6
8
8
16
8
8
10
10
10
11
11
14
**
14
14
13
D
15
 Loading...