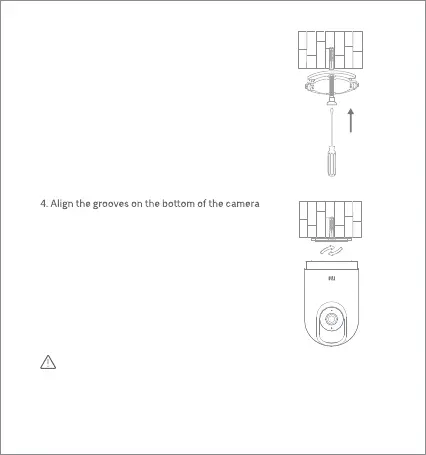
3. Place the side of the base with arrows facing
forward, and then align the holes. Insert the screws
and then tighten them into the wall plugs with a
Phillips head screwdriver.
with the raised part on the base, and then turn it
clockwise until it locks into place.
Notes:
1. The wall must be able to support at least three times the total weight
of the camera.
2. To prevent possible injury, the camera must be securely fixed to the
ceiling or wall according to the installation instructions.
3