1. Once you have put on the HIPSTER™ hip seat base (see 4
Simple Steps for the HIPSTER™ Hip Seat), zip the top of the
Hip Seat to the bottom of the Double Shoulder Top Carrier.
2. Make sure to button the 2 security buttons at the beginning
and at the end of the zipper (which connects the Double
Shoulder Top Carrier and Hip Seat ) as a second security measure.
3. With the Double Shoulder Top Carrier hanging down in front
of you, place your baby on the hip seat base facing towards
your chest (for the Face-In Carry position) or facing outwards
(for the Face-Out Carry position). Make sure your baby
’
s
legs are properly positioned on each side of the hip seat.
4. Using your left hand to support your baby for safety, use
your right hand to reach for the right shoulder strap, put
your arm through the loop and place the shoulder strap
over your right shoulder.
5. Using your right hand to support your baby for safety, use
your left hand to reach for the left shoulder strap, put your
arm through the loop and place the shoulder strap over
your left shoulder.
6. Reach over your shoulder with both hands over your head
behind your neck, and buckle in the adjustable back strap.
The adjustable back strap should sit right below your neck
along the shoulder blades. If the back strap is too low and
you cannot reach, adjust it higher on the shoulder strap. If it
is too dicult to adjust with your baby on the hip seat, adjust
the height of the back strap before you place your baby in.
7. Adjust the length of the shoulder straps with the adjustable
shoulder straps under your arms. Do not strap the baby
too tight against your body and always allow room for
head movement. Keep your baby
’
s face free from any
obstructions at all times.
8. Make a nal check to assure all straps and buckles are secured.
9. For step-by-step video instructions, please visit:
www.miamily.com/instructions
FACE-IN
CARRY +
FACE-OUT
CARRY
HOW TO USE HOW TO USEDOUBLE SHOULDER TOP CARRIER DOUBLE SHOULDER TOP CARRIER
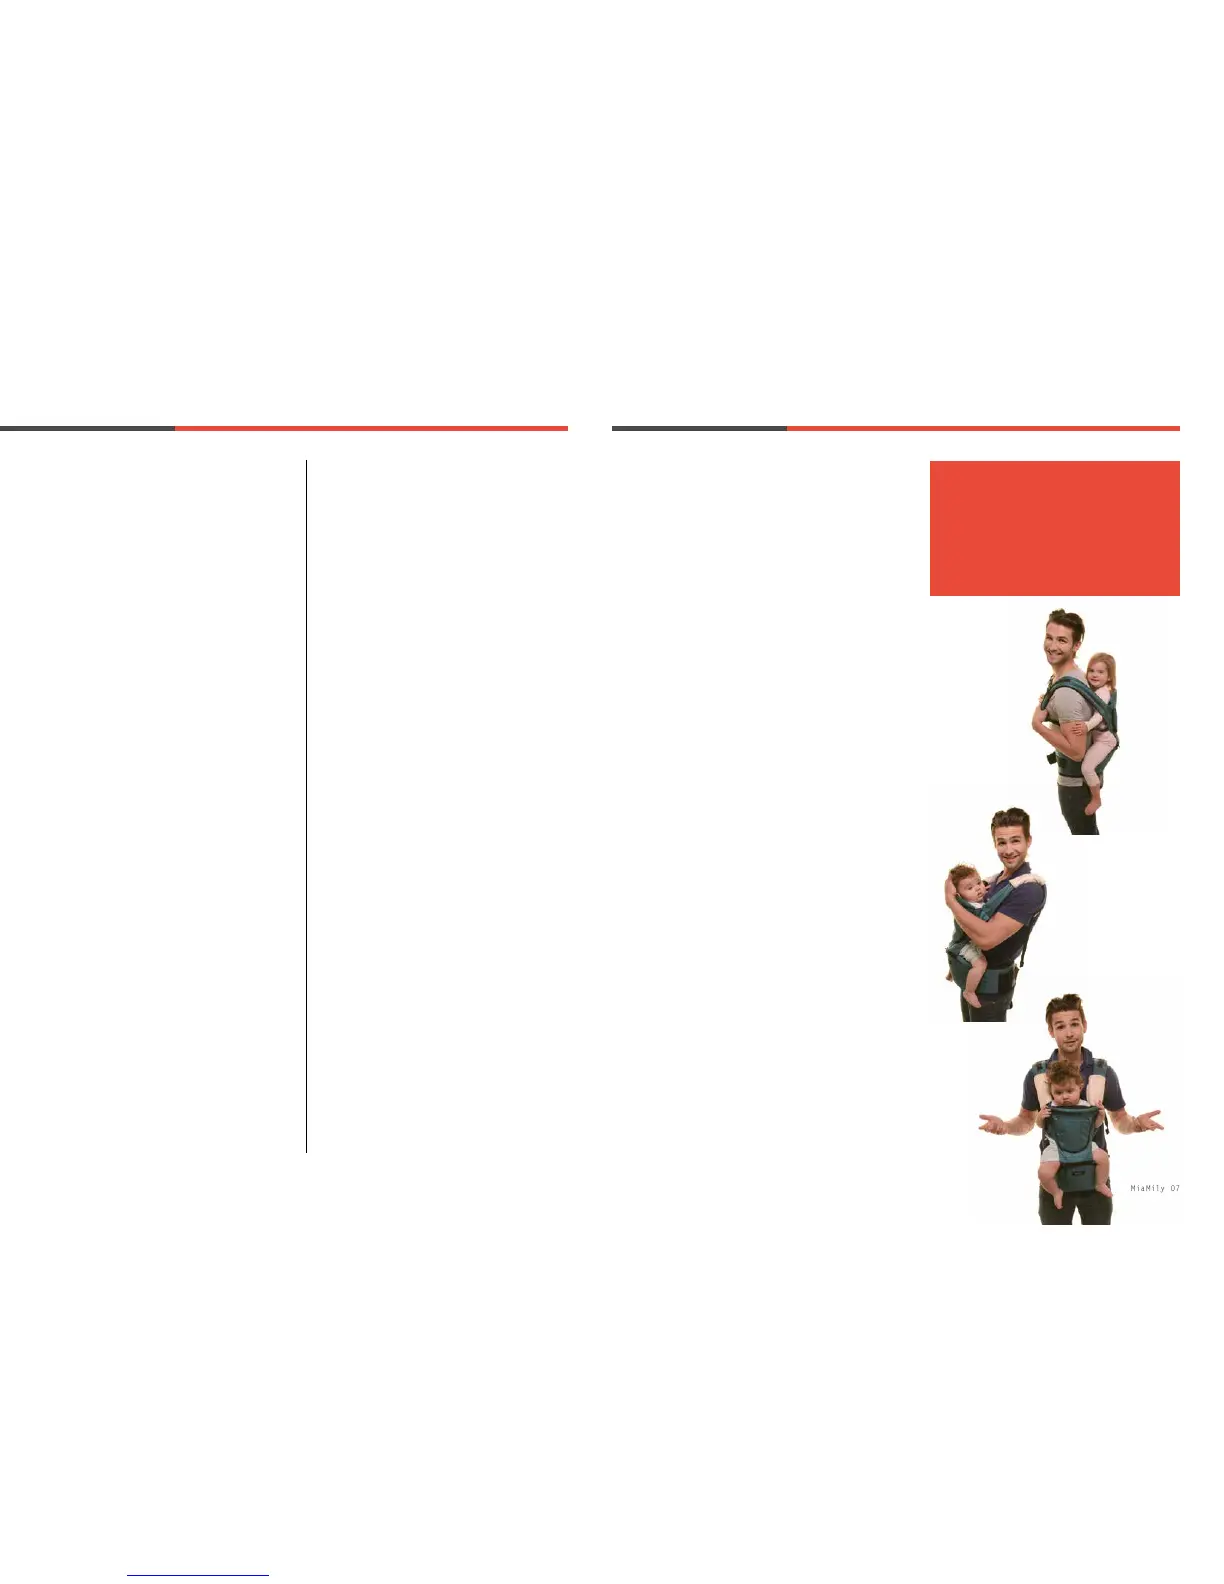
BACK
CARRY
1. Once you have put on the HIPSTER™ hip seat base (see 4
Simple Steps for the HIPSTER™ Hip Seat), zip the top of the
Hip Seat to the bottom of the Double Shoulder Top Carrier.
2. Make sure to button the 2 security buttons at the beginning and
at the end of the zipper (which connects the Double Shoulder
Top Carrier and Hip Seat) as a second security measure.
3. Let the top carrier part hang down in the front and slide
the hip seat to your right hip. Place your baby on the hip
seat base facing towards your chest.
4. With the Double Shoulder Top Carrier hanging down in
front of you, slide the hip seat to your right hip.
5. Place your baby on the hip seat base, facing towards your
chest.
6. Using your left hand to support your baby, pull up the
Double Shoulder Top Carrier with your right hand against
your baby
’
s back.
7. Use your left hand to reach behind you for the left shoulder
strap, loop your arm through, and place the left shoulder
strap over your left shoulder. Be sure to keep supporting
your baby with your right hand.
8. Lean slightly forward to have your baby leaning against
you, and slide the hip seat base to your back.
9. Slide your right hand into the right shoulder strap, and
loop your right arm through the shoulder strap.
10. Reach both hands in front of your chest to secure the
adjustable back strap. The back strap should sit in front of
your chest. If it
’
s too low or too high, you can adjust the
back strap on the shoulder strap
11. Adjust the length of the shoulder straps with the adjustable
shoulder straps under your arms. Do not strap the baby
too tight against your body and always allow room for
head movement. Keep your baby
’
s face free from any
obstructions at all times.
12. Make a nal check to assure all straps and buckles are secured.
13. For step-by-step video instructions, please visit:
www.miamily.com/instructions
BREASTFEEDING
1. Follow the instructions of Double Shoulder Top Carrier:
Face-In Carry but wear the hip seat lower on your hip so
that your baby
’
s face is at breast level. Loosen the shoulder
straps if necessary to give your baby more room.
2. Nurse baby in the carrier and cover with the head cover for
more privacy.
USING
THE
HEAD
COVER
1. When your baby is asleep or when you want to keep out
distractions, attach the head cover to the carrier, buttoning
the two bottom buttons rst.
2. Take the left side of the head cover and extend it to cover
your baby
’
s head. Button the buttons on the left shoulder
strap. You can adjust the height of the head cover by using
the dierent buttons.
3. Repeat with the right side of the head cover.
USING
THE
TEETHING
PADS
1. Wrap the teething pads around each shoulder strap.
2. Adjust the teething pads by using the velcro pads. Adjust
teething pads to the height of your baby
’
s mouth.
3. Wash teething pads regularly.
MiaMily 07MiaMily 06
TIP ╱ This is a more advance carry position and is suitable
for babies 18 months old who can hold on to the parent
while adjusting the carrier. Baby must have full control of
his head and can look over parent
’
s shoulder. Please watch
our video instructions at www.miamily.com/instructions
and have someone help you when you try this position for
the first time.
BACK CARRY
FACE IN
FACE OUT

 Loading...