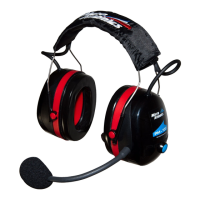
Features & Functions
• Muting circuit, cuts out music, telephone & second radio when master radio receives
a signal.
• Side tone, hear your own voice on transmit.
• Stereo Music giving superb sound.
• Stereo Line out for recording sound.
• Mobile telephone connection.
• User can configure the headset to work with most radios.
• Use two radios at once (i.e. Airband and PMR).
• PTT on headset.
• Digital Volume dial on headset.
Accessories.
Mobile telephone lead – Sometimes requires base adapter (ask for more information)
Stereo Music lead
Line Out sound recording lead
Auxiliary second radio lead
Remote PTT lead
Splitter box lead for more than one accessory lead
Automobile 12 volt charging lead
In aircraft 12 volt charging lead
Adapters for converting twin jack radio lead to single jack lead.
Icom A5, A23 require CT44 adapter
Vertex/ Yaesu VXA radios require LA44 adapter
Vertex/ Yaesu VX Radios require CT44 adapter
Charging.
There is a DC power jack on the right hand ear cup. This accepts 9 to 14 volts. Connect the
supplied power supply to the headset and leave on charge for up to 20 hours. Alternatively
you can connect any 12 volt lead to the headset from your aircraft or automobile’s power
supply. We can supply extra charging leads on request. The batteries are NiMH. These have
no memory effect and you can part charge the batteries if required. If your headset is not flat
do not charge for 20 hours, instead charge for lesser time. You can discharge the batteries
quickly by plugging a music source to the headset and leave playing until the batteries are
flat, then charge for 20 hours.
Battery condition Indicator LED.
There is a charge indicator LED next to the on/off switch. When the LED is ‘ON’ the power
switch will be in the on position. When the LED is ‘OFF’, either the power switch is ‘off’ or the
batteries are low. The headset can be used when the LED fades off, but the battery condition
is low and should be charged. The headset can be charged with the switch in ‘on’ or ‘off’
position.
How to use the headset.
1. Check the DIP switch position with the chart 1 below.
2. First turn the power switch on, this can be found inside the left hand ear cup. You
must turn this off when not in use.
3. Connect your device (radio, MP3 etc.) to the headset.
4. Set volume dial. Do this by asking for a ‘radio check’. Be very careful; the volume in
the headset can be turned high so you must check the volume levels before flight.
5. When the headset is not in use turn the power switch ‘OFF’.
Bluetooth – Streams music and telephone calls.
Turn headset power ON. Search for Bluetooth on your telephone and pair to MicroAvionics
once found. Telephone will auto answer after 1-2 rings.
Connecting auxiliary inputs
Stereo Music Input. When connecting an MP3 player you need to connect the locking bayonet
lead to the headset. Turn the headset power switch ‘ON’.Set the volume levels before flight.
 Loading...