System Connection
4
Function Instruction
3
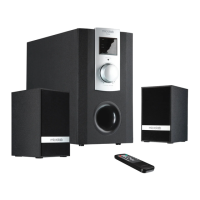
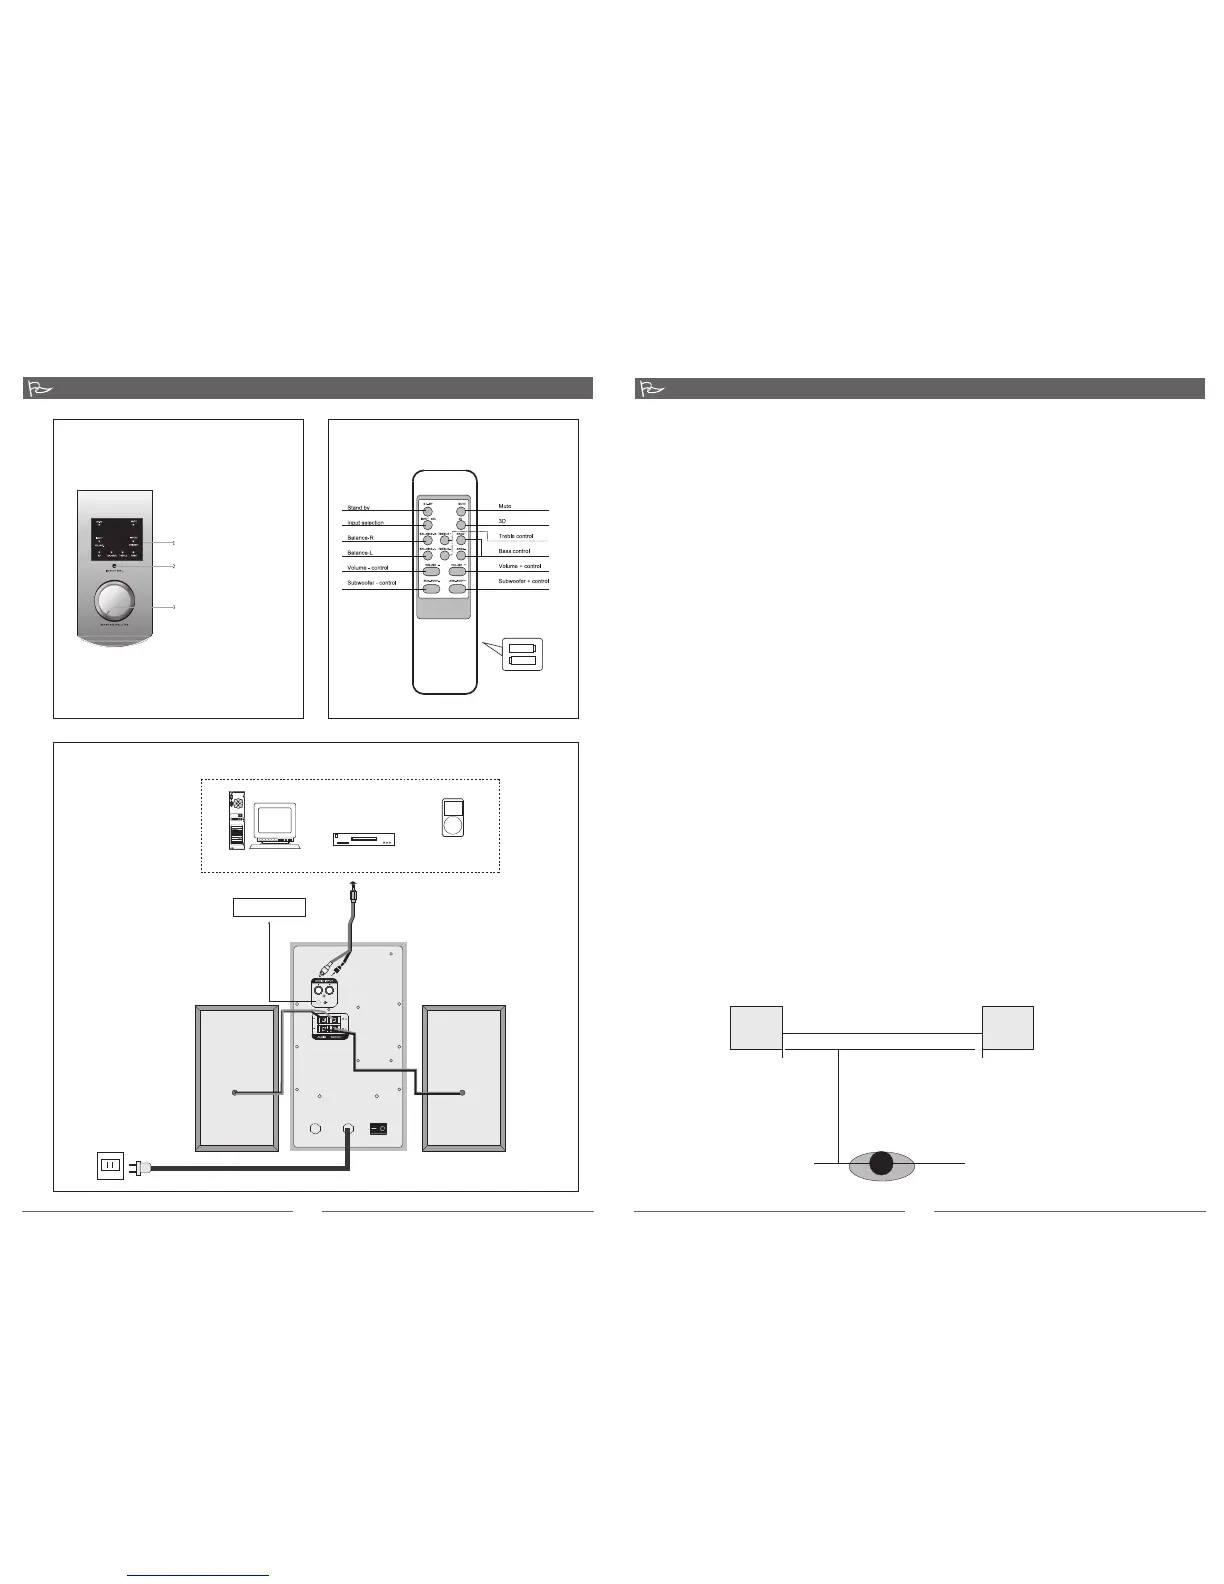
Front Panel ( Illustration 1 )
Operation
1. Plug the AC power plug to the wall AC source or any AC power distribution sockets.
2. Ensure the volume level is lowered to zero.
3. Turn on the power switch on the rear panel of the subwoofer to put the system to standby (ST-
BY) mode with its LED illuminated.
4. Next, turn the master volume knob to turn ON the system.
5. Depress the INPUT SEL button to select the audio inputs between INPUT1 and INPUT2. The
INPUT SEL button is located on the Subwoofer front panel or the remote control. Note: the
remote control have duplicated button functions as the Subwoofer front panel.
Connection ( Drawing 3 )
Remote Control (Illustration 3)
INSTALLATION
Precaution: Prior to connecting the speakers, ensure the AC power plug is removed from the AC
source. Secondly, ensure the volume knob is set to zero.
1. Connect the satellite speaker cables to the Left (L) and Right (R) audio outputs at the rear panel of
the Subwoofer. Next, position the left channel satellite on the left of the Subwoofer and the right
channel satellite on the right side of the Subwoofer.
2. Connecting the playback source (VCD, DVD, CD player) to the speaker systems with the included
audio cable (3.5mm stereo - 2 x RCAs). Plug the 2 x RCA plugs to left and right channel RCAs on
the playback source such as VCD, DVD, or CD player. Next plug the 3.5mm stereo plug to the Input
socket(INPUT2) at the rear panel of the Subwoofer. Alternatively, you can purchase a 2 x RCA - 2 x
RCA cable for a second playback source and connect to INPUT1 at the rear panel of the
Subwoofer.
3. Connecting to a PC (alternative), use the 3.5mm - 2 x RCA audio cable. Plug the 3.5mm stereo
connector to the computer's soundcard or the audio output socket (green coloured: 3.5mm stereo
socket) of of the PC. Next, plug the 2 x RCA to the INPUT1 socket at the rear panel of the
Subwoofer.
4. Ensure all plugs are seated properly and the AC power supply is properly connected. Please always
ensure the AC power ratings printed on the rear panel of the Subwoofer tally with your country's AC
power supply ratings. If they do not match, please do not connect and turn ON the power. This will
SPEAKER POSITIONING
For ideal stereophonic effects, we recommend the stereo speakers or satellites be placed
approximately 70cm apart and about 50cm to 100 cm away from the listener. The best listening
position is to sit in the middle of the two satellite speakers. There are no special requirements
on the Subwoofer placement, it can be place in position in the room. Subwoofer handles the
bass and depth, the low frequency range has no directional effect on our ears.
Front panel controls
1. LED display window
and remote control
infrared sensor
2. INPUT selection button
3. Master volume knob
(Note: Master volume
can be controlled from
this knob or the remote
control)
Subwoofer rear panel
Left satellite
Right satellite
3.5mm s tereo
RCA Left
AC IN
ON OFF
AC power supply:
220V - 240V 50Hz
PC
Mp3 \ Mp 4
Medi a player
CD\ VC D \ DVD
RCA Right
+ -
+ -
( Put t he batt eries i n
the b atter y compa rtmen t )
70 cm
Left
Right
100 cm
3.5mm stereo socket
FUSE
T315m AL250V
80-M930-97-0001-02chu
 Loading...