CLINICAL TECHNIQUES
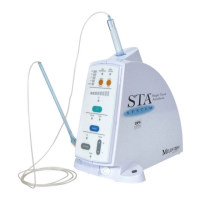
STA Intraligamentary
STA Intraligamentary Injection Technique
The STA System utilizing the STA Wand handpiece employs only two injection
sites:
1. The mesiolingual line angle and the distalingual line angle are the most
effective for mandibular teeth.
2. On the maxillary teeth the mesiobuccal and distalbuccal line angles are
utilized.
3. In some instances, the distolingual site alone may provide adequate pulpal
anesthesia.
Prior to the injection, place a gauze pad or cotton roll on the lingual area adjacent
to the injection site. This will be used to absorb any anesthetic which is
inadvertently expressed before needle penetration and during withdrawal.
Prepare the patient for a slow injection experience.
Utilize a 30 or 27 gauge extra-short needle with the bevel oriented toward the
tooth. The needle bevel should face the tooth surface and be orientated parallel
with its long axis. The STA Wand handpiece can also be broken off to create a
very short, easy to control needle holder. The injection is initiated by activating
the STA mode followed by a slow penetration of the needle into the periodontal
ligament space. The moment that the needle enters the tissue, the foot control is
activated on the STA injection rate (slow). Use the STA (slow) flow rate only.
The needle is advanced following the natural contour of the intrasulcular anatomy
of the tooth until it will advance no further. If no resistance is encountered, the
needle may not be within the PDL space. Moderate pressure is maintained to
ensure the adequate “seal” of the needle track.
Observe the pressure indicator on the device and listen for the audible tone
indicating that the pressure is building. This is an indication that the needle is
properly positioned to “seal” the PDL space and the anesthetic is being properly
delivered. Continue to deliver anesthetic as the pressure builds into the GREEN
zone on the pressure indicator. There will also be an audible tone consisting of
three ascending tones indicating the correct high pressure zone is reached, in
addition, the unit will say “PDL”.
If two sites are utilized, the slow rate of flow is maintained until approximately 0.9
ml of solution has been administered at each site. (A molar may take 1.8 ml. A
single rooted tooth may take half as much). You should note a significant degree
of blanching which encompasses the facial and lingual gingiva. Stop flow and
wait 6 seconds to dissipate pressure or remove during the aspiration cycle.
 Loading...