EasyManua.ls Logo

Million Dollar Baby Dresser User Manual

Million Dollar Baby Dresser
11 pages
To Next Page IconTo Next Page
Page #1 background imageLoading...
Page #1 background image
revised 11DEC2013 Page 1
Dresser (8299) - Assembly and Operation Manual
Congratulations on purchasing an MDB Family product. This product will provide many years of service
if you adhere to the following guidelines for assembly, maintenance, and operation. This product is
for residential use only. Any institutional use is strictly prohibited.
Please be sure to follow the instructions for proper assembly. Use a Phillips head screwdriver for assembling
the product in addition to the Allen wrench included in the hardware box. Do not use power screwdriv-
ers. All of our products are made from natural woods. Please understand that natural woods have color vari-
ations which are the result of nature and not defects in workmanship.
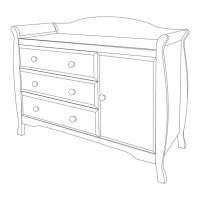
DO NOT SUBSTITUTE PARTS. ALL MODELS HAVE THE SAME QUANTITY OF PARTS AND HARD-
WARE. YOUR MODEL MAY LOOK DIFFERENT FROM THE ONE ILLUSTRATED DUE TO STYLISTIC VARI-
ATIONS.
Question and Answer IconNeed help?

Do you have a question about the Million Dollar Baby Dresser and is the answer not in the manual?

Million Dollar Baby Dresser Specifications

General IconGeneral
BrandMillion Dollar Baby
ModelDresser
CategoryBaby & Toddler Furniture
LanguageEnglish

Summary

Parts List

Hardware List

Assembly Steps

Set up the center panel (C)

Initial setup of the center panel, involving hardware and specific panel orientations.

Set up side panels (A and B)

Attaching panel glides and hardware to the left and right side panels.

Set up all bars (G, H, J, K and L)

Preparing the various top, bottom, and center bars for assembly by inserting dowels and support blocks.

Attach center panel to right bottom panel

Securing the center panel to the right bottom panel using cam locks.

Attach front bars and center panel to right side panel

Connecting front top and bottom bars, and the center panel assembly to the right side panel.

Insert wood dowels to top support bar

Inserting specified wood dowels into the top support bar.

Attach back bars and top support bar to right side panel

Connecting back bars and top support bar to the right side panel and sliding in the top panel.

Attach the left side panel

Securing the left side panel to the main assembly using cam locks.

Attach back boards

Fastening the back boards using wood screws and washer head screws.

Attach the door and place the shelf

Mounting the door with hinges and positioning the shelf inside the dresser.

Drawer Assembly

Detailed steps for assembling the dresser drawers, including panels, bottom boards, and glides.

Furniture Anti-Tipping Kit Installation

Safety Warnings for Tip-Over Prevention

Crucial safety advice to prevent furniture tip-over injuries, including placement and usage guidelines.

Wall Stud Location and Marking

Locating a 2" x 4" stud behind the wall and making a mark for strap installation.

Wall Strap Installation

Installing one end of the anti-tip strap onto the wall stud with a long screw and washer.

Dresser Strap Attachment

Attaching the other end of the strap to the dresser's wood framing with a short screw and washer.

Maintenance, Storage, and Warranty

Maintenance and Cleaning Guidelines

Instructions for cleaning the furniture finish without damage, and warnings about refinishing.

Storage Recommendations

Advice on storing the furniture to prevent damage from moisture, temperature, and sunlight.

One Year Limited Warranty

Details on warranty coverage, exclusions, and how to obtain replacement or missing parts.

Related product manuals