11. Use the adjustment tool to rotate the chain tension-
ing screw to increase tension (clockwise) until the
chain is snug around the guide bar.
• The tension is correct when the chain snaps back
after being pulled 1/8" (3 mm) away from the
guide bar. No sag should be visible in the chain.
• Do not over-tension the chain - excess tension
will cause excessive wear and will reduce the life
of the chain and could damage the bar.
• New chains could stretch and loosen during
initial use. NOTE: Remove battery pack and
check chain tension frequently during the rst
two hours of use.
12. Tighten the guide bar nuts securely.
SHARPENING THE SAW CHAIN
Improper chain sharpening increas-
es the potential of kickback.
Failure to replace or repair damaged chain can
cause serious injury.
The saw chain is very sharp, always wear pro-
tective gloves when performing maintenance to
the chain.
Toe
Depth Gauge
Side Plate
Top Plate
Rivet Hole
Heel
Gullet
Cutting Corner
Be careful to le all cutters to the specied angles and
to the same length, as fast cutting can be obtained only
when all cutters are uniform.
• Wear gloves for protection. Properly tension the chain
prior to sharpening. Refer to Chain Tension section
earlier in this manual. Do all of your ling at the mid-
point of the bar.
Left Hand Cutters
Right Hand Cutters
• Use a 5/32 in. diameter round le and holder.
• Keep the le level with the top plate of the tooth. Do
not let the le dip or rock.
• Using light but rm pressure, stroke towards the front
corner of the tooth.
• Lift le away from the steel on each return stroke.
• Put a few rm strokes on every tooth. File all left
hand cutters in one direction. Then move to the other
side and le the right hand cutters in the opposite
direction. Occasionally remove lings from the le
with a wire brush.
IMPORTANT SAFETY
INSTRUCTIONS
To reduce the risk of injury, read
and follow all safety instructions
provided with this accessory and your saw. Kick-
back can occur with any saw chain. Guard against
kickback, which may result in severe injury, by
using your saw safely at all times. Always wear
proper PPE.
READ AND SAVE THESE
INSTRUCTIONS
• Follow instructions for lubricating, chain tension-
ing and changing the bar and chain. Improperly
tensioned or lubricated chain may either break or
increase the chance for kickback.
• Cut wood only. Do not use pruning saw for pur-
poses not intended. For example: do not use
pruning saw for cutting metal, plastic, masonry
or non-wood building materials. Use of the pruning
saw for operations dierent than intended could result
in a hazardous situation.
Causes and operator prevention of kickback:
Kickback may occur when the nose or tip
of the guide bar touches an object, or when
the wood closes in and pinches the saw
chain in the cut.
Tip contact in some cases may cause a
sudden reverse reaction, kicking the guide
bar up and back towards the operator.
Pinching the saw chain along the top of the
guide bar may push the guide bar rapidly
back towards the operator.
Either of these reactions may cause you to lose con-
trol of the saw which could result in serious personal
injury. Do not rely exclusively upon the safety devices
built into your saw. As a pruning saw user, you should
take several steps to keep your cutting jobs free from
accident or injury.
Kickback is the result of pruning saw misuse and/or in-
correct operating procedures or conditions and can be
avoided by taking proper precautions as given below:
• Maintain a rm grip on the pruning saw and posi-
tion your body and arm(s) to allow you to resist
kickback forces. Kickback forces can be controlled
by the operator, if proper precautions are taken. Do
not let go of the pruning saw.
• Only use replacement guide bars and saw chains
specied by the manufacturer. Incorrect replace-
ment guide bars and saw chains may cause chain
breakage and/or kickback.
• Follow the manufacturer’s sharpening and main-
tenance instructions for the saw chain. Decreas-
ing the depth gauge height can lead to increased
kickback.
• Always be aware of what you are doing when
using the pruning saw. Use common sense. Do
not operate the pruning saw when you are tired, ill, or
under the inuence of alcohol, drugs, or medication.
• Keep all parts of your body away from the saw
chain when the unit is running.
• Maintain the unit with care. Keep the cutting edge
sharp and clean for best performance and to reduce
the risk of injury. Follow instructions for lubricating
and changing accessories.
• Save these instructions. Refer to them frequently
and use them to instruct others who may use this
product. If you loan someone this product, loan them
these instructions also.
• Always use common sense and be cautious when
using tools. It is not possible to anticipate every
situation that could result in a dangerous outcome.
Do not use this tool if you do not understand these
operating instructions or you feel the work is beyond
your capability; contact Milwaukee Tool or a trained
professional for additional information or training.
• Follow the manufacturer’s sharpening and main-
tenance instructions for the saw chain. Decreas-
ing the depth gauge height can lead to increased
kickback.
Causes du rebond et précautions à prendre:
Un rebond pourra se produire lorsque l’extrémité du
guide-chaîne touche un objet ou bien, lorsque le bois
se referme sur la lame et la pince dans l’entaille.
Dans certains cas, le contact de la pointe de la lame
avec un objet peut causer une réaction de rebond
soudain, projetant le guide-chaîne vers le haut et
l’arrière, en direction de l’utilisateur.
Le pincement de la chaîne sur le haut du guide-chaîne
peut causer une projection violente de la lame en
arrière, en direction de l’utilisateur.
Chacune de ces deux réactions peut entraîner la perte
de contrôle de la scie, et causer des blessures graves.
Ne pas compter exclusivement sur les dispositifs
de sécurité intégrés à la scie. En tant qu’utilisateur
d’une scie d’élagage, vous devez prendre un certain
nombre de précautions pour éviter les accidents et
les blessures.
Le rebond est causé par une mauvaise utilisation de
la scie d’élagage et/ou des méthodes de travail incor-
rectes et il peut être évité en prenant les précautions
suivantes:
• Tenir fermement la scie d’élagage et placer le
corps et les bras d'une façon telle qu'il soit
possible de résister les rebonds. S'il prend les
précautions nécessaires, l'opérateur peut contrôler
la force du rebond. Ne pas lâcher la scie d’élagage.
• N’utiliser que les guides chaînes et les chaînes
spéciés par le fabricant. La substitution inadéquate
des chaînes et des guide-chaînes pourra provoquer
que la chaîne se casse et/ou rebondisse.
• Suivre les instructions d’aûtage et d’entretien
fournies par le fabricant de la scie à chaîne. La
réduction de la hauteur de la jauge de profondeur
peut provoquer un rebond plus fort.
• Toujours se concentrer sur le travail à faire lors
de l’usage d’une scie d’élagage. Faire preuve
de bon sens. Ne pas utiliser cette scie en état de
fatigue ou sous l'inuence de l'alcool, de drogues ou
de médicaments.
• Garder toutes les parties du corps à l'écart de la
scie à chaîne lorsque le moteur tourne.
• Entretenir soigneusement l'outil. Garder l'outil
bien aûté et propre, pour obtenir des performances
optimales et minimiser les risques d'accident. Suivre
les instructions de lubrication et de changement
d’accessoires.
• Conserver ces instructions. Les consulter fréquem-
ment et les utiliser pour instruire les autres utilisateurs
éventuels. Si ce produit est prêté, il doit être accom-
pagné de ces instructions.
• Toujours faire preuve de bons sens et procéder
avec prudence lors de l’utilisation d’outils. C’est
impossible de prévoir toutes les situations dont le
résultat est dangereux. Ne pas utiliser cet outil si vous
ne comprenez pas ces instructions d’opération ou si
vous pensez que le travail dépasse votre capacité ;
veuillez contacter Milwaukee Tool ou un professionnel
formé pour recevoir plus d’information ou formation
• Suivre les instructions d’aûtage et d’entretien
fournies par le fabricant de la scie à chaîne. La
réduction de la hauteur de la jauge de profondeur
peut provoquer un rebond plus fort.
SPÉCIFICATIONS
Pour utilisation avec ............................ 49-16-2733
Longueur de la barre ............................. 152 mm (6")
Jauge de chaîne .............................. 1,1 mm (0,043")
Type de chaîne ....................................Rebond faible
Pitch de la chaîne ............. 9,5 mm (3/8") Prol faible
Dents d’entraînement ........................................... 28
SUBSTITUTION/AJUSTAGE DE
LA CHAÎNE ET BARRE DE SCIE
Avant de son utilisation, lire
le manuel et les étiquettes du
bloc moteur. Des consignes importantes à propos de
l’utilisation et l’assemblage sont fournies dans le
manuel du bloc moteur. Brancher l'accessoire sur le
bloc moteur selon les consignes qui se trouvent dans
le manuel du bloc moteur.
Toujours retirer le bloc-piles avant de changer ou
enlever les accessoires.
La scie est tranchante. Toujours
porter des gants protecteurs
lors de la manipulation de la chaîne.
Utiliser des chaînes pour scie à rebond réduit - les
jauges de profondeur placées en avant de chaque dent
peuvent minimiser la force de réaction du rebond en
empêchant les dents de mordre trop profondément
dans la zone de rebond. Utiliser exclusivement des
chaînes de rechange équivalentes à celle d’origine
ou certiées « rebond réduit » selon ANSI B175.1.
À mesure qu’une chaîne est aûtée au cours de sa vie
utile, elle perd une partie de ses qualités antirebond.
Il est convenable donc de l’utiliser avec une prudence
accrue.
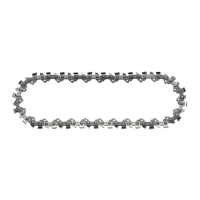
REPLACEMENT LOW KICKBACK
SAW CHAIN
CHAÎNE DE SCIE À FAIBLE
REBOND DE REMPLACEMENT
REEMPLAZO BAJO CONTRAGOLPE
CADENA DE SIERRA
Cat. No. / No de cat.
49-16-2732
SPECIFICATIONS
For use with .......................................... 49-16-2733
Bar Length ............................................. 6" (152 mm)
Chain Gauge ................................... 0.043" (1.1 mm)
Chain Type ..........................................Low Kickback
Chain Pitch ....................... 3/8" (9.5 mm) Low Prole
Chain Drive Teeth ..................................................28
REPLACING/ADJUSTING THE
SAW CHAIN AND BAR
Before use, read manual and labels
of the power head. Important assem-
bly and use instructions are provided in the pow-
er head manual. Connect the attachment to the
power head in accordance with the power head
manual.
Always remove battery pack before changing or
removing accessories.
Chain is sharp. Always wear protec-
tive gloves when handling the chain.
Use Low Kickback Saw Chains - The rakers (depth
gauges) ahead of each cutter can minimize the force
of a kickback reaction by preventing the cutters from
digging in too deeply at the kickback zone. Only use
replacement chain that is equivalent to original chain
or has been certied as low kickback chain per ANSI
B175.1.
As saw chains are sharpened during their useful life,
they lose some of the low kickback qualities and extra
caution should be used.
1. Remove the battery pack.
2. Place the saw on a at, rm surface.
3. Remove the drive cover by removing the guide bar
nuts using the adjustment tool.
4. Loosen the chain by turning the chain tensioning
screw counterclockwise with the adjustment tool.
5. Pull the guide bar off of the guide bar bolts
and unloop the chain from the drive hub.
CAUTION! Saw Chain is sharp.
6. Remove the chain from the guide bar groove.
CAUTION! Saw Chain is sharp. Inspect guide bar
for cracks or wear; replace if damaged.
7. Wrap the new or sharpened chain around the guide
bar in the direction indicated on the saw .
8. Ensure the chain is properly set in the slot around
the entire guide bar.
9. Loop the chain around the hub and t the bar around
the bolts.
Hub
Bolts
10. Replace the drive cover.
TOP PLATE FILING ANGLE
CORRECT
Top Plate Filing Angle
More
than 30°
Less
than 30°
30°
INCORRECT
Top Plate Filing Angle
• CORRECT 30° - File holders are marked with guide
marks to align le properly to produce correct top
plate angle.
• LESS THAN 30° - For Cross Cutting.
• MORE THAN 30° - Feathered Edge Dulls Quickly.
Side Plate Angle
CORRECT
Side Plate
Filing Angle
Backward
Slope
Hook
80°
INCORRECT
Side Plate Filing Angle
• CORRECT - 80° Produced automatically if correct
diameter le is used in le holder.
• HOOK - “Grabs” and dulls quickly. Increases potential
of KICKBACK. Results from using a le with diameter
too small, or le held too low.
• BACKWARD SLOPE - Needs too much feed pres-
sure, causes excessive wear to bar and chain. Results
from using a le with diameter too large, or le held
too high.
Depth Gauge Clearance
• The depth gauge should be maintained at a clearance
of .025 in. Use a depth gauge tool for checking the
depth gauge clearances.
• Every time the chain is led, check the depth gauge
clearance.
Depth Gauge Jointer
Flat File
Use a at le and a depth gauge jointer to lower all
gauges uniformly. Depth gauge jointers are available
in .020 in. to .035 in. Use a .025 in. depth gauge joint-
er. After lowering each depth
Restore
original
shape by
rounding
the front
gauge, restore original shape
by rounding the front. Be
careful not to damage adjoin-
ing drive links with the edge of
the le.
Depth gauges must be adjust-
ed with the at le in the same
direction the adjoining cutter
was led with the round le.
Use care not to contact cutter face with at le when
adjusting depth gauges.
CONSIGNES DE SÉCURITÉ
IMPORTANTES
Pour réduire les risques de
blessures, lisez et respect-
ez toutes les consignes de sécurité fournies avec
cet accessoire et votre scie. Le rebond peut se
produire avec n'importe quelle chaîne de scie.
Protégez contre le rebond, ce qui peut entraîner
des blessures graves, en utilisant votre scie en
toute sécurité à tout moment. Portez toujours un
EPI approprié.
LIRE ET CONSERVER CES
INSTRUCTIONS
• Suivre les consignes de lubrication, la mise en
tension de la chaîne et le changement de la barre
et la chaîne. La chaîne qui ne soit pas bien mise en
tension ni lubriée pourra se casser ou augmenter le
risque de rebond.
• Ne couper que de bois. Ne pas utiliser la scie
d’élagage pour d’applications pour lesquelles
elle n'est pas conçue. Par exemple: ne pas utiliser
la scie d’élagage pour couper du métal, du plas-
tique, des matériaux de maçonnerie et tout autre
matériel de construction diérent à ceux faits en
bois. L’usage de la scie d’élagage pour d’applications
pour lesquelles elle n’ait pas été conçue peut causer
une situation dangereuse.
1. Retirer le bloc-piles.
2. Poser la scie sur une surface plate et rme.
3. Retirer le carter d’entraînement en enlevant les bou-
lons de guide-chaîne à l’aide de l’outil de réglage.
4. Desserrer la chaîne en tournant la vis de tension
de la chaîne à gauche à l'aide de l’outil de réglage.
5. Sortir le guide-chaîne des boulons de guide-chaîne
et déboucler la chaîne du moyeu d’entraînement.
ATTENTION! La scie à chaîne est tranchante.
6. Enlever la chaîne de la rainure de guide-chaîne.
ATTENTION! La scie à chaîne est tranchante. Ex-
aminer le guide-chaîne pour détecter toutes ssures
ou usure ; veuillez le remplacer si endommagé.
7. Enrouler la nouvelle chaîne ou celle qui a été aûtée
autour du guide-chaîne, en la direction indiquée sur
la scie .
8. Veuillez s’assurer que la chaîne soit bien mise en
place dans les fentes autour de tout le guide-chaîne.
9. Boucler la chaîne autour du moyeu et la faire con-
venir au guide autour des boulons.
\Moyeu
Boulons
10. Remplacer le carter d’entraînement.
11. Se servir de l’outil de réglage pour faire tourner
la vis de tension de chaîne an d’augmenter la
tension (à droite) jusqu’à ce que la chaîne se serre
autour du guide-chaîne.
• Vous saurez que la tension est la correcte quand
la chaîne claque après l'avoir tirée 3 mm (1/8")
du guide-chaîne. La chaîne ne doit pas s’aaisser
visiblement.
• Ne pas appliquer tension excessive sur la chaîne
puisqu’elle provoquera de l’usure excessive et
réduira la vie utile de la chaîne et peut endom-
mager le guide-chaîne.
• Des nouvelles chaînes pourraient s’étirer
et se desserrer pendant l’utilisation initiale.
REMARQUE: Retirer le bloc-piles et vérifier
fréquemment la tension de la chaîne pendant
les premières heures d’utilisation.
12. Serrer fermement les boulons du guide-chaîne.