The document describes the installation manual for Mimo Monitors' 7", 10.1", and 15.6" Tablet and 10.1" Vue Wall Box enclosures. These enclosures are specifically designed to seamlessly fit Mimo Monitor products.
Function Description:
The Mimo Monitor In-Wall Enclosures provide a secure and integrated mounting solution for Mimo Monitors' tablets and displays. They allow for the flush installation of these devices into drywall, creating a clean and professional appearance. The enclosures are designed to accommodate various display sizes and can be installed in either vertical or horizontal orientations, depending on the specific model and stud spacing. The installation process involves preparing the wall, securing the in-wall box, mounting the display to an adapter plate, and finally installing a front bezel to complete the flush look.
Important Technical Specifications:
Usage Features:
- Seamless Integration: The enclosures are designed to provide a flush, integrated look for Mimo Monitors, blending them into the wall surface.
- Versatile Orientation: The enclosures can be installed in either vertical or horizontal orientations, offering flexibility in display placement.
- Secure Mounting: Drywall clips and screws ensure the in-wall box is securely fastened to the wall.
- Adapter Plate System: An adapter plate facilitates the mounting of the display to the in-wall box, using standard VESA 75 mounting points.
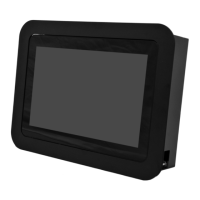
- Aesthetic Finish: A front bezel is installed after the display is mounted, covering the edges of the enclosure and providing a clean, finished appearance.
- Product Compatibility: Specifically designed for Mimo Monitors' tablet and Vue display products, ensuring a perfect fit.
Maintenance Features:
- Accessibility (Implied): While not explicitly detailed as a maintenance feature, the design with a removable bezel and an adapter plate suggests that the display can be accessed and potentially removed for maintenance or replacement without significant damage to the wall.
- Durable Construction (Implied): The use of an "in-wall box" and secure mounting hardware suggests a robust installation intended for long-term use.
Installation Process Overview:
- Locate Studs: Use a stud finder to locate and mark the edges of wall studs to determine the optimal installation area and orientation.
- Cut Drywall Hole: Based on the specific enclosure size and desired orientation (landscape or portrait), cut the appropriate hole in the drywall. Special considerations are noted for the 15.6" enclosure in landscape mode, which may require notching studs.
- Insert Wall Box: Insert the in-wall box into the prepared hole, ensuring the clips are on the inside of the box.
- Secure Wall Box: Rotate and tighten the drywall clips and screws to secure the box to the wall. The process involves initially securing the top clips, then the bottom, and finally tightening all screws once the box is level.
- Mount Display to Adapter Plate: Attach the Mimo Monitor display to the adapter plate using the provided M4 screws and the VESA 75 holes on the back of the display.
- Mount Adapter Plate to Wall Box: Secure the adapter plate (with the display attached) to the in-wall box using four M4 screws.
- Install Bezel: Align and press the front bezel into place, completing the installation and providing a finished look.
The manual emphasizes the importance of accurate measurements and proper stud location to ensure a successful and seamless installation. It also highlights the custom design of the enclosures to perfectly integrate with Mimo Monitor products.