5-74 Image Optimization
Impacts The bigger the value of iClear is, the less the noise becomes.
Auto Comment
The system adds the orientation and the organ comments to the desired area according to the active
ultrasound image.
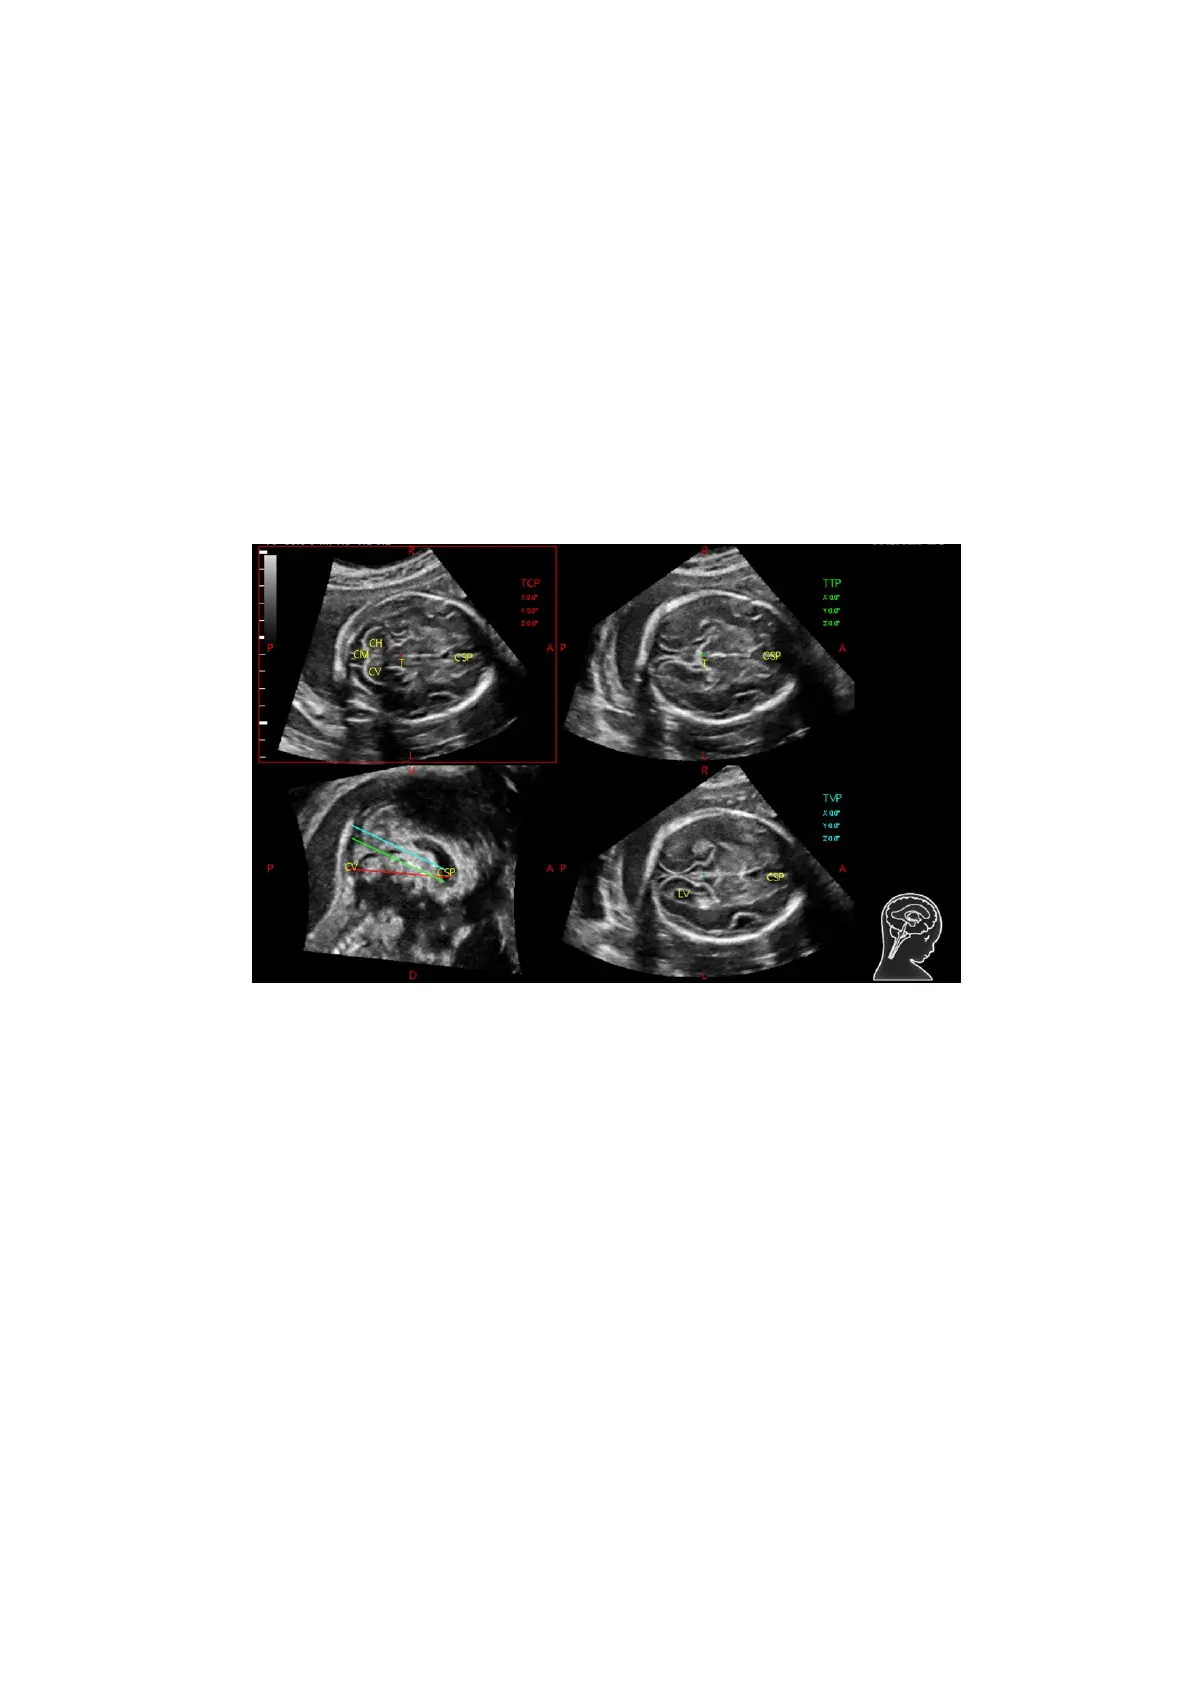
1. Acquire 3D data. Tap [S-Planes CNS] to enter the automatic detection of the mode.
2. Click [Auto Comment]. The comments appear on the image automatically.
Each of them is:
The orientation comments describe the location of the plane, referring to A (anterior), P
(posterior), L (Left), R (right), U (up), D (down).
Organ comments describe the position of the organ, referring to CSP (cavum septum
pellucidum), T (thalamus), CH (cerebellar hemisphere), CV (cerebellar vermis), CM (cisterna
magna), LV (lateral ventricles).
3. Rotate [Font Size] knob to adjust the font size of the comment.
4. See 9.1 Comments for adding, moving or deleting the comments.
5. Save the image.
6. Click [Auto Comment] again to clean them.
Axis Rotation
1. Acquire 3D data. Tap [S-Planes CNS] to enter the automatic detection of the mode.
2. Tap [TCP]/[TTP]/[TVP] to select the plane, and rotate <M>, <PW> or <C> knob to rotate the image
plane along with X/Y/Z axis. The angle value appears on the right of the image.
NOTE: it supports the rotation to the saved image.
Reference line rotating
1. Acquire 3D data. Tap [S-Planes CNS] to enter the automatic detection of the mode.
2. Press <Cursor> to show the cursor. Move the cursor over the red line of the MSP plane. Press left
<Set> to select the red reference line after the cursor becomes hand-shaped. Then, the red
reference line becomes dotted line.
3. Move the trackball left or downwards. The reference line rotates anticlockwise along the center.
TCP image rotates clockwise along the Y-axis, and the value of Y-axis becomes bigger.
 Loading...


