Page 4/4
Form No. FX_062098 18.12.04 Rev 18.1
© 2018 | Minimax Fire Protection | 321 Industrial Park Dr. | Hastings, MI 49058 | www.minimax-re.com
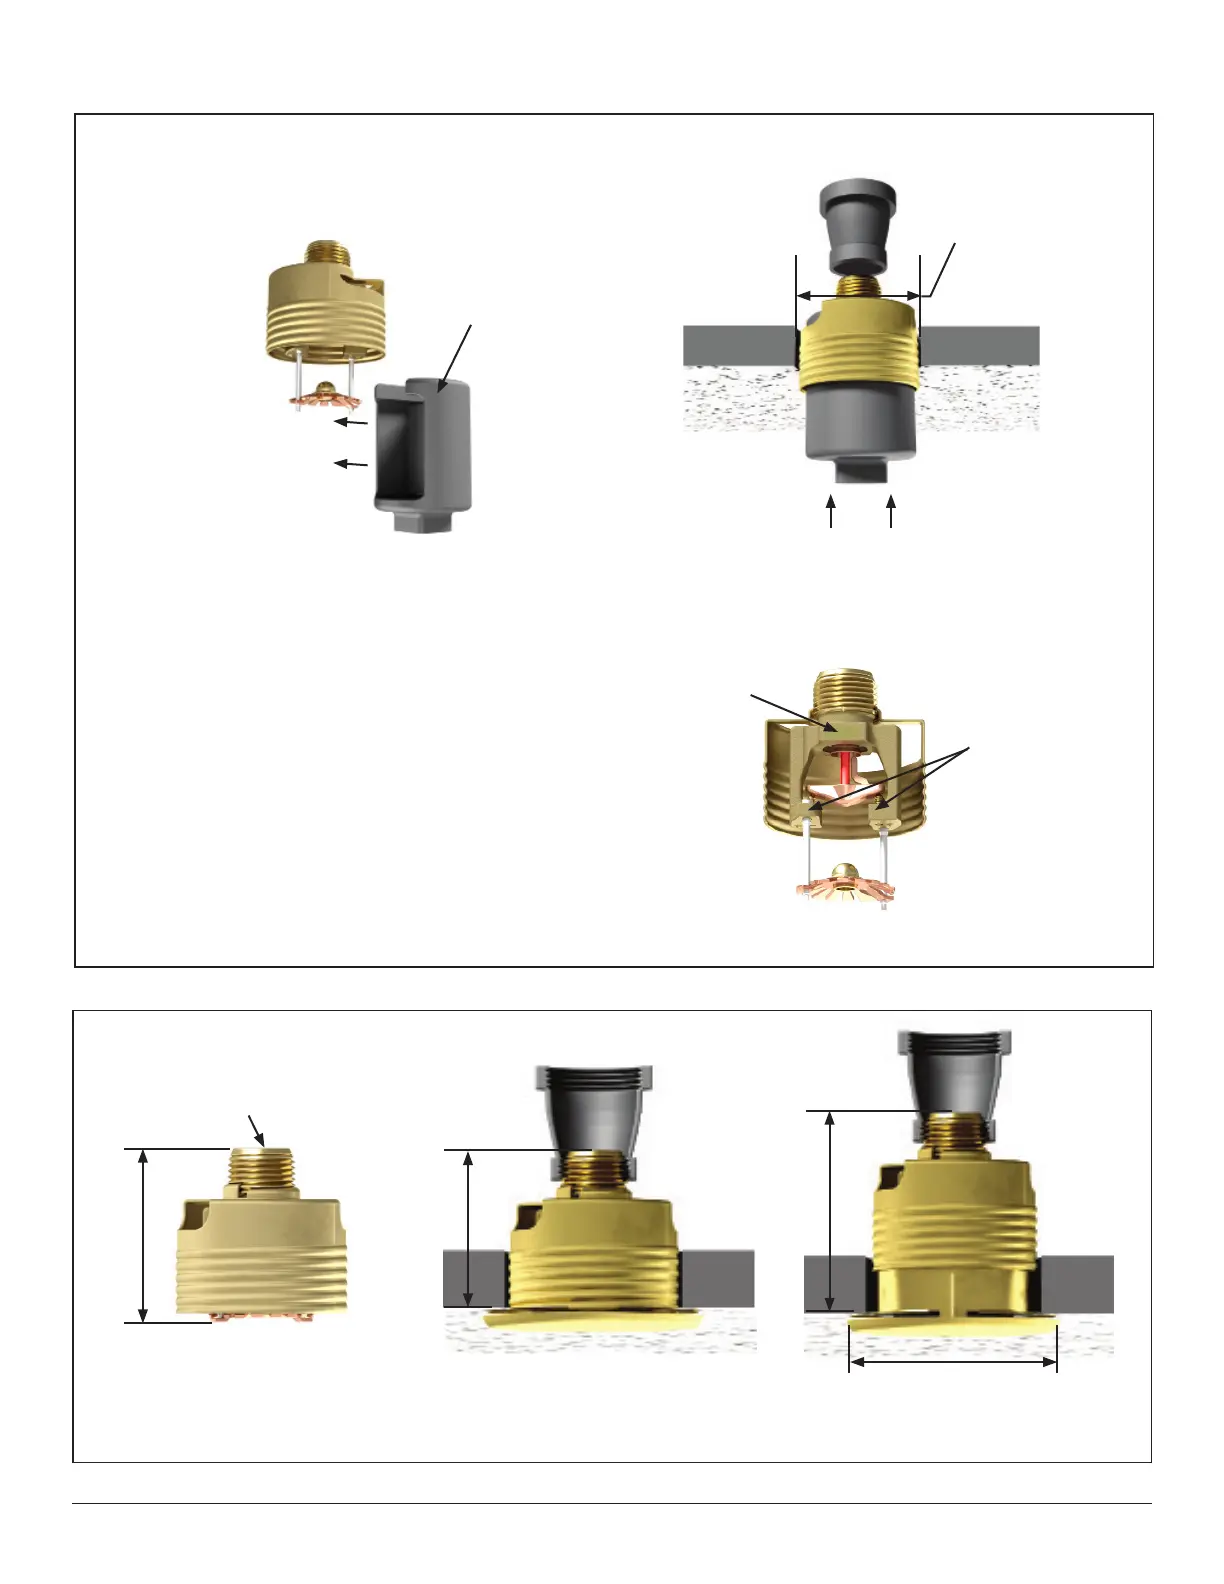
Sprinkler and Adapter Assembly
• Protective cap removed
• Use wrench 14031**
Step 1:
Carefully slide the
wrench sideways around
the deector and pins
Sprinkler Wrench
Part No. 14047WB**
2-1/4” (57 mm)
diameter opening
required in the
ceiling.
Step 2:
Carefully press the wrench upward and
turn slightly to ensure engagement with
the sprinkler wrench ats.
**
A 1/2” ratchet is required (Not available from us.)
Figure 2: Sprinkler Installation and Proper Wrench Usage (Sprinkler MX8462 Shown)
• NEVER install the sprinkler by applying the
installation wrench across the frame arms.
• DO NOT overtighten.
• Use only the designated sprinkler wrenches,
Minimax Fire Protection Part Numbers 14047WB or
14031**.
• A leak tight seal should be achieved by turning the
sprinkler clockwise 1 to 1-1/2 turns beyond nger
tight.
Sprinkler
wrench at
Sprinkler
frame arms
Figure 3: Sprinkler Dimensions and Cover Installation (Sprinkler MX8462 Shown)
1/2” (15mm) NPT (MX8462)
or
3/4” (20mm) NPT (MX8464)
2-3/16”
(56 mm)
2-1/8” (54 mm)
Minimum
2-5/8” (67 mm)
Maximum
2-3/4” (70 mm) or
3-5/16” (84 mm)
NOTE: Upon sprinkler activation, the deector descends
to approximately 13/16” (21 mm) below the sprinkler body.
 Loading...