2928
Menu Functions and Settings
Manual Controls
This setting offers you the possibility of using your
DTC 1100 like a normal digital camera. As in any other
normal digital camera, you can view the digital stills
and video clips on the display monitor and accept
them at the same time. Once your DTC 1100 is in the
“SETUP” mode (see the section on Setup and Opera-
tion mode), it is immediately in the “Manual Controls”
mode. You can use the right (photo) and left (video)
arrow keys (11) to move between the “photo” and
“Video” mode. You can change the image resolution
of the picture by repeatedly activating the respective
arrow key. Pressing the menu key (15) again will allow
you to get to the “Manual Controls” mode.
Camera
The LCD monitor (8) displays the following information:
The camera icon and the current screen resolution
appear at the top left edge and the top right edge
displays the image capacity (0000/0000). The battery
level is shown at the bottom left edge. By pressing
the OK button (11), you can manually take a picture
in the camera mode.
Video
To switch to the “Video Mode”, press the left arrow
key (11). The LCD monitor (8) displays the following
features: The video icon and the current screen reso-
lution appear at the top left edge and the top right
edge displays the remainder of the recording time in
[00:00:00]. The lower left edge displays the battery
level. By pressing the OK button (11), you can start
recording in the “Video Mode”. By pressing the OK
button (11) again, you stop recording.
Day and Night Mode
In the “Manual Control” mode, you can use the Up-
key (11) to activatethe day or night mode. The default
setting on your DTC 1100 is the “Day Mode” (colour
mode). Photos or video clips are displayed in colour.
To switch to the “Night-IR Mode”, press the top arrow
key (11). The setting changes from colour mode during
the day to the Night IR mode and the image displayed
on the LCD monitor (8) changes from colour image to
a blackwhite image.
Note: In the operation mode (main switch (12)
right), the camera uses the twilight sensor to auto-
matically select the appropriate mode corresponding
to the time of the day.
Playing back Picture/Video
In the “Manual Control” mode, press the lower arrow
key (11) or select “Playback Picture/ Video” in the
selection menu for the “Camera Mode”, which is lo-
cated in the “Main Menu” under the first tab “Camera
Settings”. The pictures are displayed on the LCD moni-
tor (8). The picture format (photo/video) is displayed at
the bottom left edge of the image as the camera icon.
In addition, the top right edge of the LCD monitor (8)
shows the number of photos and video recordings.
Press the left or right arrow key (11) to viewthe pictures
and video clips in the chronological or reverse order.
Press the menu button (15) to access “Main Menu”.
By repeating that action, you will be able to return to
“Replay photo/video”. You can return to the “Manual
Controls” mode by again pressing the lower arrow key
(11).
Delete the Picture or Video Clips
Press the lower arrow key (11) in the “Manual Con-
trols” mode or select “Playback Photo/ Video” option
in the “Camera Mode”, which is located under the
“Camera Settings” tab in the “Main Menu”.
Select the picture to be deleted. By pressing the upper
arrow key (11), you access the lower menu option
“File Management”. You can use the Up and Down
keys (11) to choose between “1 Delete the picture”
and “Delete all”. Confirm with OK (11). Select “Yes”
and confirm with OK (11) to delete the picture (pictures)
or the video (videos). If you select “No” and confirm,
you will brought back to the submenu “File Manage-
ment”. Using the left arrow key (11) you can return to
the Yes/No menu selection in the previous menu option
“File Management” and from “File Management”
back to “Manual Control”. Using the left arrow key
(11) you can return to the previous menu selection
“File Management” or “Manual Control”. By pressing
the menu button (15), you can directly return to replay
photo/video option in the menu from anywhere with-
out deleting the file.
Replaying Video Clips
Press the lower arrow key (11) in the “Manual Control”
mode or select “Playback Photo/ Video” in the “Camera
mode” menu option that is located in the “Main Menu”
under the first tab “Camera Settings”. In case of video
files, you can see a “Camera Icon” at the lower left
edge of the LCD monitor (8). Press the OK button (11)
to play the video. Pressing the Up arrow key (11) to
stop the video. The image freezes.
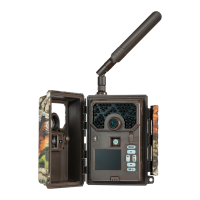
Inserting the SIM Card
To send photos with your DTC 1100, you will need
an activated SIM card from a mobile phone provider
of choice. You can use a prepaid card or a phone plan
card. Make sure that the card used for the DTC 1100 is
activated to send MMS messages. It is also important
that this card is not locked with a PIN. Insert the SIM
card into the correct slot (10) with the chip towards
the front of the camera. A schematic imprint of the
proper card position is indicated next to the card slot.
Note: MINOX assumes no responsibility for any
costs that may arise in connection with the use of
mobile telephone networks.
Note: Please make the sure the camera is turned
off before inserting or removing the card.
Mounting the Camera
1. Mounting strap
On the back of the camera are two mounting brackets
(17) for fixing the camera to a tree or post with a
strap or mounting harness. Pass the mounting strap
(included in the scope of delivery) through the two
brackets, around a tree or post and fasten tightly with
the buckle.
2. Tripod
On the back of the camera is a ¼” tripod thread (18)
for mounting the camera on a tripod.
Language Setting
Since the Trail Camera DTC 1100 comes with default
factory settings with an English menu, follow these
steps to make the right language selection:
1. Bring the main switch (12) to the switch setting
“SETUP” mode.
2. You will directly be brought to “manual Activation”
option in the camera.
3. Now press the menu key (15). You will be directed
to the main menu of the camera.
4. Now press the the arrow key to the right (11) to
change the tab in the “Main Menu”.
5. Then press the arrow key (11) facing downward.
6. Now it shows the highlighted menu option
“Language”.
7. Press the OK button (11).
8. Using the down arrow key (11) select “German”
(highlighted).
9. Press the OK button (11).
10. The camera will return to the “Main Menu”.
The language has been set to “German”.
Setup and Operating Mode
Your Camera has two Main Modes:
1. Setup Mode
Switch your DTC 1100 camera to the “Setup Mode”
(SETUP = setup mode, main switch (12) in centre
position). You will be directed to the “Manual con-
trols” of the camera. Press the menu button (15) to
get to the main menu of the camera. You can alternate
between three tabs in the main menu by activating
the right and left arrow keys (11). The tab currently
selected is highlighted in green. Under the first tab
displaying the “Camera Icon” you can adjust the
settings directly relevant to the functioning of the
camera. This tab will hereinafter be referred to as
“Camera Settings”. The second tab showing the
“Hammer and Wrench icon” allows you to adjust all
the other settings. This will hereinafter be referred to
as “General Settings”. This mode allows you to pro-
gram the camera and undertake all display settings
such as date, time, temperature, etc. that are supposed
to be displayed later on the pictures or video clips.
The third tab showing the letter “N” for network (mo-
bile phone network) allows you to specify all settings
for the mobile phone connection and the send para-
meters for pictures. This will hereinafter be referred to
as “Mobile Service Settings”. Use the Up/Down arrow
keys (11) to access the individual menu options of the
tabs. To change the tabs once a menu option has been
selected (highlighted), press the left arrow key (11)
once. The camera will return to the previous selection
menu. Only that option is now highlighted in green.
Now you can use the Right/Left arrow key (11) to
move between the tabs “Camera Settings”, “General
Settings” and “Mobile Service Settings”, and select
the desired menu options with the Up/Down arrow
keys (11).
2. Operating Mode
Switch your DTC 1100 camera to the “operation
mode” (ON = operation mode, main on/ off switch
(11) right hand side). In this mode, your DTC 1100
camera automatically accepts the new settings you
previously programmed in the “SETUP” mode.
Note: The blue activating LED (3) will blink for a
few seconds before the camera is ready for use.
 Loading...