Do you have a question about the Mirpol MIR1008 and is the answer not in the manual?
Study the manual and check local building codes for proper installation.
Read the entire manual and follow sequence carefully for correct results.
Verify all necessary parts are present and organized by number.
Ensure dry conditions and avoid windy days; choose a suitable installation site.
Two or more people are recommended; gather basic tools and materials.
Assemble base bars (1-4R) with screws (F1), attach channel (5) to rods (3L, 3R).
Place wall panels (P1, P2, P2A) on base bars (3L, 3R, 4L, 4R) and secure.
Install reinforcement bars (22, 23, 24L, 24R) inside wall panels with screws (F1).
Install upper slide pieces (G2), door bar (6), and sliding channels (7, 8) on front panels.
Attach upper angles (9, 10L, 10R, 11) to the top of the wall panel with screws (F1).
Attach door columns (25L, 25R) to base bar (3L) and wall panel, secure with screws (F1).
Assemble gable panels (21L, 21R) with joint (B1), connect roof supports (13, 14), attach roof structures.
Place top panels (21L, 21R, 13, 14) on channels (7, 8) and rods (10L, 10R), secure with screws (F1).
Attach roof panels (P5, P6, P7, P8) to gable panel, secure with screws (F1) and nuts.
Attach remaining roof panels (P5, P6, P7, P8) to gable panel, secure with screws (F1) and nuts.
Connect roof slats (15, 16, 17, 18) to roof panels, secure with screws (F1). Attach corner pieces (GC).
Attach central roof trim (19) to roof panels, secure with screws (F1). Slide end cover (GE).
Connect door trim (20) to door panels (D1, D2) with rod (27). Install lower slide (GD).
Attach handles (GB) to door panels (D2) from inside using bolt (F2) and nut.
Slide door panel into base strip (3L), attach top to slide (G2) with screws (F3).
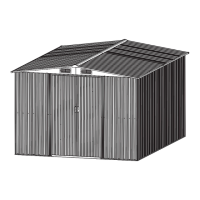
Sheds for garden equipment storage, outdoor use only.
Assemble on dry ground by adults. Ensure firm assembly to prevent accidents.
Periodically clean, wax, and protect the shed from damage.
Keep door guides clean, lubricate, and secure doors against wind.
Use pads for protection and regularly check and tighten all screws.
Use floor vapor barrier for condensation; wash panels and store materials safely.
| Brand | Mirpol |
|---|---|
| Model | MIR1008 |
| Category | Outdoor Storage |
| Language | English |