1.5 SAUNA STOVE INSTALLATION
Unpack the sauna stove and remove any protective
plastic from its surfaces. After unpacking, the stove
must be handled with special care, to protect external
surfaces against damage. We recommend using
protective gloves when installing the sauna stove.
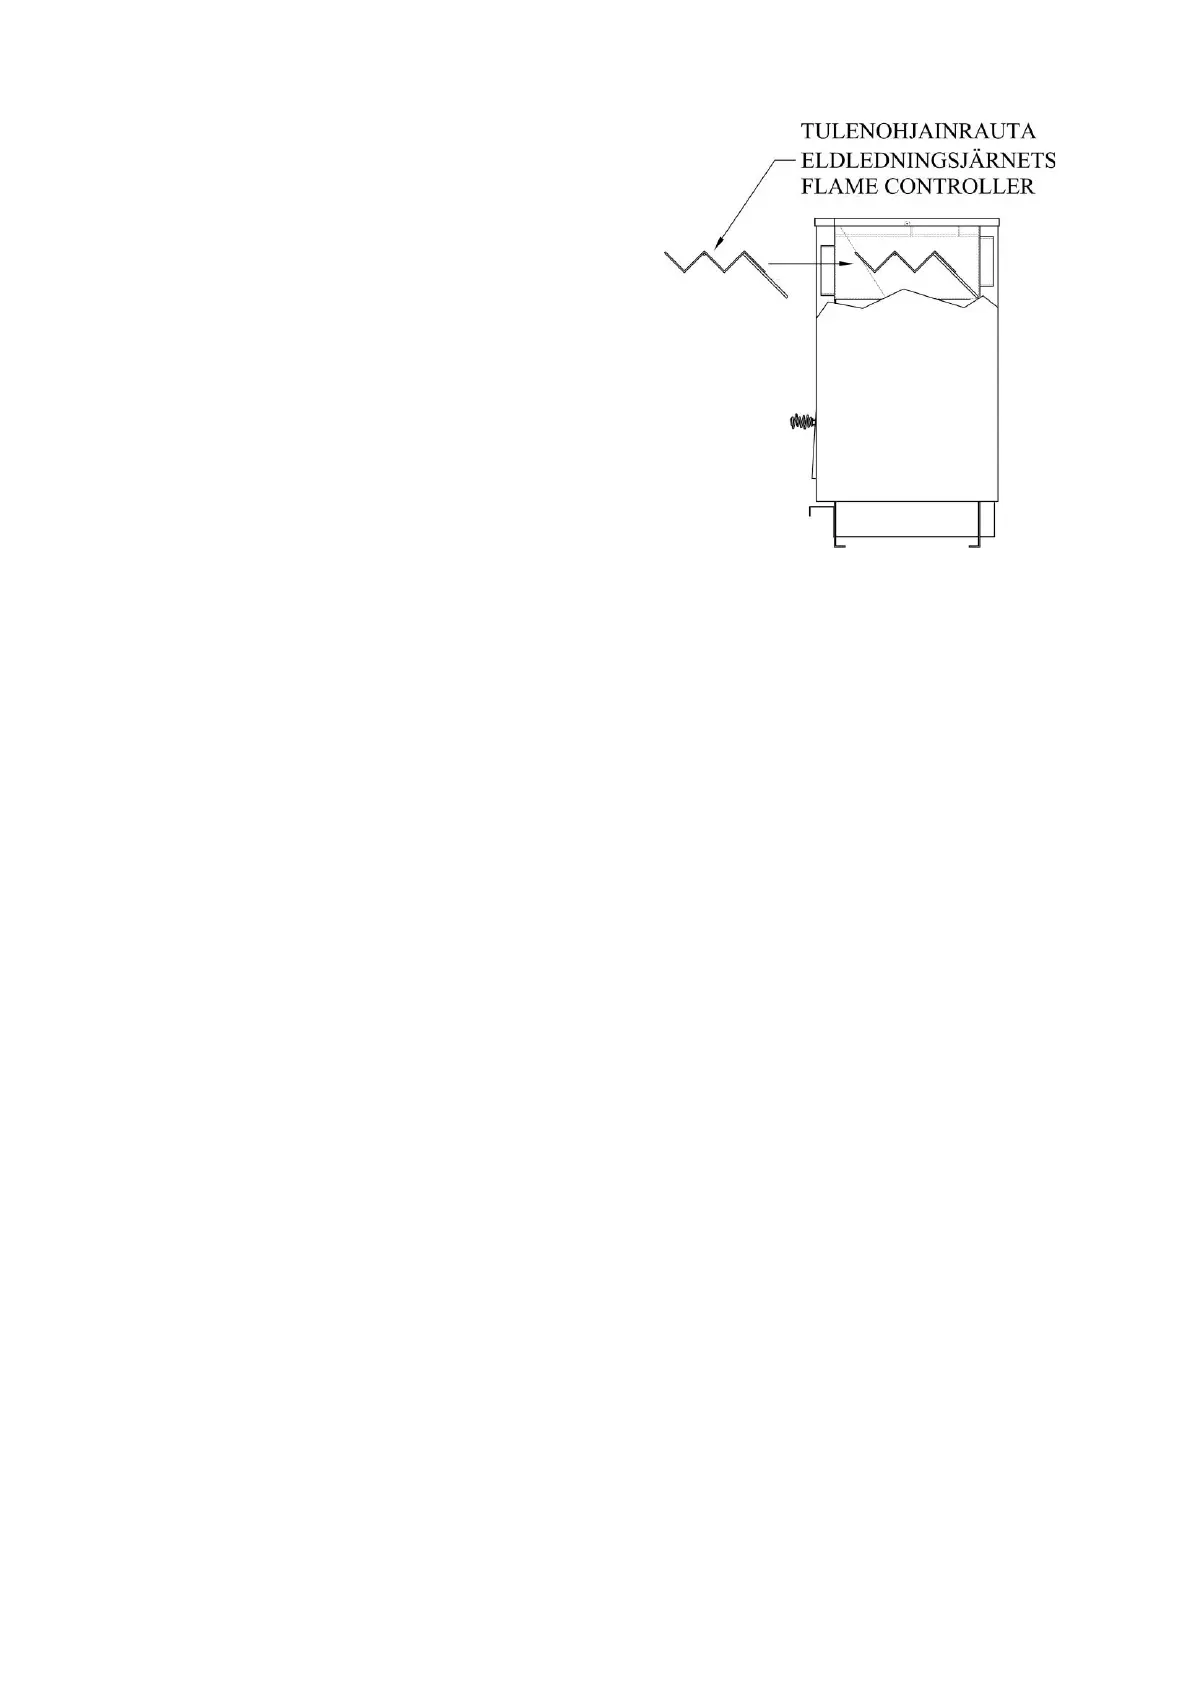
Remove the accessories from the heater that were
included in the delivery, and check that the grate is in
the correct position. The correct position of the flame
controller inside the central flue of the heater must be
checked. The cover plug on the front plate of the
heater is removed by pulling it upwards. The cleaning
aperture plug situated behind it is removed by pulling.
The correct position of the flame controller is outlined
in the adjacent drawing. The cleaning aperture plug
and the cover plate
are placed back in their correct positions after the inspection.
The opening direction of the hatch of the sauna stove can be changed by screwing off the four
fastening screws of the frame of the hatch, after that the hatch with frame is turned round and the
fastening screws are screwed on again.
In the course of installation, local legislation must be followed, including any references to local or
European standards.
1.5.1 PRE-HEATING
Before actual use, the sauna stove must be pre-heated. In the course of pre-heating, the protective
paint/oil residues remaining after manufacture are cleared from the stove surfaces. The pre-heating
must be made without the stones. The lateral water tank must not be installed to the stove. The
preheating must be completed outdoors. Install the connection pipe supplied to the chimney
connection on top of the sauna stove and close the other chimney connection apertures by smoke
aperture plugs. The stove should be heated until the surfaces stop giving off burning smell; approx.
two batches of firewood should be enough. If pre-heating is carried out after stove installation to
the sauna, connect the stove to the chimney and ensure sufficient ventilation.
1.5.2INSTALLATION AND CONNECTING TO CHIMNEY
The sauna stove should be installed on a non-combustible base, with consideration of safety distances to
combustible materials.
- If the floor is not made of non-combustible material, protect it by a 6 cm thick concrete slab
or use a bottom plinth suitable for the sauna stove. In addition to this, combustible floor in
front of the firewood hatch must be protected by a spark plate. The spark plate should
extend to the distance of 400 mm from the firewood hatch front surface and 100 mm over
the hatch sides.
- Note! If the floor under the stove is water-insulated, a bottom plinth must also be used.
For sauna stove-specific safety distances, see Table 2. The safety distances can be reduced by
 Loading...