MISSION 776 OPERATING INSTRUCTIONS
(Bracketed numbers refer to panel drawings)
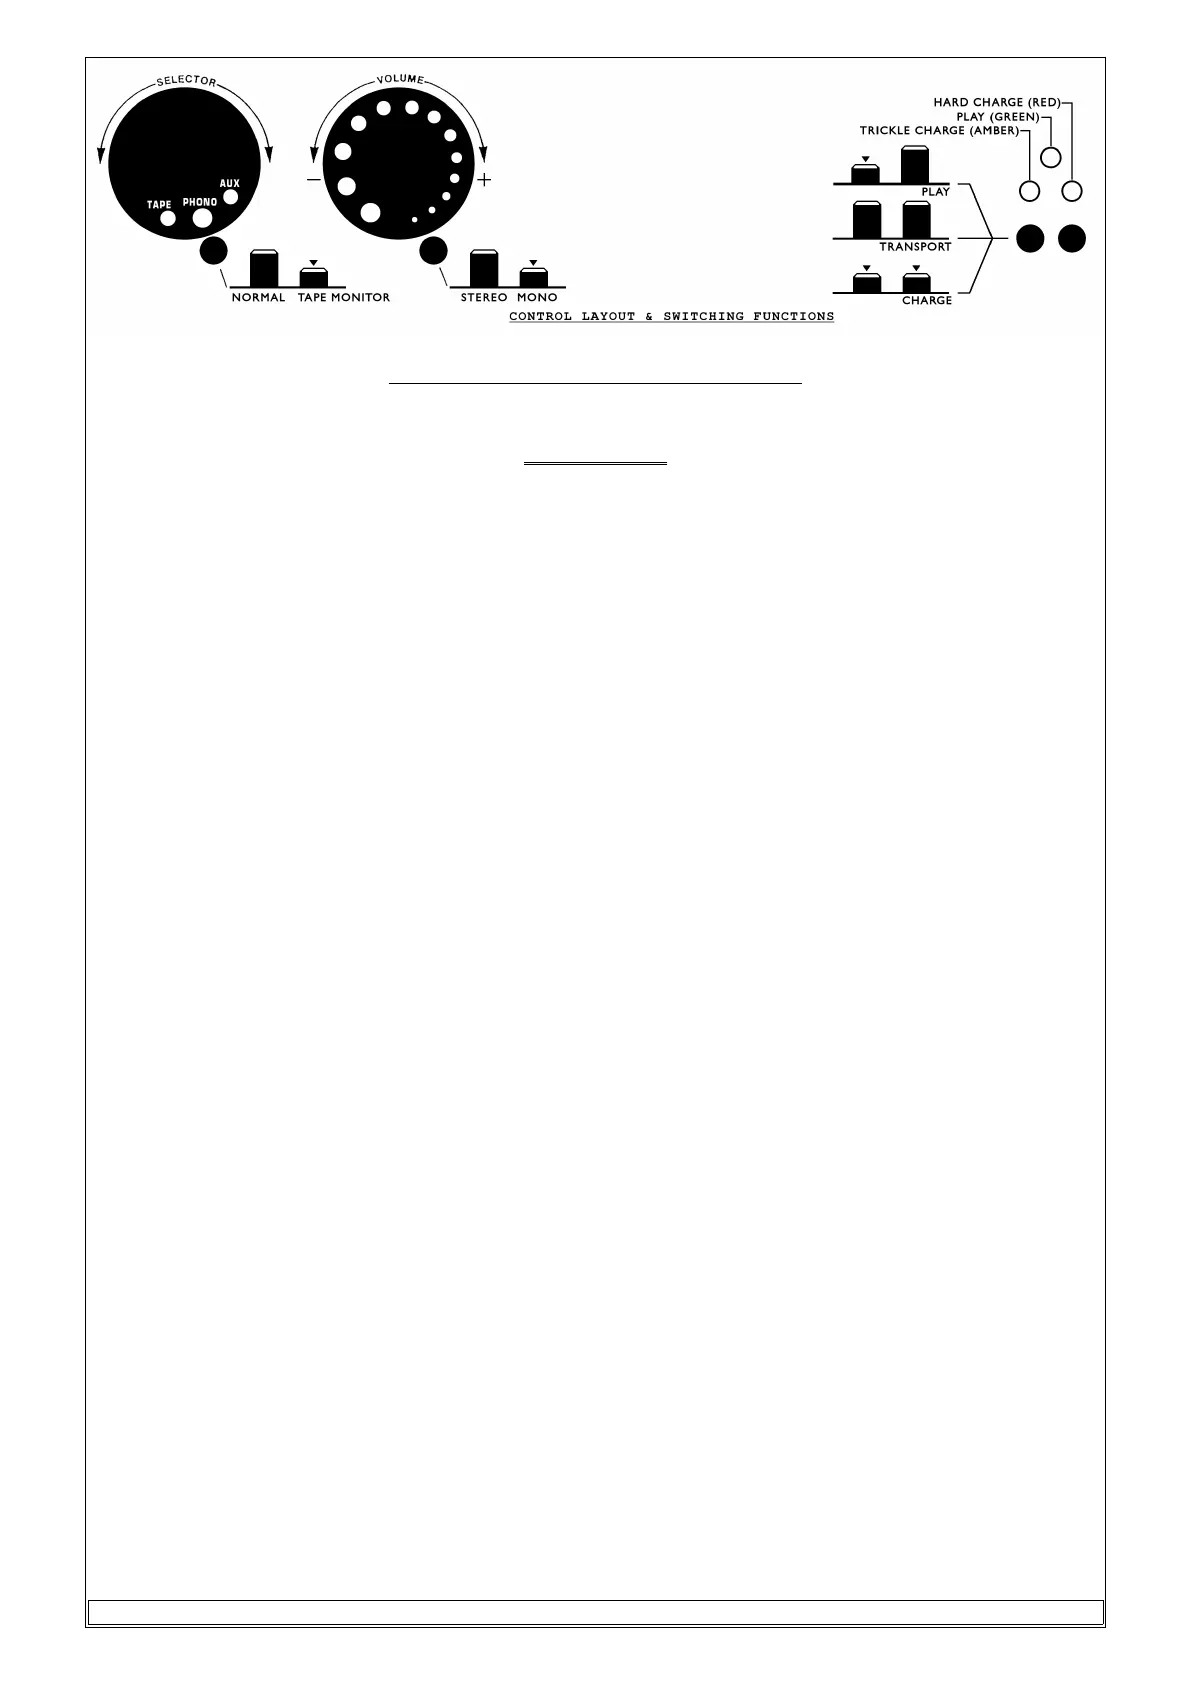
FRONT PANEL
1. ON/OFF SWITCH (5) & (9)
There are two push button switches situated on the right hand side of the front panel, the switch on the
extreme right is designated "S1" (9) & beside it is "S2" (5).
With switch "S1" in the "out" position & "S2" depressed the pre-amplifier is powered from the internal
battery & all A.C. line currents are disconnected. After about 20 seconds the green L.E.D. (7) will light
up indicating the normal operating mode of the amplifier.
When both switches are in the "out" position the amplifier is totally dead & is in its transportation mode.
With switch "S1" depressed (S2 in either position) the pre-amplifier is shut down & the battery is put on
charge.
When this is done the red L.E.D. (8) must always come on to indicate full charging mode. If the battery
requires full charging the red L.E.D. will remain on; otherwise, after a few minutes the yellow L.E.D. (6)
will illuminate indicating trickle charge mode.
The switch over from full charge to trickle charge is done automatically.
In order to avoid the situation of having a discharged battery just when you wanted to use the
amplifier, it is recommended that after normal use the pre-amplifier be switched to charge mode. The
battery can be left on charge for several days & weeks ready to be used. A fully charged battery can
produce optimum performance for as long as 20-30 hours of continuous use,
2. INPUT SELECTOR SWITCH (1)
The input selector switch is located at the extreme left of the front panel. The input selected is indicated by
the lining up of the indentations on the selector switch knob with the push button (2) just under it. The
middle indentation represents phono, left indentation is tape & the right indentation is auxiliary input.
3. VOLUME CONTROL (3)
The volume control is the knob with progressively enlarged indentations which indicate volume setting.
Its alignment is relative to the push button (4) just under it. The volume control adjusts gain from -70db
(small indentation) up to 0dB or full gain (large indentation) in a stepwise fashion.
4, TAPE MONITOR SWITCH (2)
This is the push button under the input selector knob (1). Tape monitor is selected by depressing the
button.
5. MONO/STEREO SWITCH (4)
This push button is located under the volume knob (3). Mono operation is selected by depressing the
button.
3 of 20
 Loading...