24
WT07627X03
4-3-1. Setting IP addresses of AE-50/EW-50
Set the AE-50/EW-50 IP addresses. Settings screens will differ depending on the unit model.
AE-50: AE-50’s LCD or AE-50’s Web Browser for Initial Settings
EW-50: EW-50’s Web Browser for Initial Settings
Note: Set IP address for “LAN1.”
Note: “LAN2” is exclusively used for BACnet
®
function. To use the BACnet
®
function, configure the BACnet
®
settings on the BACnet
®
Setting Tool. Refer to the Instruction Book (BACnet
®
function) for the BACnet
®
function settings.
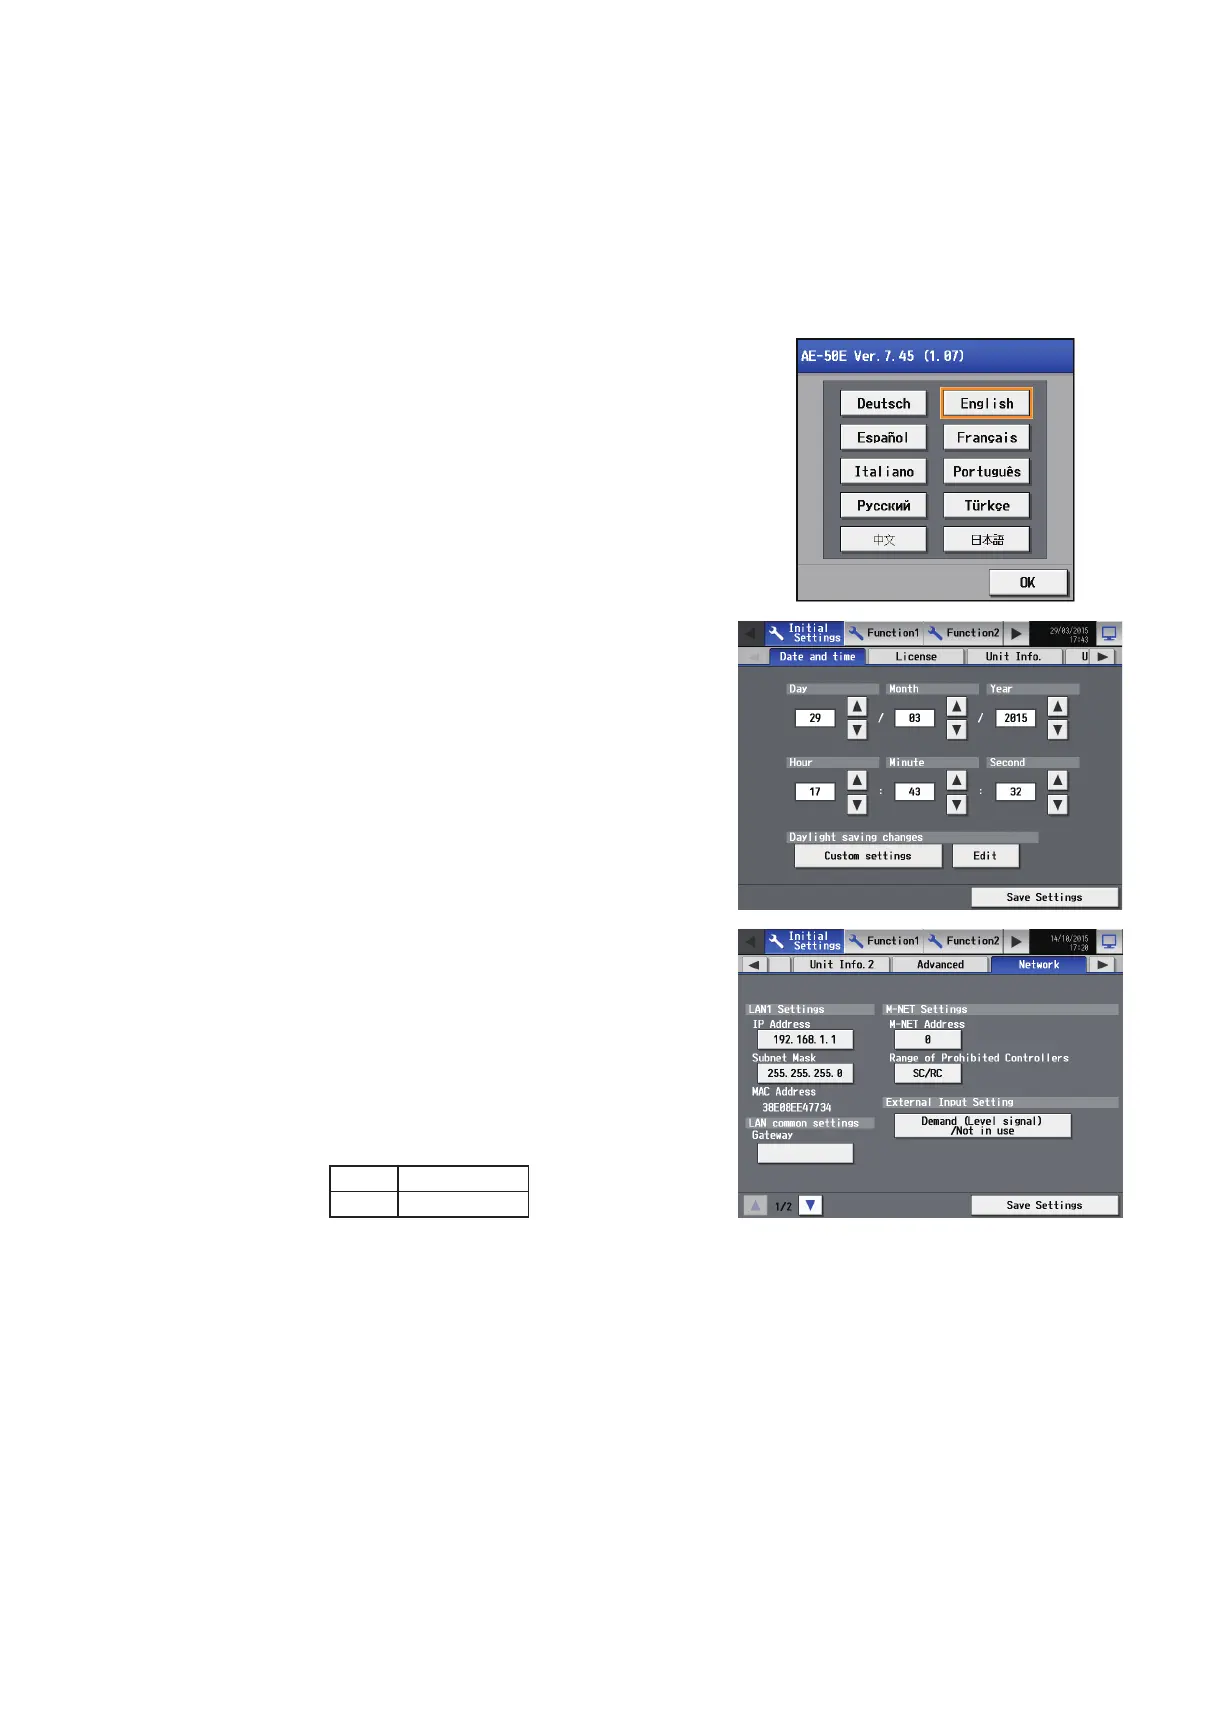
[1] When setting on the AE-50’s LCD
(1) After the power is turned on to the AE-50, a language selection
screen will appear.
Select the language to be used for display, and then touch [OK].
Note: It will take approximately one minute for the display to appear
after the power is turned on.
Note: Once the initial settings have been made, [Monitor/Operation]
screen will appear after the power is turned on.
(2) The [Date and time] screen will appear.
(3) Touch the right triangle button to display the [Network] tab, and
touch it.
Referring to section 5-1-5 “Network”, set the AE-50’s IP
address, and then touch [Save Settings].
The AE-50 will reboot.
Note: When multiple AE-50 controllers are connected, set the IP
addresses on all AE-50.
Note: The AE-200 and AE-50’s IP addresses must have the same
network address.
<Reference: Default IP address>
AE-200 192.168.1.1
AE-50 192.168.1.211
 Loading...