-
70
-
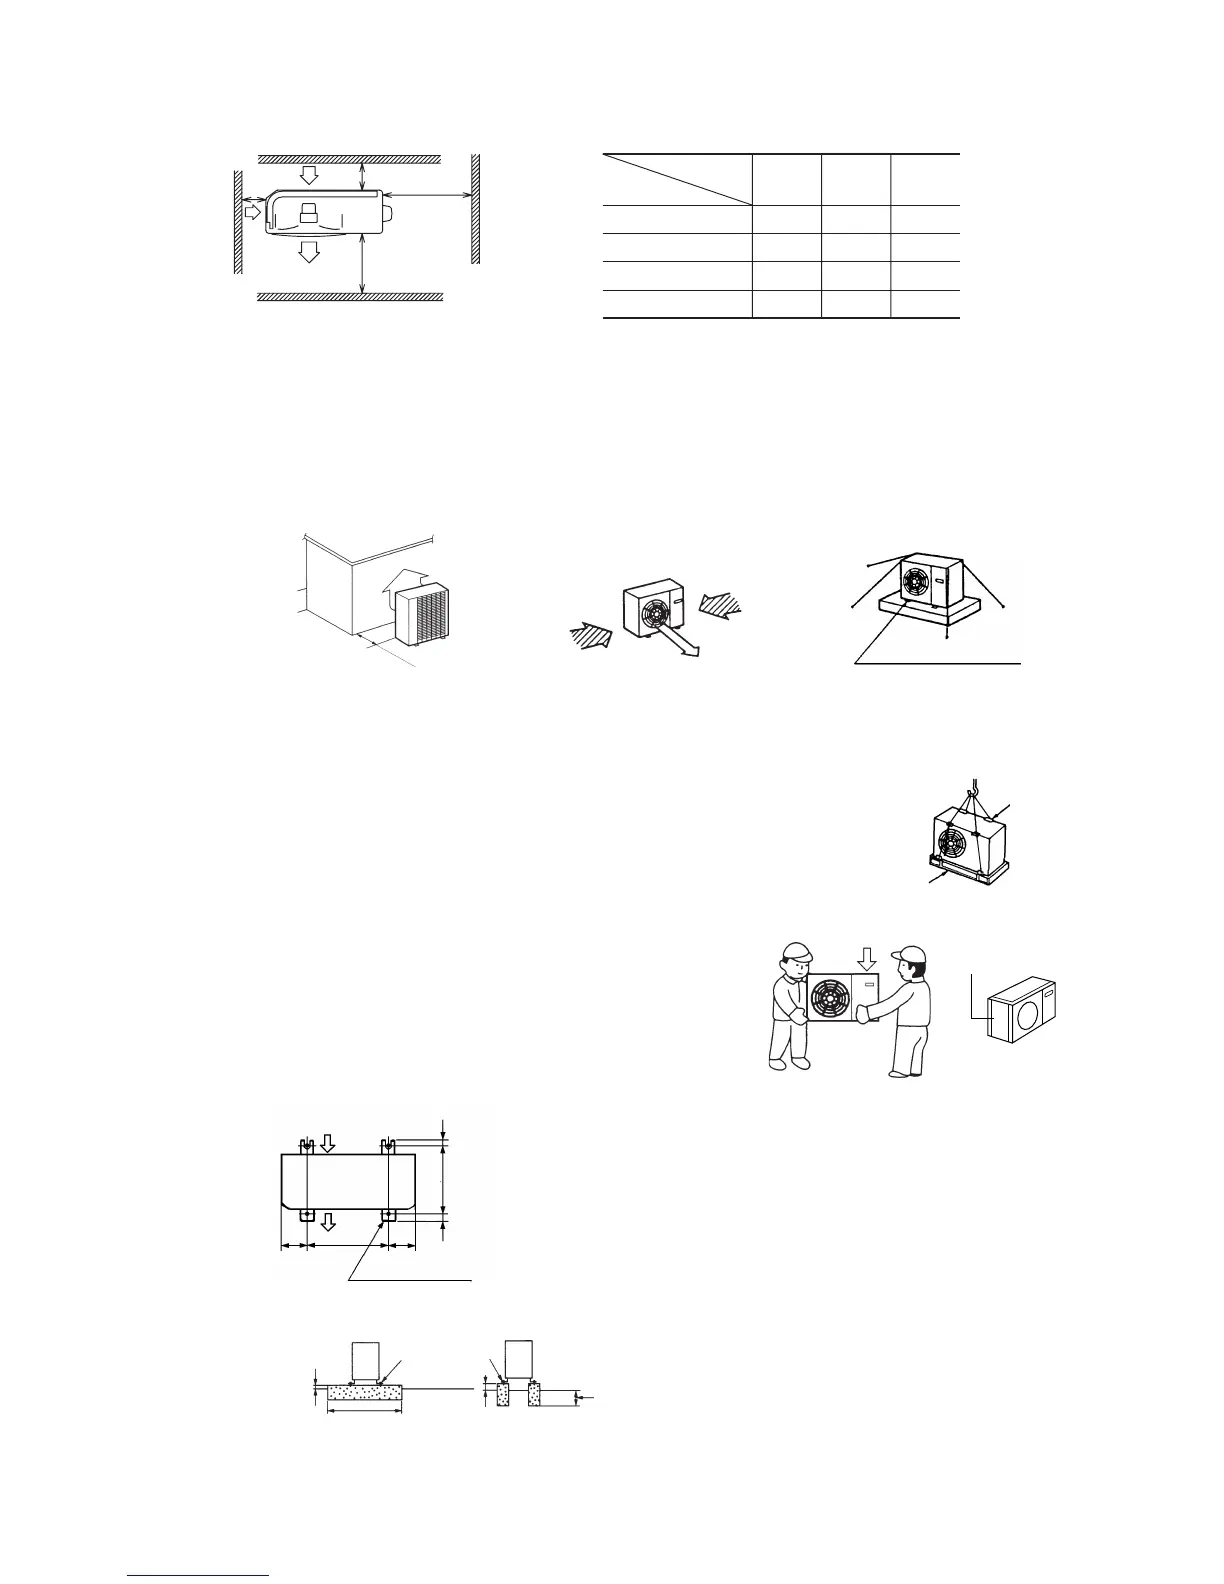
(d) Carry-in and installation of unit
Pay sufficient attention to the carry-in and moving work of the unit, and always execute work by two persons or more.
1) Carry-in
a) When carrying-in the unit, carry it in as packed condition to the installation site as
near as possible.
b) If you are compelled to carry-in the unit unpacked condition, lift the unit by the rope
using a nylon sling or applying protection plates so that the unit is not marred.
a) To install the unit, secure the legs of unit by below mentioned bolts without fail.
Secure with the anchor bolt.
2) Install the unit directing the air out-
let port at a right angle to the wind
direction.
(c) Location where strong wind blows against the unit
● Where the unit is likely to be subjected to strong winds, guard it from winds with the following measures.
A failure to give protection against winds may cause performance degradation, a rise of high pressure resulting is an
operation interruption, a broken fan, etc.
3) Where the foundation is not stable,
secure the unit with wire, etc.
Wind
direction
1) Install the unit directing the air out-
let port to the wall.
500 or more
Wind
direction
Protection plate
Wood base
Heavier on
the right side
2) Moving
a) The unit is heavier on the right side looking from the front of unit
(air outlet port side). Therefore, sufficient caution is required for
the person who carries the right side of unit. The person who car-
ries the left side must hold the handle of front panle and the conner
pillar with both hands.
3) Bolt securing position
Conner
pillar
Bury the foundation deeper
into the ground.
Make the found-
ation wider.
Secure with bolts.
(M10 to 12)
Anchor bolt position
(4 places)
Air inlet
Air outlet
Unit : mm
150 580 150
19
380
19
*
Unit:mm
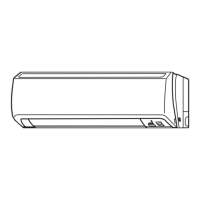
Mark
123
L1 Open Open 500
L2 300 250 Open
L3 100 150 100
L4 250 250 250
Installation
type
L2
L1
L3
L4
Air inlet
Air outlet
Maintenance
space
( )
Air
inlet
*
Ground level (floor level)
Ground level
(floor level)
 Loading...