EasyManuals Logo
Home>Mitsubishi>Air Conditioner>SCM60ZJ-S1

Mitsubishi SCM60ZJ-S1 User Manual

Mitsubishi SCM60ZJ-S1
246 pages
To Next Page IconTo Next Page
To Previous Page IconTo Previous Page
Page #86 background imageLoading...
Page #86 background image
-
85
-
'11 • SCM-SM-110
(iii) FDUM series
• Control PCB
Replace and set up the PCB according to this instruction.
Set to an appropriate address and function using switch on PCB.
 
Select the same setting with the removed PCB.
Set to an appropriate capacity using the model selector switch(SW6).
 
Select the same capacity with the PCB removed from the unit.
Replace the PCB
1. Exchange PCB after detaching all connectors connected with the PCB.
2. Fix the PCB so as not to pitch the wiring.
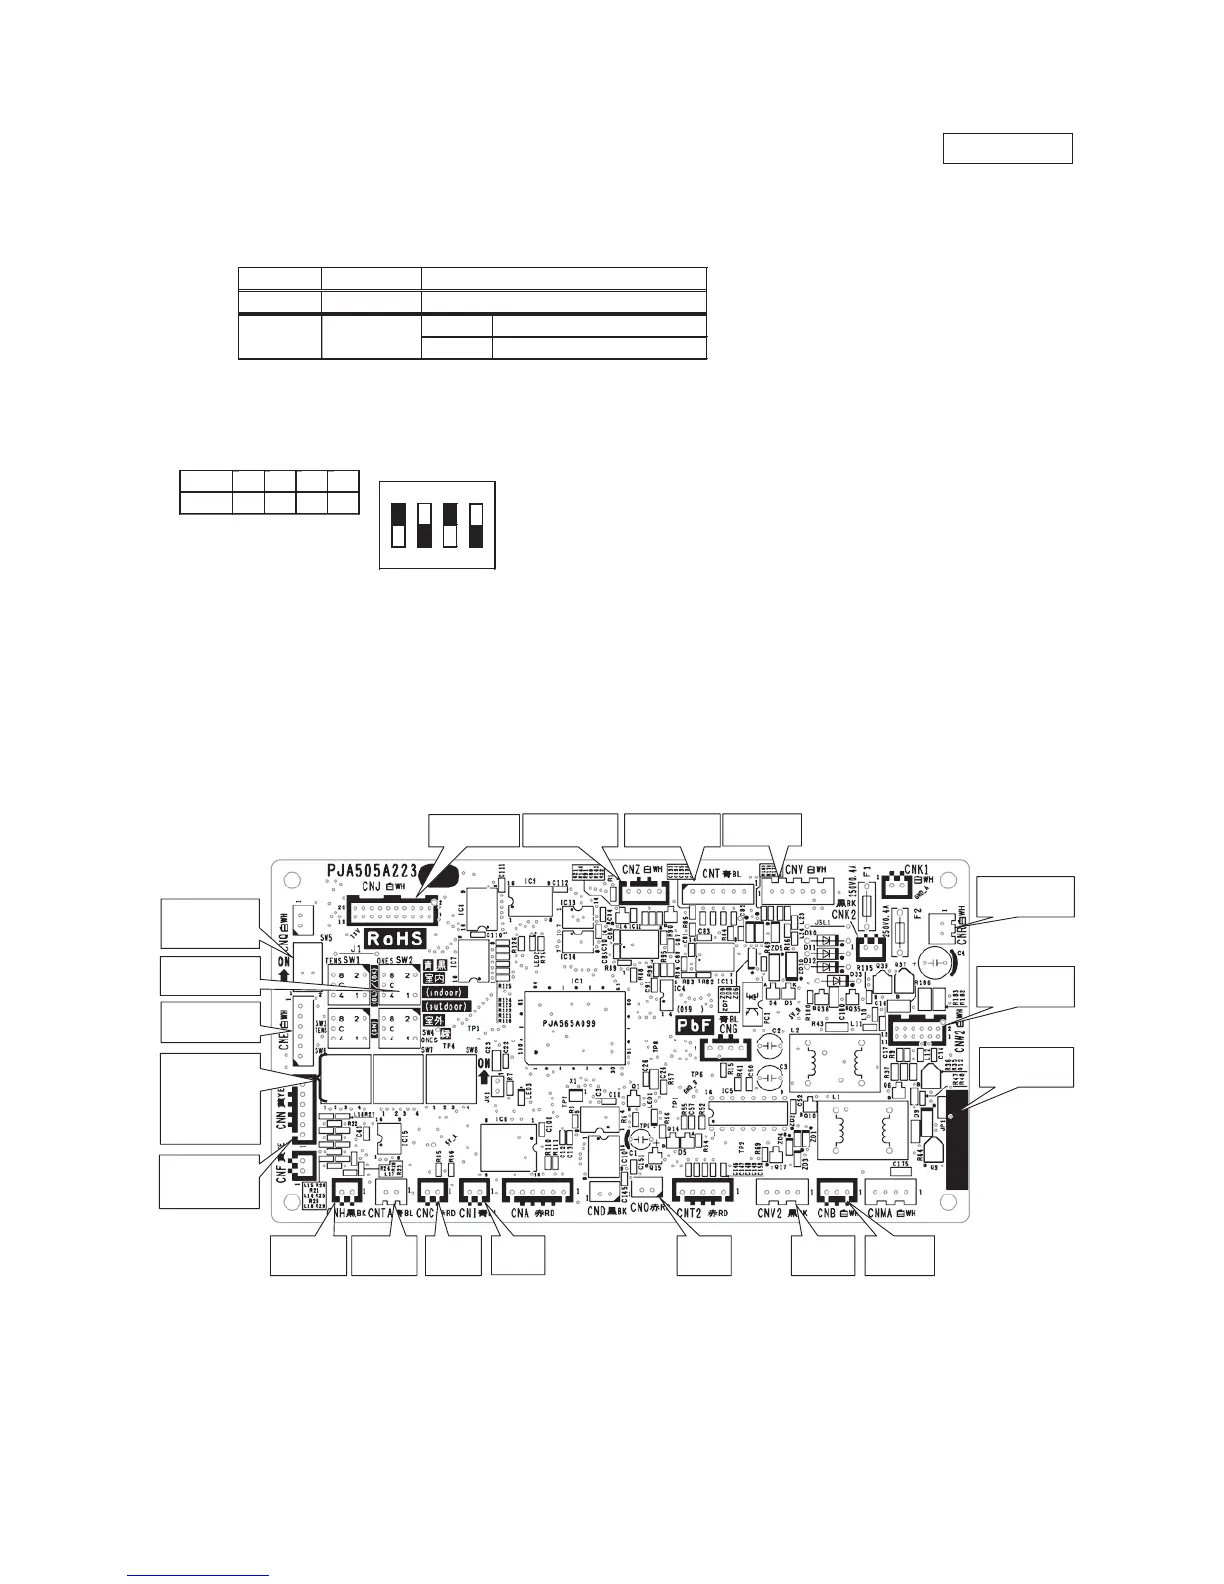
3. Connect connectors to the PCB. Match the wiring connector to the connector color on the PCB and connect it.
Control PCB
Parts mounting are different by the kind of PCB.
〇:ON -:OFF
item
switch
Address
SW2
Content of control
Plural indoor units control by 1 remote controller
Test run
SW7-1
Normal
Operation check/drain motor test run
SW6
ON
1 2 3 4
SW6 -1 -2 -3 -4
50V
Part number
SW5
Master/Slave
setting
SW2(Blue)
Address setting
CNI(Blue)
Float SW
CNH(Black)
Thermistor
(
Return air
)
CNB(White)
Remote
controller
CNC(Red)
Humidity
sensor
CNO(Red)
Heater
output
CNTA(Blue)
External
in
p
ut
CNV2(Black)
Auto clean
panel
CNW2(White)
Power PWB
CNR(White)
Drain motor
CNT(Blue)
External switch
CNJ(White)
Louver moto
r
CNZ(White)
HA
CNV(Red)
Auto lift
CNN(Yellow)
Thermistor
(Heat exchanger)
SW6
Capacity setting
SW7
Function setting
SW8
Function setting
CNE(White)
RAM checker
PSB012D990

Table of Contents

Questions and Answers:

Question and Answer IconNeed help?

Do you have a question about the Mitsubishi SCM60ZJ-S1 and is the answer not in the manual?

Mitsubishi SCM60ZJ-S1 Specifications

General IconGeneral
BrandMitsubishi
ModelSCM60ZJ-S1
CategoryAir Conditioner
LanguageEnglish

Related product manuals