800.732.4565 937.253.7706 Fax: 937.723.7702
sales@monaghantooling.com www.monaghantooling.com
2) Decrease feedrate by 0.001” IPR (0.025 mm/rev) increments.
If the surface starts geng too rough or starts aking, back o
deecon (tool pressure).
NOTE: Aer making adjustments to deecon (tool pressure)
or feedrate, do not burnish over the same area more than two
mes or the material may ake due to too much tool pressure.
Alternate method for tool pressure seng (such as O-ring
grooves, keyways, snap ring grooves or to feed on and o part):
Before this method can be used, the proper deecon (tool
pressure) must rst be determined by the Inial Set Up method
on an area without the interrupons.
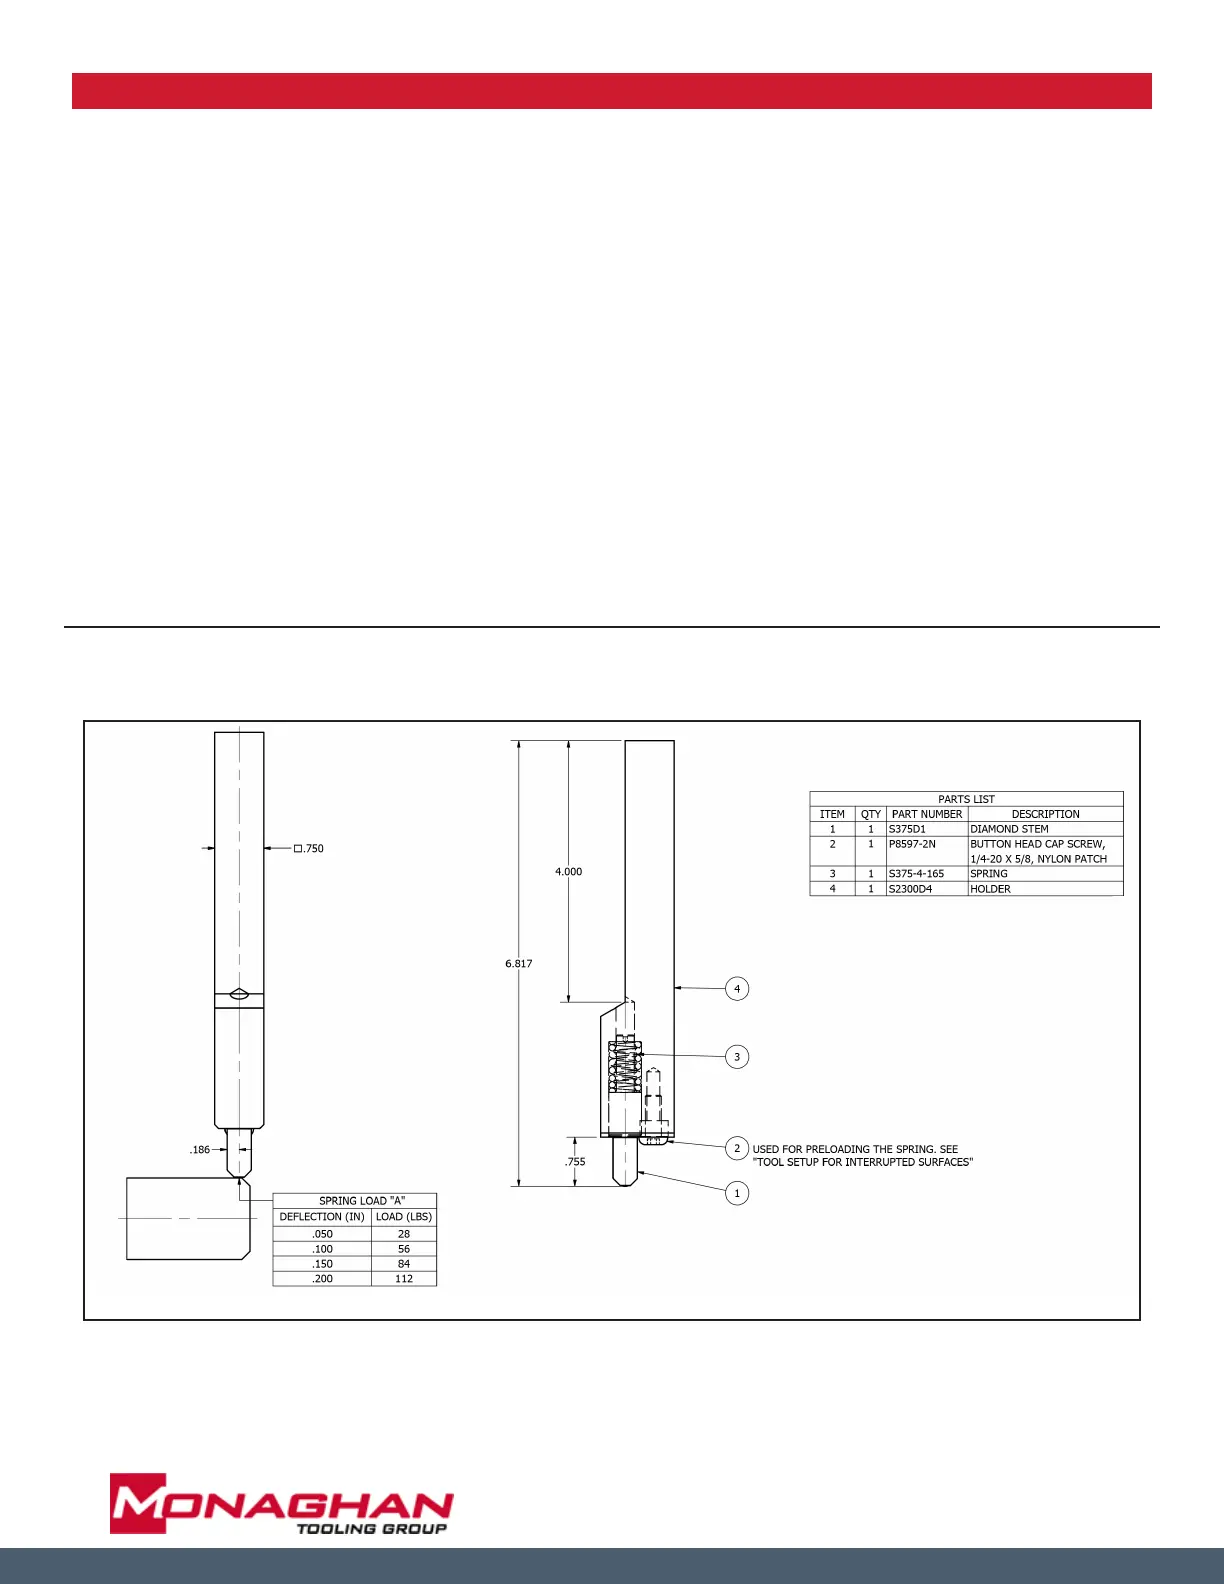
From the factory, the cap screw has been screwed in just far
enough to touch the stem to the spring, eliminang any slack
in the assembly with approximately 5 lbs (2.37 kg) worth of
preload.
Using a 5/32” (0.156”) hex key wrench, turn the cap screw ½
clockwise to advance the screw approximately 0.025” (0.635
mm). Connue to ghten the screw in unl you reach the
amount of deecon you determined in Inial Set Up. Now, use
only approximately 0.002-0.003” (0.051-0.076 mm) worth of
deecon to burnish the part and you will have the same tool
pressure as in the Inial Set Up process.
Face burnishing parts:
Use same the methods outlined above, except turn tool 90
degrees to the face making sure the diamond is on center with
the part.
To replace the diamond stem, remove the cap screw and the
used diamond stem. Insert the new diamond stem and re-adjust
the cap screw to remove any play in the stem. If you used the
preload method, then you will need to adjust the cap screw to
the previous value.
For addional technical support:
11/2017
**PLEASE BE ADVISED THAT THE STEMS (S375D1) ARE NO LONGER ABLE TO BE MODIFIED IN ANY WAY**
 Loading...