Do you have a question about the Mondraker GROMMY 12 and is the answer not in the manual?
Adult supervision is essential for safe riding, proper use, and following manual recommendations to prevent injury.
Grommy is not for children under 3. Children must show coordination and skill; adults are liable for injuries from misuse.
Grommy is for riders under 40 kg. Heavier riders risk damage or overheating; misuse voids warranty.
Regular maintenance is needed for proper working. Tighten bolts, keep clean, and lubricate the chain.
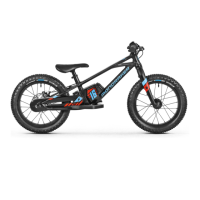
Unpack carefully. For 16" version, assemble front wheel by sliding axle into dropouts and tightening nuts to 20-25 Nm.
Handlebar is factory set. Adjust alignment to center of stem and perpendicular to front wheel using stem bolts.
Ensure child can touch the ground with both feet for correct seat height.
Insert fully charged battery into frame socket, ensuring it is fully seated.
Press and hold left handlebar button for 5s to power on. Display shows modes, then last selected mode.
Select speed mode suited to rider's skills. Speed chart details modes: Balance, Fun, Advanced.
Press and hold the left button for 3s to power off. Display shows 'E9'.
| Chainring | 28T |
|---|---|
| Wheel Size | 12" |
| Frame | 6061 Alloy |
| Headset | 1-1/8" |
| Stem | 30mm |
| Grips | GROMMY custom |
| Rims | Alloy |
| Brakes | Tektro Alloy |
| Saddle | Mondraker |
| Seatpost | Alloy, 27.2mm |
| Gearing | Single Speed |
| Color Options | Black, Red |