4
14. Ensure that the rubber gasket is in place behind the cover plate,
place it over the enclosure and secure it in place with the screws
provided.
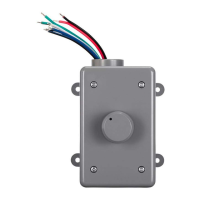
15. Place the volume knob onto the volume control post.
16. Repeat steps 4-15 for each additional speaker pair, enclosure, and
volume control.
17. Ensure that the amplifier is powered off and unplugged from the power source.
18. At the amplifier, use a terminal block or wire nut to connect all the left-channel
negative (-) wires and a short length of speaker wire together.
19. Connect the negative lead on the short length of speaker wire to the left-channel
negative (-) terminal on the amplifier.
20. Repeat steps 18-19 for the left-channel positive (+) lead.
21. Repeat steps 18-20 for the right-channel negative (-) and positive (+) leads. The
image below illustrates a proper connection for two volume controls.
 Loading...