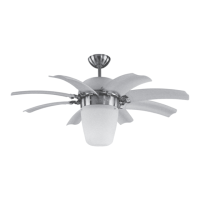
Do you have a question about the Monte Carlo Fan Company 8ATR44XXD-L Series and is the answer not in the manual?
| Brand | Monte Carlo Fan Company |
|---|---|
| Model | 8ATR44XXD-L Series |
| Category | Fan |
| Language | English |
Follow all instructions, use qualified personnel, and adhere to wiring best practices.
Ensure power is off, avoid shock, and use only approved controls to prevent fire hazards.
Mount securely to approved boxes, maintain blade clearance, and install safety cables as required.
Avoid installation over tubs/showers and consider combustion airflow for fuel-burning equipment.
Switch off power at the service panel and lock the disconnecting means.
Ensure proper outlet box installation and use provided screws for the mounting bracket.
Thread wires and safety cable through the downrod and secure it to the motor yoke.
Install the upper glass over the downrod and attach the canopy to the hanger bracket.
Install the safety cable through the mounting bracket into structure beams.
Set dip switches on the transmitter and receiver to the same settings for communication.
Make wire connections according to diagram, connecting fan, house, and ground wires.
Install the halogen bulb, avoid touching the surface, and be aware of over-lamping.
Install the glass to the fan using the provided ball screws.
Attach blade assemblies to arms from the motor housing using screws and washers.
Install the battery, attach the remote cover, and mount the wall control unit to the outlet box.
Depress dots for low, medium, or high fan speed; press square to turn off.
Press once to turn on/off, hold to dim light from bright to dim or vice-versa.
Press the reverse button to change fan rotation direction while running.
Check fuses/breakers, wire connections, and transmitter/receiver dip switches.
Check screws, wire nuts, avoid solid-state controls, and allow a break-in period.
Ensure canopy, blades, and holders are secure; use dynamic balancing for correction.
Check wiring, bulbs, and reset the lights; replace with correct wattage bulbs.
 Loading...