ASSEMBLY & INSTALLATION
3
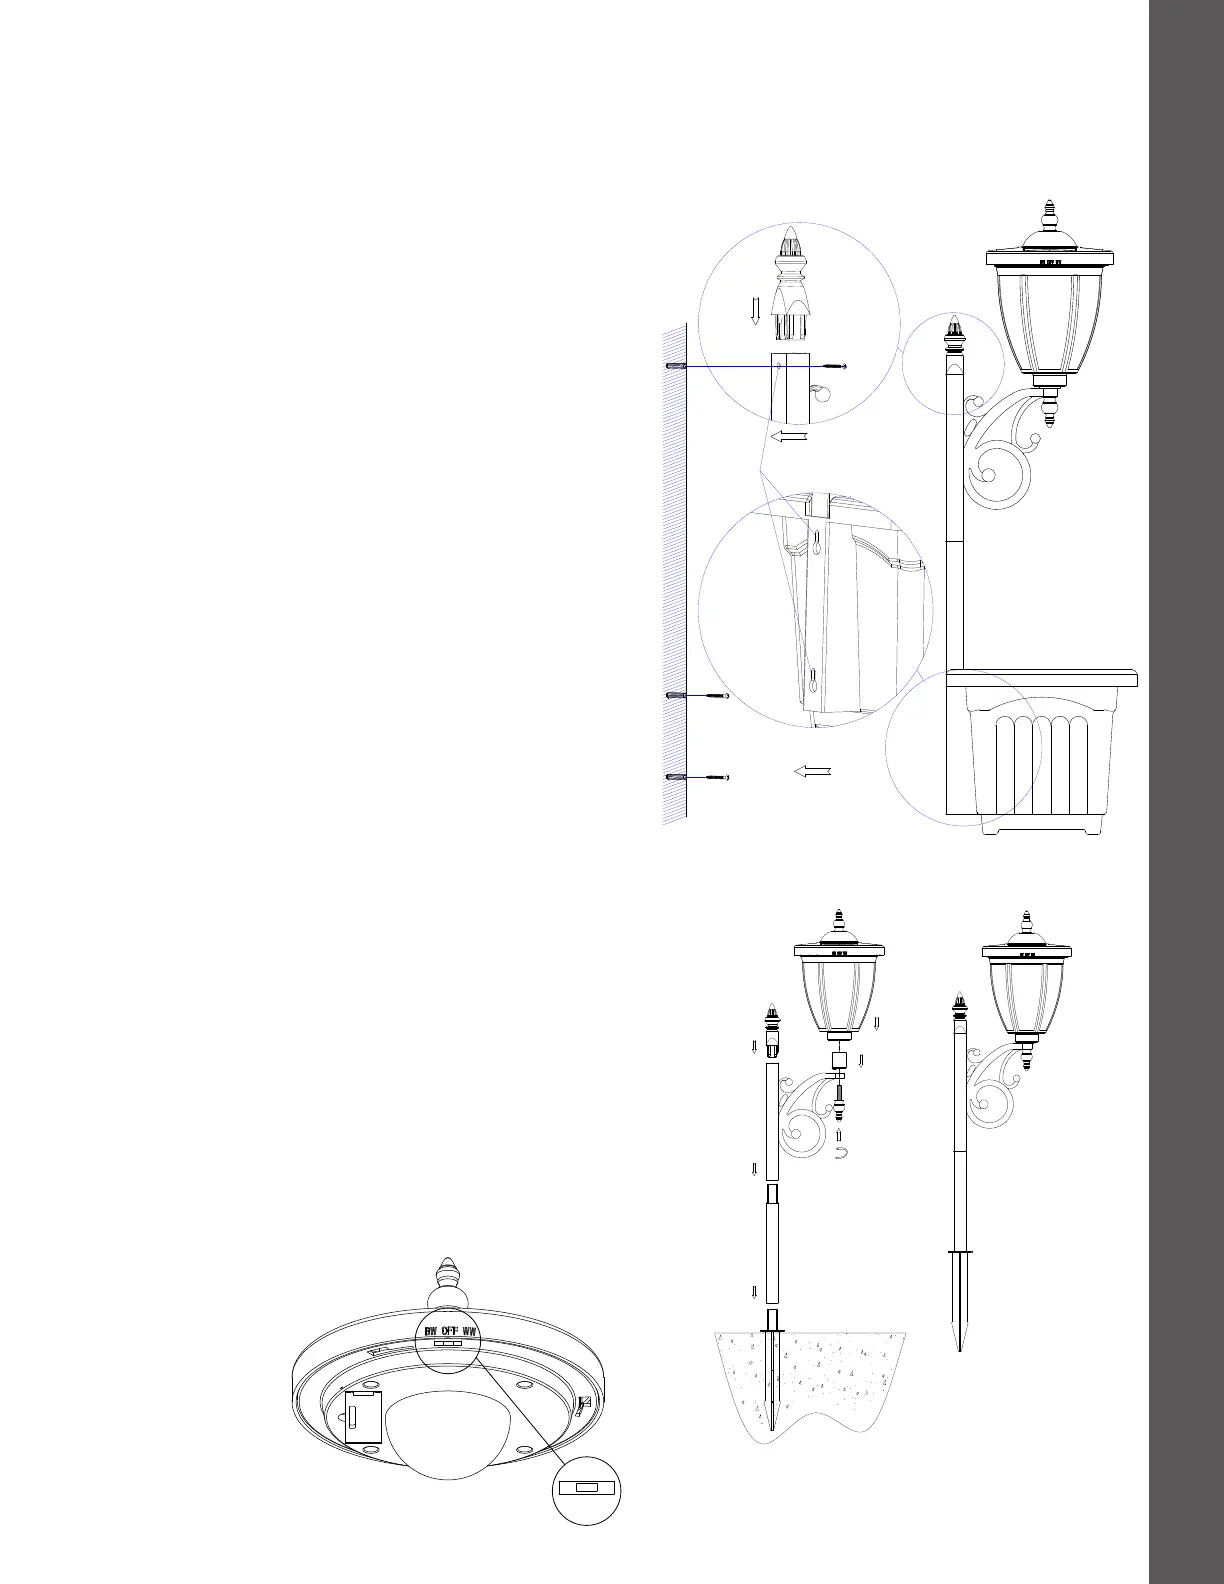
Operation (Figure 5)
Fully charge the battery before first use. Allow the unit to fully
charge in direct sunlight for up to 2 days in the OFF position. Move
the switch to BW (for bright white light) or WW (for warm white
light). Once fully charged, your solar light will automatically turn on
once it gets dark.
BW/OFF/WW
Alternate Ground Mounting (Figure 4)
Step 1: Select the ground area where you wish to locate the solar
lamp post and planter, and insert the Ground Stake (G), leaving
the small section at the top of the ground stake exposed above
ground. CAUTION: Never push the fixture into the ground
by pressing down on any of the components from above.
In compacted, clay, or hard soils, moisten the ground
with water before inserting the Ground Stake (G) into the
ground to avoid breakage. Do not force the Ground Stake
(G) into the ground. Use an item such as a screwdriver to
create a pilot hole in the ground first before installing the
Ground Stake (G).
Step 2: Once the Ground Stake (G) is firmly in the ground, insert
the base of the Extension Post (F) over the top of the Ground
Stake (G) until secure.
Step 3: Insert the base of the Top Finial (D) into the top of the
Decorative Post (C) until secure.
Step 4: Line up the Lantern Adapter (B) above the top of the
scrolled arm of the Decorative Post (C). From below, secure the
Lantern Adapter (B) to the Decorative Post (C) by tightening the
Bottom Finial (E) in a clockwise direction until secure.
Step 5: Place the Lamp Head (A) over the Lantern Adapter (B).
Carefully press down until secure.
Planter Base Assembly (Wall Mounted)
Figure 3.
NOTE: To provide additional stability for the solar lamp
post and planter, follow the steps below for wall mounting
the unit.
Step 1: Measure and mark with a pencil on your wall or post in 3
locations where you will need to pre-drill for Screws (I), and for
Wall Anchors (J) if required.
Step 2: Secure Screws (I) to the wall in 2 locations, leaving the
screws out enough to attach the Planter Base (H). Line up the
heads of the 2 Screws (I) with the corresponding holes on the
back of the Planter Base (H). Carefully press down from the top of
the Planter Base (H) until secure.
Step 3: Temporarily remove the Top Finial (D). Secure the 3rd
Screw (I) through the hole towards the top of the Decorative Post
(C) and into the wall or post. Replace the Top Finial (D) back onto
the Decorative Post (C).
figure 3
figure 5
figure 4
 Loading...