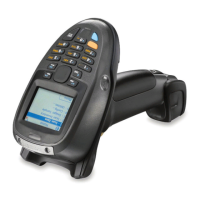
1 - 14 MT2070/MT2090 User Guide
Battery Charging
Charge the device using a cradle or host interface cable, or remove and charge the Li-ion battery using a spare
battery charger.
Before using the device for the first time, fully charge the Li-ion battery until the green LED on the device goes off
(default). The battery fully charges in less than four hours, when the device is placed in a cradle with a 12V supply
connected.
This device does not have a backup battery. Any data in RAM is lost when the battery is removed. However, the
real-time clock is maintained for a period of 20 minutes during a battery change.
Use the following accessories to charge the Li-ion battery:
•
Cradles:
• Single Slot USB Charge Only Cradle - with power supply for fast charging
• Single Slot Multi-interface Bluetooth Cradle - with power supply; powered from host (slow charge)
• Four Slot Charge Only Cradle - with power supply
• Four Slot Ethernet Cradle - with power supply.
•
Spare Battery Charger:
• Four Slot Battery Charger - with power supply.
•
Cables (and a power supply):
• USB Client Charge Cable
• RS-232 Serial Cable - with power supply.
Use a cradle or a charge cable to charge the Li-ion battery in the device. Use either the four slot cradle or four slot
battery charger to charge up to four spare batteries. The charge cable requires a Motorola approved power supply.
•
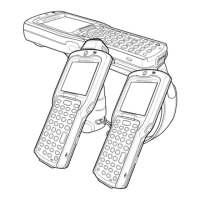
Cradles
Insert the device into a cradle. See Chapter 13, Accessories for accessory setup. The device starts to charge
automatically. The charge LED on the device flashes during charging and goes off when the battery is fully
charged (default). See Table 13-2 for charging indications.
•
Cables
Connect a charge cable to the appropriate power source and connect the other end of the charge cable to
the device. See Chapter 13, Accessories for accessory setup. The device starts to charge automatically. The
charge LED on the device flashes during charging and goes off when the battery is fully charged (default).
See Table 13-2 for charging indications.
See Table 3-2 on page 3-3 for detailed scanning LED descriptions.
IMPORTANT 1) If the host PC is powered off, for example every night, the device continues to operate from its
battery until the battery is totally drained. Upon restart of the host PC, the device may not boot. The
battery has to charge at a reduced charge rate until the battery acquires sufficient charge to boot the
device. This can take up to two hours, depending on the level of discharge.
2) To prevent irreversible harm to battery do not store the device with the battery installed for
extended periods of time. For maximizing battery life, see Battery on page 15-2.
NOTE The default state of the LED is off when the battery is fully charged with the exception of several initial
charge cycles. The LED may continually blink until the battery goes through several discharge cycles to
calibrate itself.
 Loading...