4 - 6 WT4090 Wearable Terminal User Guide
2. Dip the cotton portion of the cotton tipped applicator in isopropyl alcohol.
3. Rub the cotton portion of the cotton tipped applicator along the pins of the connector. Slowly move the
applicator back-and-forth from one side of the connector to the other. Do not let any cotton residue on the
connector.
4. All sides of the connector should also be rubbed with the cotton tipped applicator.
5. Spray compressed air in the connector area by pointing the tube/nozzle about ½ inch away from the surface.
6. Ensure that there is no lint left by the cotton tipped applicator, remove lint if found.
7. If grease and other dirt can be found on other areas of the cradle, use lint free cloth and alcohol to remove.
Cleaning Frequency
The cleaning frequency is up to the customer’s discretion due to the varied environments in which the mobile
devices are used. They may be cleaned as frequently as required. However when used in dirty environments it
may be advisable to periodically clean the ring scanners’ exit windows to ensure optimum scanning performance.
Troubleshooting
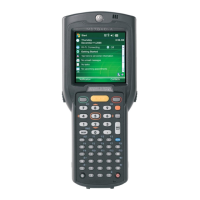
Wearable Terminal
CAUTION Do not point nozzle at yourself and others, ensure the nozzle or tube is away from your face.
CAUTION Allow at least 10 to 30 minutes (depending on ambient temperature and humidity) for the alcohol to air dry
before applying power to cradle.
If the temperature is low and humidity is high, longer drying time is required. Warm temperature and dry
humidity requires less drying time.
Table 4-1
Troubleshooting the Wearable Terminal
Problem Cause Solution
Wearable terminal
does not turn on.
Lithium-ion battery
not charged.
Charge or replace the lithium-ion battery in the
wearable terminal
.
Lithium-ion battery
not installed
properly.
Ensure battery is installed properly. See
Installing and Removing
the Main Battery on page 1-7
.
System crash. Perform a warm boot. If the
wearable terminal
still does not turn on,
perform a cold boot. See
Resetting the Wearable Terminal on page
2-17
.

 Loading...