03
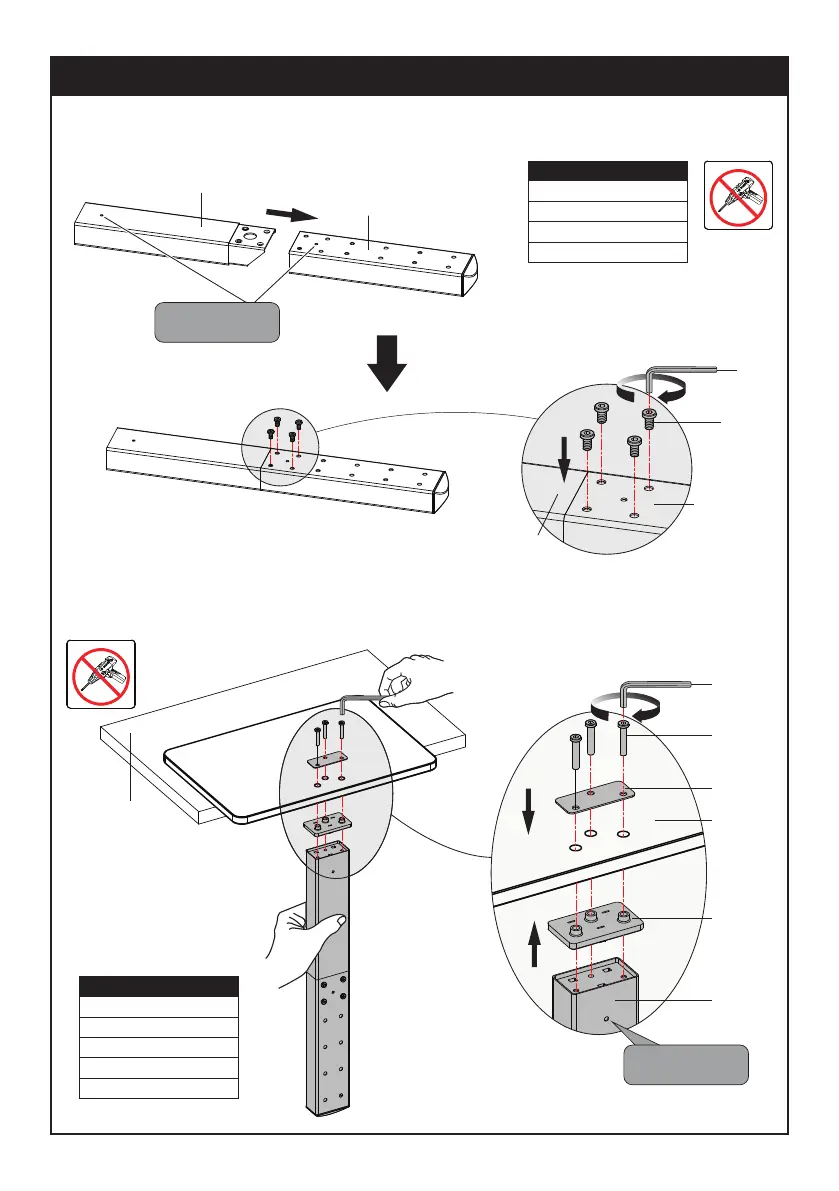
STEP 1: Support Pillar Installation
Step 1-1: Connecting two Support Pillar (
②&③
). Insert 4pcs Screws (E) through the holes of Support
Pillar (
②&③
), use the 4mm Allen Key (J1) to tighten them.
Step 1-2: Put Base (
①
) on the table, put washer (B) and M6×30mm bolts (A) on the base, put Plastic Cover
(F) and Support Pillar (
③
) under the base, then tighten the bolts (A) with the 4mm allen key (J1).
③
②
E
②
③
J1
Note: Clip holes
in the same side.
Checklist
②
(x1) Support Pillar
③
(x1) Support Pillar
E (x4) Bolt M6×10mm
J1 (x1) 4mm Allen Key
Checklist
①
(x1) Base
A (x3) Bolt M6×30mm
B (x1) Washer
F (x1) Plastic Cover
J1 (x1) 4mm Allen Key
No!
No!
A
B
①
F
③
J1
Note: Clip holes
toward backside.
Table