9
Assembly
WARNING: Stop the engine and unplug the spark plug
before any repairs or maintenance operations.
It is necessary to fit the lower handle (2), handle bar (1),
and catcher (5) to the mower.
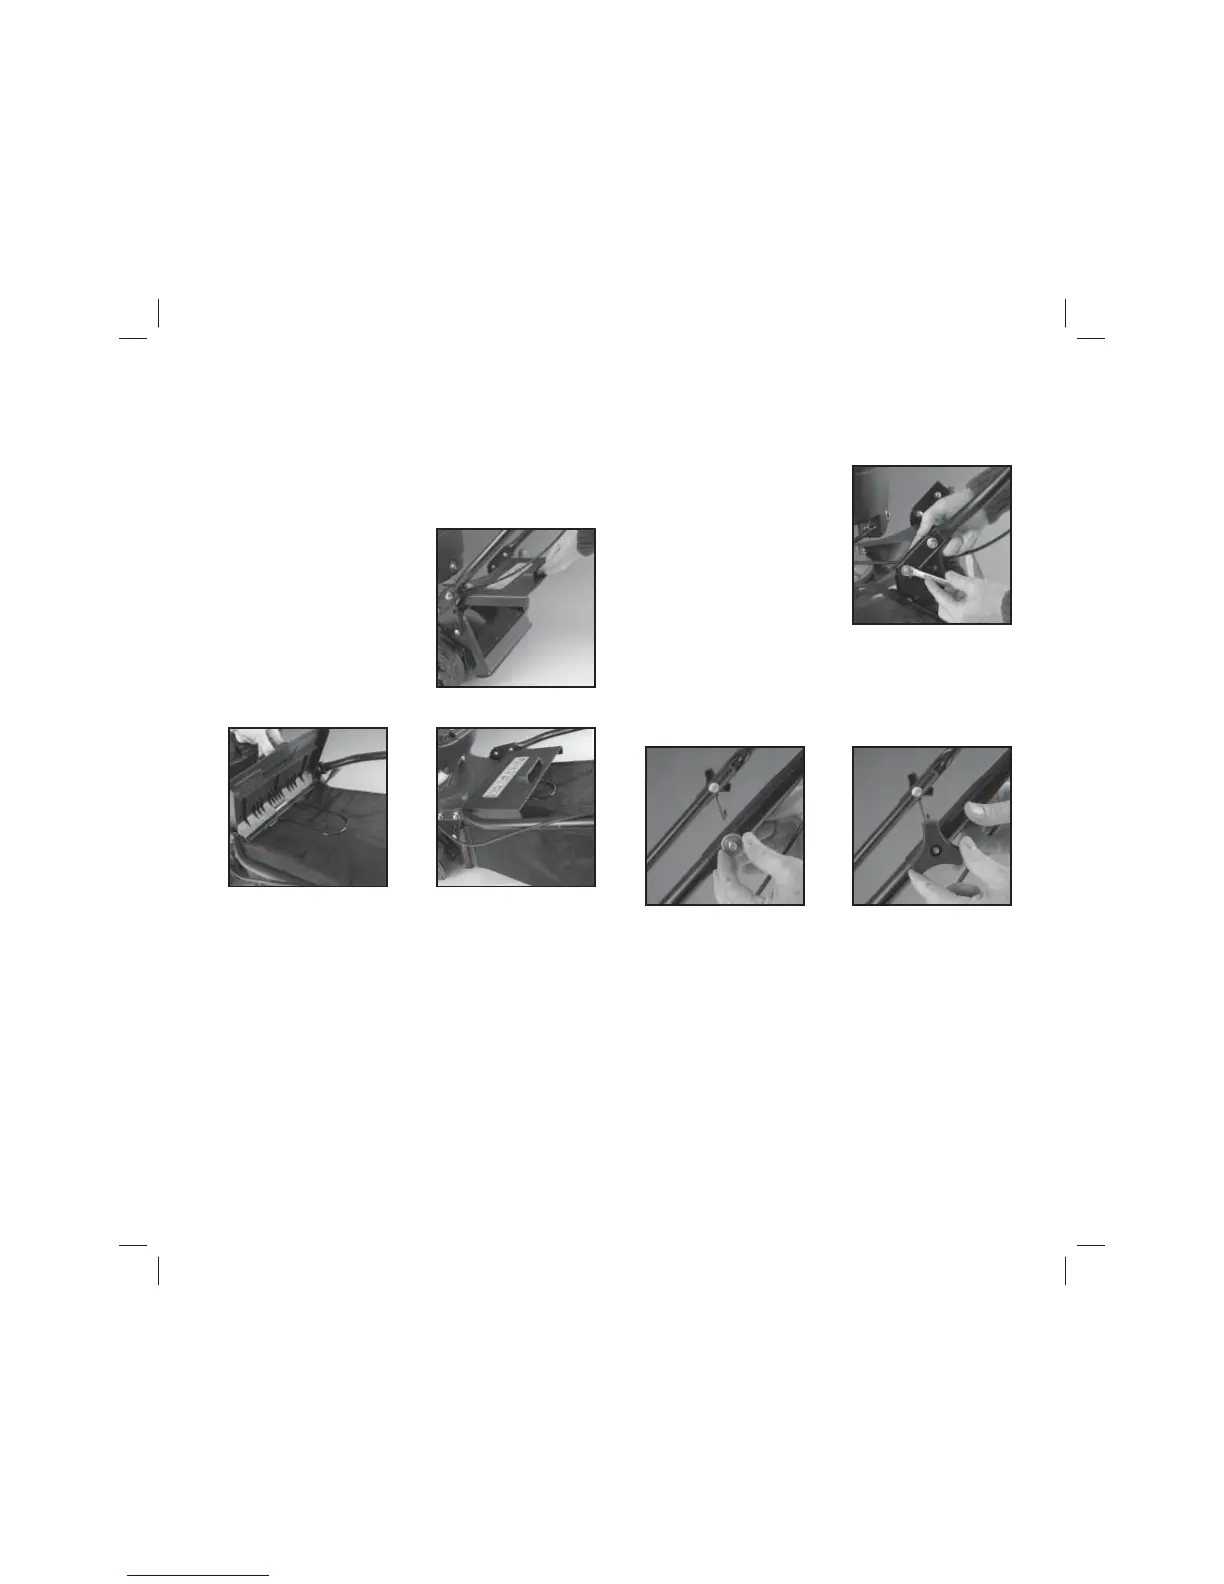
Attaching the catcher
1. Lift the discharge guard (15) in
order to position the catcher.
2. While lifting the discharge
guard, align the holes in the
lower half of the catcher with
the hooks on the mower deck
(located under the discharge
chute). Push the catcher onto
the hooks in a downwards direction.
3. Push the catcher down until it locks into place.
4. Release the discharge guard to secure the catcher in
place between the 2 ribbed locking notches.
Note. Always empty the catcher before it has reached
maximum capacity, otherwise it will decrease the
performance of the mower.
Tip. Do not leave clippings in the catcher for extended
periods.
Attaching the handles
It is necessary to attach both the lower handle
and handle bars.
1. To attach the lower handle
(2), first use a spanner (not
supplied) to remove the
4 bolts.
2. Place the lower handle in
position and replace the
4 bolts. Use a spanner to
retighten the nuts.
3. To attach the handle bar (1), first remove the two handle
bar locking knobs (12).
4. Position the handle bar over the lower handle and insert
the two locking knobs. Tighten to secure the handles
together and in place.