ADVANCED INSTRUCTIONS
These instructions are intended for experienced users or for charging rechargeable AA-size
cells.
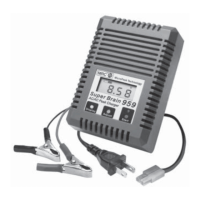
1. Connect the charger to a power source (120V AC or 12V DC).
2. Attach the battery to the charger. The battery’s voltage will appear on the screen.
3. The charger has a default charge rate of 3.0 Amps. Press the start button to begin
charging if this is the intended setting. The charge current rate can be changed by pressing
the “Display” button to select the Amp display, and then pressing the “Adjust” button
to select the Amps setting.
WARNING: Consult battery manufacturer’s instructions before adjusting charger
settings.
4. The charger has the ability to select the optimum delta peak voltage threshold for each
battery. Experienced users may wish to set the delta peak voltage threshold. Press the
“Display” button until “mV” appears at the top of the screen, then press the “Adjust”
button to select the voltage level
NOTE: Once the Delta Peak threshold is set manually, the charger will use this setting
even if it is not an appropriate setting for the battery. We recommend most customers
allow the charger to select the delta peak voltage threshold.
5. Press the “Start” button to begin charging.
6. The first 30~60 seconds is the battery diagnostic period. The unit will not accept new
commands during this diagnostic period.
7. The charge rate, charge time, voltage and delta peak voltage threshold can be viewed by
pressing the “Display” button. Data is displayed for 10 seconds and then it defaults to
the battery status and battery voltage.
8. Charging can be stopped at any time during the charge cycle by pressing the “Start”
button.
9. When the fast charge cycle is complete, the unit will beep three times and automatically
begin a 50-minute 0.1 Amp trickle charge cycle. During the trickle charge cycle the red
light will blink (with very short on time and long off time). After the trickle cycle, the
charger will automatically go into sleep mode.
10. Under normal ambient conditions, this charger stays cool and can continue to charge 3 to
4 batteries consecutively. After several consecutive charges, the protection circuit may
activate to prevent the unit being damaged. When this happens, disconnect the charger
from the power source and allow the charger to cool down. Please do not continue use if
the unit becomes excessively hot.
11. The LCD screen will become unclear if the unit is excessively hot. Please stop using the
charger if the LCD screen becomes unclear and allow the unit to cool.
NOTE: Ambient temperature will affect the charger’s heat level.
12. “Err” displayed at any time indicates an error has occurred.
Example: If the charger is not correctly connected, “Err” message may appear.
CHARGING 8 CELLS WITH A CAR BATTERY
If you use a 12V car battery to charge an 8-cell battery pack, you will not be able to receive
high current charging even you select a high current charge. It may take a longer time to charge
an 8-cell battery pack with a DC 12v power supply or 12v battery.
 Loading...