Page 20mrcool.com
Outdoor Unit Installation
SPECIAL CONSIDERATIONS FOR
EXTREME WEATHER
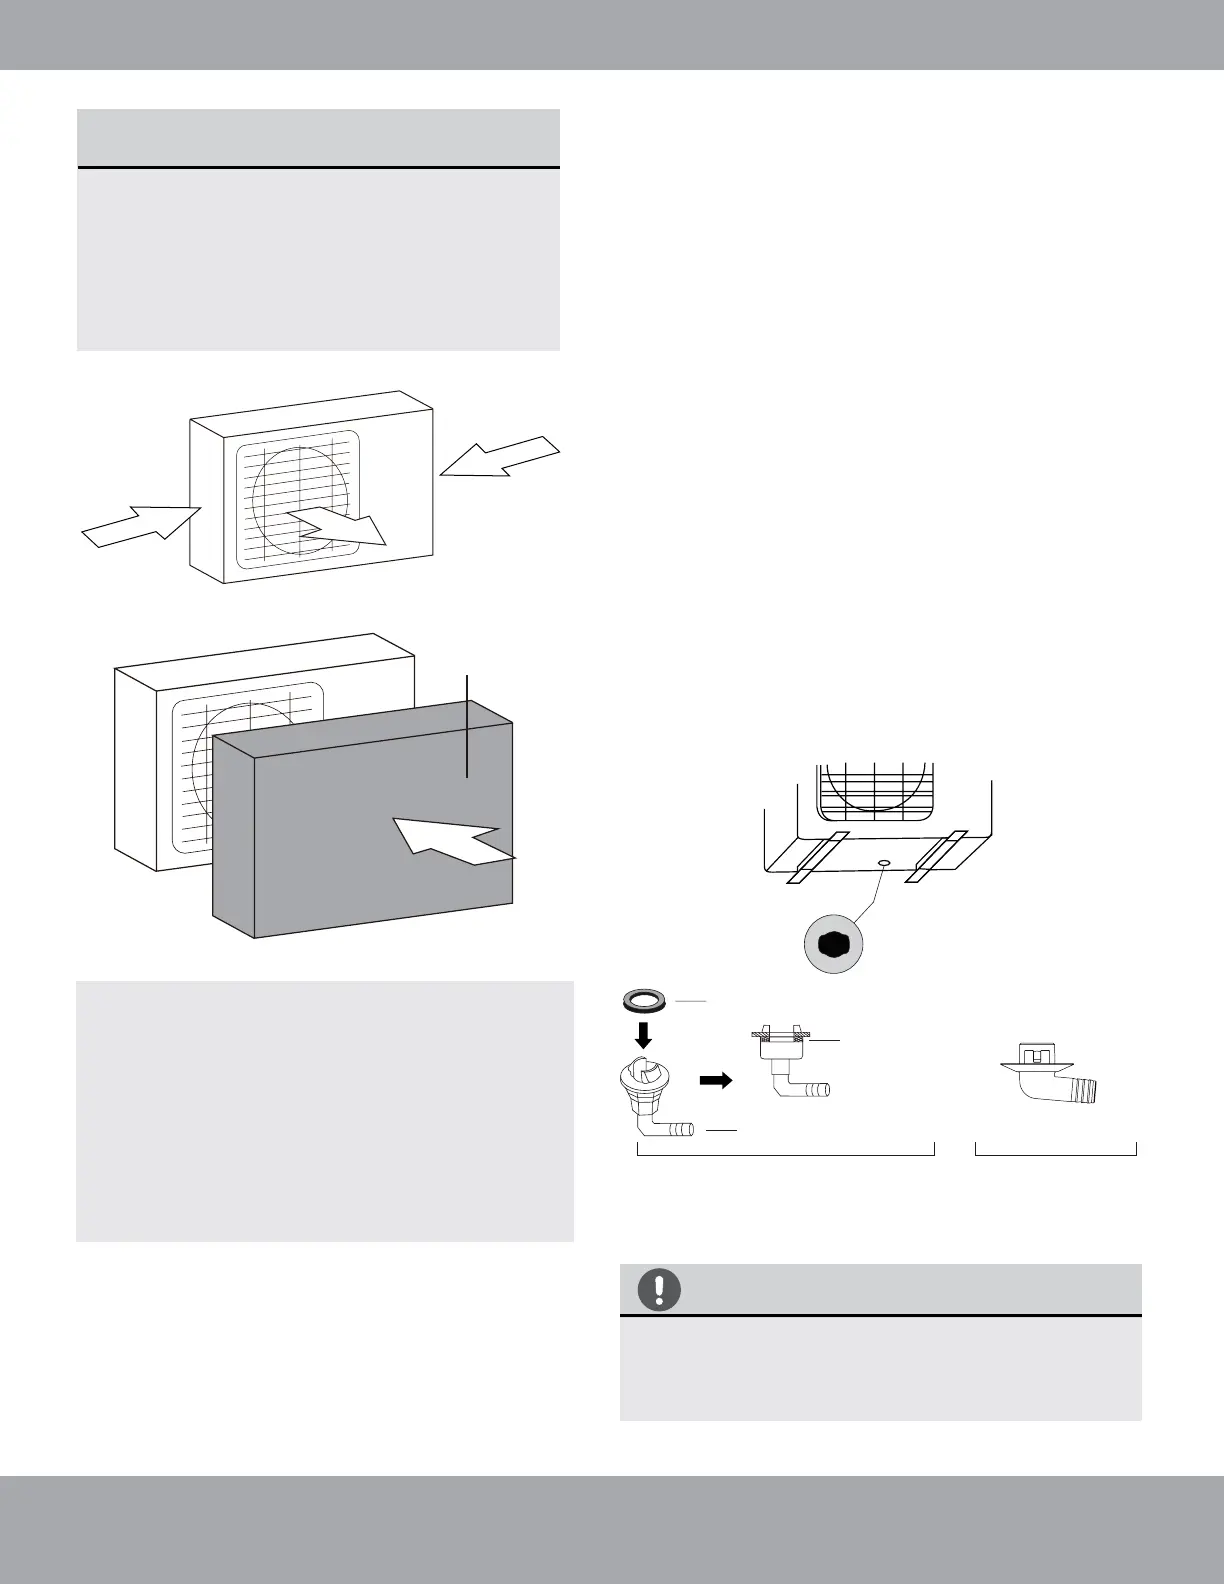
If the unit is exposed to heavy wind:
Install unit so that air outlet fan is at a 90°
angle to the direction of the wind. If needed,
build a barrier in front of the unit to protect it
from extremely heavy winds. Ensure the wind
barrier does not block necessary airflow. See
Fig. 5.2 and Fig. 5.3 below.
If the unit is frequently exposed to
heavy rain or snow:
Build a shelter above the unit it to protect
it from the rain or snow. Be careful not to
obstruct air flow around the unit.
If the unit is frequently exposed to salty
air (seaside):
Use the outdoor unit that is specially designed
to resist corrosion.
Step 2: Install drain joint
Heat pump units require a drain joint. Before
bolting the outdoor unit in place, you must
install the drain joint at the bottom of the unit.
NOTE: that there are two different types of
drain joints depending on the type of outdoor
unit.
Strong wind
Strong wind
Fig. 5.2
Fig. 5.3
Strong wind
Wind Baffle
CAUTION
In cold climates, make sure that the drain
hose is as vertical as possible to ensure swift
water drainage. If water drains too slowly, it
can freeze in the hose and flood the unit.
Seal
Drain joint
(A) (B)
Base pan hole of
outdoor unit
Seal
Fig. 5.4
If the drain joint comes with a rubber seal (see
Fig. 5.4 - A), do the following:
1. Fit the rubber seal on the end of the drain joint that
will connect to the outdoor unit.
2. Insert the drain joint into the hole in the base pan of
the unit.
3. Rotate the drain joint 90° until it clicks in place
facing the front of the unit.
4. Connect a drain hose extension (not included) to
the drain joint to redirect water from the unit during
heating mode.
If the drain joint doesn’t come with a rubber seal
(see Fig. 5.4 - B), do the following:
1. Insert the drain joint into the hole in the base pan of
the unit. The drain joint will click in place.
2. Connect a drain hose extension (not included) to
the drain joint to redirect water from the unit during
heating mode.
 Loading...