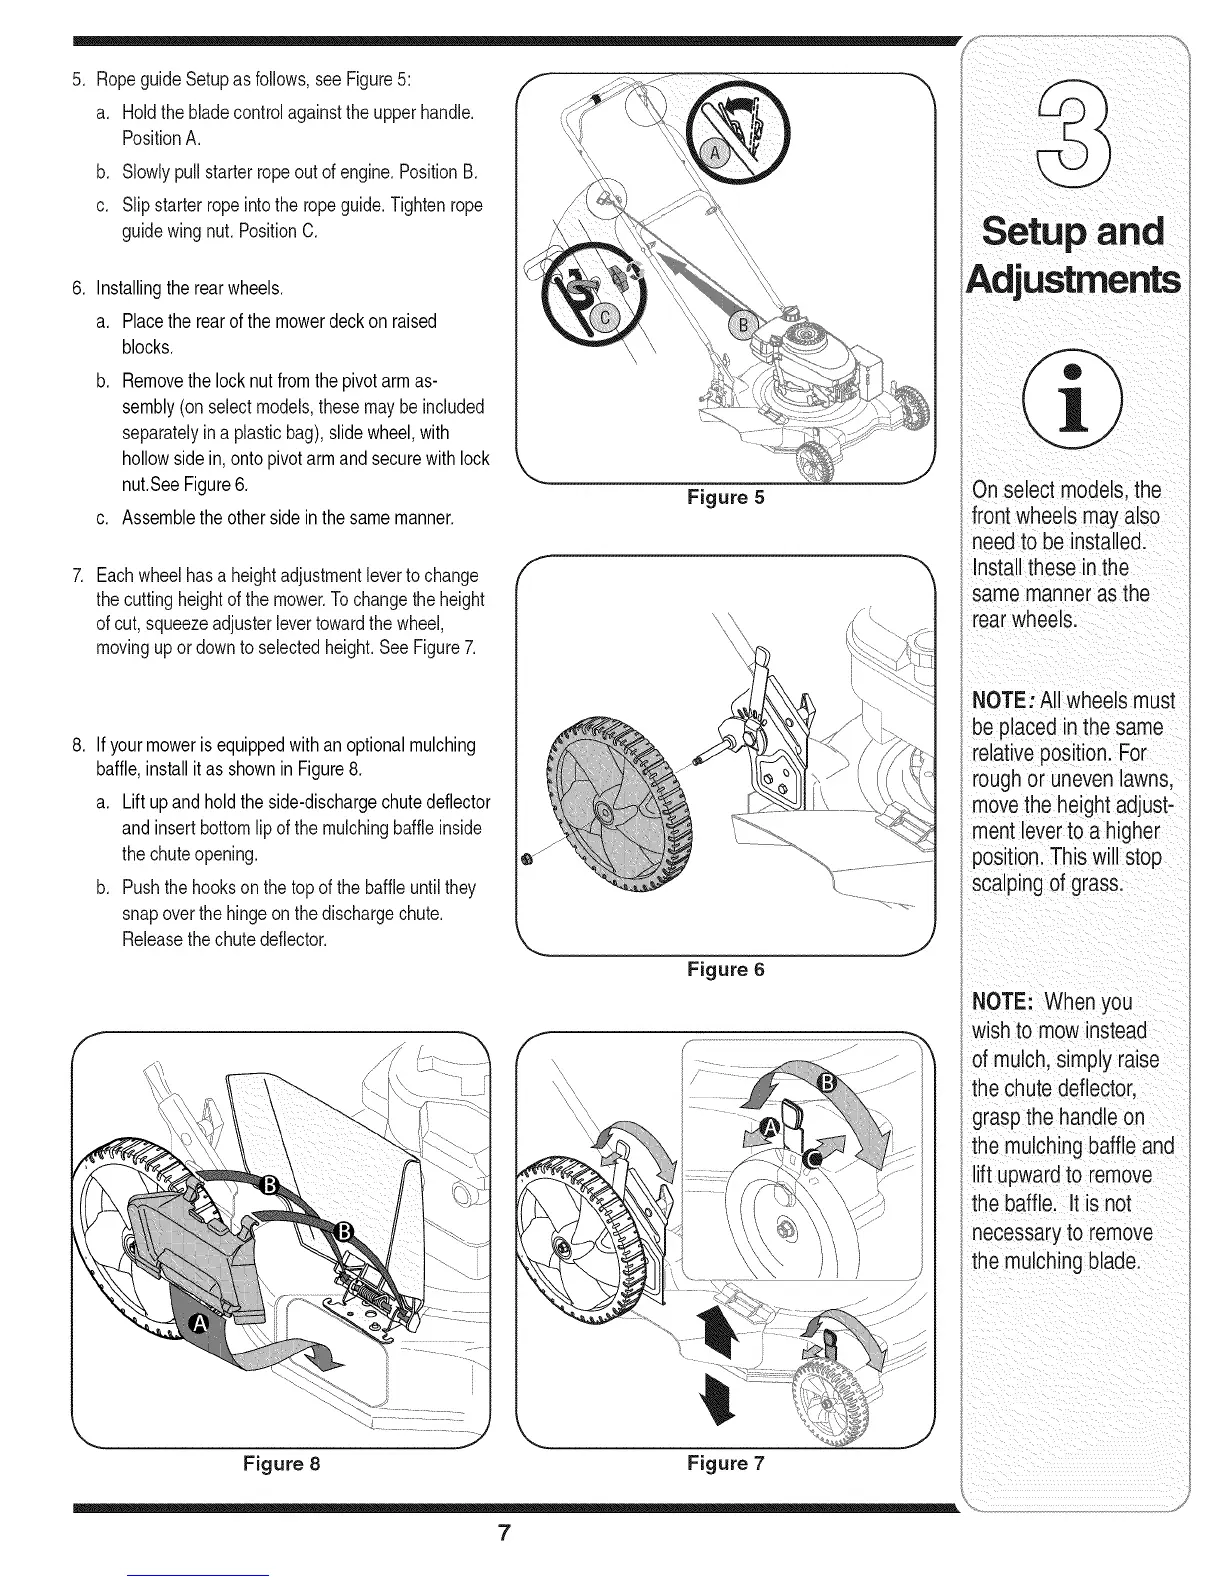
5. RopeguideSetupas follows,see Figure5:
a. Holdthebladecontrolagainsttheupperhandle.
PositionA.
b. Slowlypullstarterropeoutofengine.PositionB.
c. Slipstarterropeintotheropeguide.Tightenrope
guidewingnut.PositionC.
.
.
Installingtherearwheels,
a. Placetherearofthe mowerdeckon raised
blocks.
b. Removethe locknutfromthe pivotarm as-
sembly(onselectmodels,thesemaybe included
separatelyin a plasticbag),slidewheel,with
hollowsidein, ontopivotarmand securewith lock
nut.SeeFigure6.
c. Assemblethe other sidein thesamemanner.
Eachwheelhasa heightadjustmentlevertochange
thecuttingheightof the mower.Tochangethe height
ofcut,squeezeadjusterlevertowardthewheel,
movingupor downto selectedheight.SeeFigure7.
If yourmoweris equippedwithan optionalmulching
baffle,installitas shownin Figure8.
a. Lift upandholdthe side-dischargechutedeflector
andinsertbottomlip of the mulchingbaffleinside
thechuteopening.
b. Pushthehooksonthetopofthebaffleuntilthey
snapoverthehingeon the dischargechute.
Releasethechutedeflector.
Figure 5
Figure 6
Figure 8 Figure 7
7
Onselect models,the
front wheels mayalso
need to be installed.
Installthese in the
same manner asthe
rearwheels.
NOTE: All wheels must
be placed inthe same
relativeposition. For
roughor unevenlawns,
movethe height adjust-
ment leverto a higher
position.This will stop
scalpingof grass.
NOTE: When you
wish to mow instead
of mulch, simplyraise
the chutedeflector,
graspthe handle on
the mulching baffleand
lift upwardto remove
the baffle. It is not
necessaryto remove
the mulching blade.