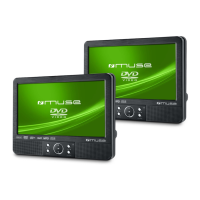
M-52 DV
DVD Player
User Manual
Please read the instruction carefully before operating the unit.
English
1. LED display
2. Reverse skip-previous track
3. PLAY/PAUSE
4. STOP
5. Forward Skip-next track
6. STANDBY button / IR Window
7. USB
8. OPEN/CLOSE button
9. DC IN
10. Audio out(left/right)
11. Video out
12. HDMI
GB - 1
LOCATION OF CONTROLS
MAIN UNIT
GB - 2 GB - 3
REMOTE CONTROL
1. Standby mode switch.
2.
0,1,2,…9
,
10+
: number entry.
3.
Cursor
(▼, ▲, ◄, ►) buttons: Press to highlight
selections on a menu screen and adjust certain settings.
4.
SETUP
: To enter and exit the setup menu.
5.
ENTER
button: Press to conrm selections on a menu
screen.
6.
MENU
: Return to DVD root menu (DVD).
7.
SEARCH
: to search for a desired title, chapter, time.
8. BUTTON: Press BUTTON allow skipping back at
5-level speed (X2->X4->X8->X16->X32->PLAY), press
ENTER
button return to normal playback.
9.
STOP
: MP3/Jpeg/Xvid files: press once to stop
playback.
DVD/VCD/CD: press once to pre-stop (resume with
button), press again to stop playback.
10. BUTTON: Press button allow skipping ahead at
5-level speed (X2-> X4->X8->X16->X32->PLAY), press
ENTER
button return to normal playback.
11.
TITLE
: To access the disc TITLE menu.
12.
RETURN
: Return to root menu (DVD), return to PBC
menu (VCD).
13.
ANGLE
: To access the camera angle function for DVD
disc.
14.
ZOOM
: To access the zoom function.
15.
MUTE
: To mute or restore sound.
16.
SUBTITLE
: To change the subtitle setting.
17.
LANGUAGE
: Press
LANGUAGE
key to change the OSD language.
18.
OSD
: To show status information on the screen.
19.
CLEAR
: Clear the input number in SEARCH or PROGRAM state.
20.
PROGRAM
: To program playback sequences.
21.
SOURCE
: To select between DVD and USB mode.
22.
WIDE
: Selects the aspect ratio of the playback picture.
23.
REPEAT
: To repeat playback.
24.
REVERSE SKIP
, Go to previous chapter/track to the beginning.
25.
PLAY/PAUSE
: To start and pause the playback.
26.
FORWARD SKIP
, Go to next chapter/track.
27. VOL +/-
28.
SLOW
: Press
SLOW
button repeatedly to enter slow playback, and cycle between dierent
speeds. The speeds are 1/2,1/4,1/8,1/16, and normal.
29. A-B: Set A-B
30.
STEP
: To play frame by frame.
31.
AUDIO
: To change the AUDIO setting.
Note: “ ” will be displayed if the function you select is not available.
INSTALLING BATTERY
Insert 2 “AAA/ UM4” batteries to the remote control prior to use. Make sure to match their
polarities (+/-) to the markings inside the compartment.
NOTES:
- Before throwing any batteries away, consult your distributor who may be able to take them
back for specic recycling.
- If the remote control is not going to be used for a long time, remove the battery to avoid damage
caused by battery leakage corrosion.
- Never recharge the batteries, apply heat to them or take them apart.
- Attention should be drawn to the environmental aspects of battery disposal.
- Do not throw batteries in re!
- Battery shall not be exposed to excessive heat such as sunshine, re or the like.
CAUTION: Danger of explosion if battery is incorrectly replaced. Replace only with the same
or equivalent type.
If at any time in the future you should need to dispose of this product please note that
Waste electrical products should not be disposed of with house hold waste. Please
recycle where facilities exist. Check with your Local Authority or retailer for recycling
advice. (Waste Electrical and Electronic Equipment Directive.)
ACCESSORIES
Remote Control x 1
AC adaptor x 1
POWER SUPPLY
Using the AC adaptor
The supplied AC adaptor is suitable for use on AC mains supplies of 100-240V 50/60Hz and
should only be connected to a mains supply within these parameters.
Cautions:
* The AC adaptor included with this unit is for its use only. Do not use it with other equipment.
* Turn o the unit before unplugging the AC adaptor from the unit so as to avoid the unit being
damaged.
* When the unit is not going to be used for long time, disconnect the AC adaptor from the AC outlet.
* Be sure to use it near the wall outlet and easily accessible. If a malfunction occurs, disconnect
the plug from the wall outlet at once.
* AC adaptor is used as the disconnect device. It shall remain readily operable and should not
be obstructed during intended use. To be completely disconnected the apparatus from supply
mains, the AC adaptor of the apparatus shall be disconnected from the mains socket outlet
completely.
* Never use an AC adaptor that is damaged, route power lead in a safe manner and make sure
it is not subjected to trapping or pinching. If the power lead is damaged refer to a qualied
service agent.
CONNECTIONS
Watching a DVD on your TV
Note: Make sure to use the cable with correct plug.
DISC PLAYBACK
Region Management Information
Region Management Information: This unit is designed and manufactured to respond to the
Region Management Information that is encoded on DVD discs. If the Region number printed on
the DVD disc does not correspond to the Region number of this unit, this unit cannot play that disc.
The region number of this unit is 2.
Basic Playback
1. Press button to turn on the unit.
2. Press OPEN button on the unit to open the disc door.
3. Insert a disc with label face you.
4. Close the disc door. It takes a short while for your unit to load the disc. After loading, the unit
will automatically bring you to the main menu of the DVD or start playing the DVD. If the unit
does not automatically start playing the DVD, press the .
Accelerated play
While the disc is playing, press or one or more times to vary the speed and direction of
the accelerated play. Press to resume normal playback.
Frame advance (DVD)
1. While the disc is playing, press STEP once.
2. Press STEP a number of times to advance forward image by image.
3. Press to resume normal playback.
Changing chapter/track
While the disc is playing, press or to go immediately to the next or previous chapter
(DVD), or to the next or previous track (CD).
Zoom (DVD, JPEG)
While a disc is playing, press ZOOM until you reach the zoom size you want. The button cycles
through 2x, 3x, 4x and then zooms out to 1/2x, 1/3x and 1/4x, then returns to normal playback.
Note: Under Zoom function for JPEG le, press ZOOM button to go to Zoom 100% mode, then
Press or button a number of times to vary the Zoom steps which you want.
ADVANCED FUNCTIONS
Search a desired section
The user can access a specic location or a specic track by keying in the target time or the
track number.
1. Press SEARCH button repeatedly to enter dierent search mode.
DVD: CD:
2. Input the chapter number or playback time, then it will jump to the target location
immediately.
PLAY MODES
Repeat playback
While the disc is playing, press the REPEAT button repeatedly to select a play mode:
DVD: Repeat Chapter, Repeat Title, Repeat All, Repeat O;
CD: Repeat Track, Repeat All, Repeat O;
MP3: Single, Repeat one, Repeat Folder, Folder, Shue, Random
Note:
“SINGLE”: The selected track will play once and then stop playback.
“REPEAT ONE”: The selected track will play continuously.
“REPEAT FOLDER”: All tracks in the selected folder will play continuously.
“FOLDER”: All tracks in the selected folder will play once and then stop playback.
“SHUFFLE”: Randomly play once and then stop playback.
“RANDOM”: Random play continuously.
Note: Some DVD discs do not allow repeat function.
Program playback
With this option, you choose and program the playback order. You can store up to 20 tracks.
1. Insert a disc.
2. In playing or stop mode, press the PROG button. The Program menu appears.
DVD CD
3. Use the number buttons to enter the title number and then the chapter number (DVD) or the
track number (CD).
4. Use ◄, ►,▼, ▲button moving to the next input. Repeat step 3 until programming is completed.
Note: press to go to next page for programming track 11 to 20.
5. Highlight the “START” icon, press ENTER button to start the program play.
6. Press the button twice to stop the program playback and clear the program memory.
USB PLAYBACK
You can connect a USB ash drive (not included) to the USB connector port on the unit to play
Xvid movies as well as sound & picture les.
1. Plug the USB ash drive into the USB port on the unit.
2. Press the SOURCE button repeatedly to select the playback source as desired, DVD or USB.
For operation of playing les on the USB ash drive, please refer to the section “PLAYING MP3/
XVID/PICTURE FILES”.
Note:
* It is recommended USB ash drive is plugged when the unit is in standby mode.
* There are many USB devices in the market. We cannot guarantee to support all dierent
models. Please try another USB device if your device is not supported.
PLAYING MP3/XVID/PICTURE FILES
This unit can play MP3, Xvid and Picture les recorded on CD-R/CD-RW/ DVD+ R/DVD+RW
discs, USB ash drive.
1. Insert a disc or USB.
2. The content of disc or USB will be displayed on screen.
3. Press ◄, ►,▼, ▲ button to view and select the le that you want to play, then press ENTER
button to conrm the selected le and start playback.
4. Press button to stop playback.
GB - 4 GB - 5 GB - 6 GB - 7
SETUP MENU
Navigating the setup menu
1. Press SETUP to display the setup main menu.
2. Press ◄ , ► to select a menu icon.
3. Press ▲ , ▼ to select one of the available options under a menu icon.
4. Press ► to access the submenu and ▲ ,▼ to select an option.
5. Press ENTER to conrm your selection.
6. Press ◄ to return to a previous menu.
7. Press SETUP to exit from the setup menu.
AUTO STANDBY 3 H
General Setup Page
DVD-3917A IB MUSE 001 REV0 (M-52 DV).indd 3 2018/5/23 10:35:02