- 6
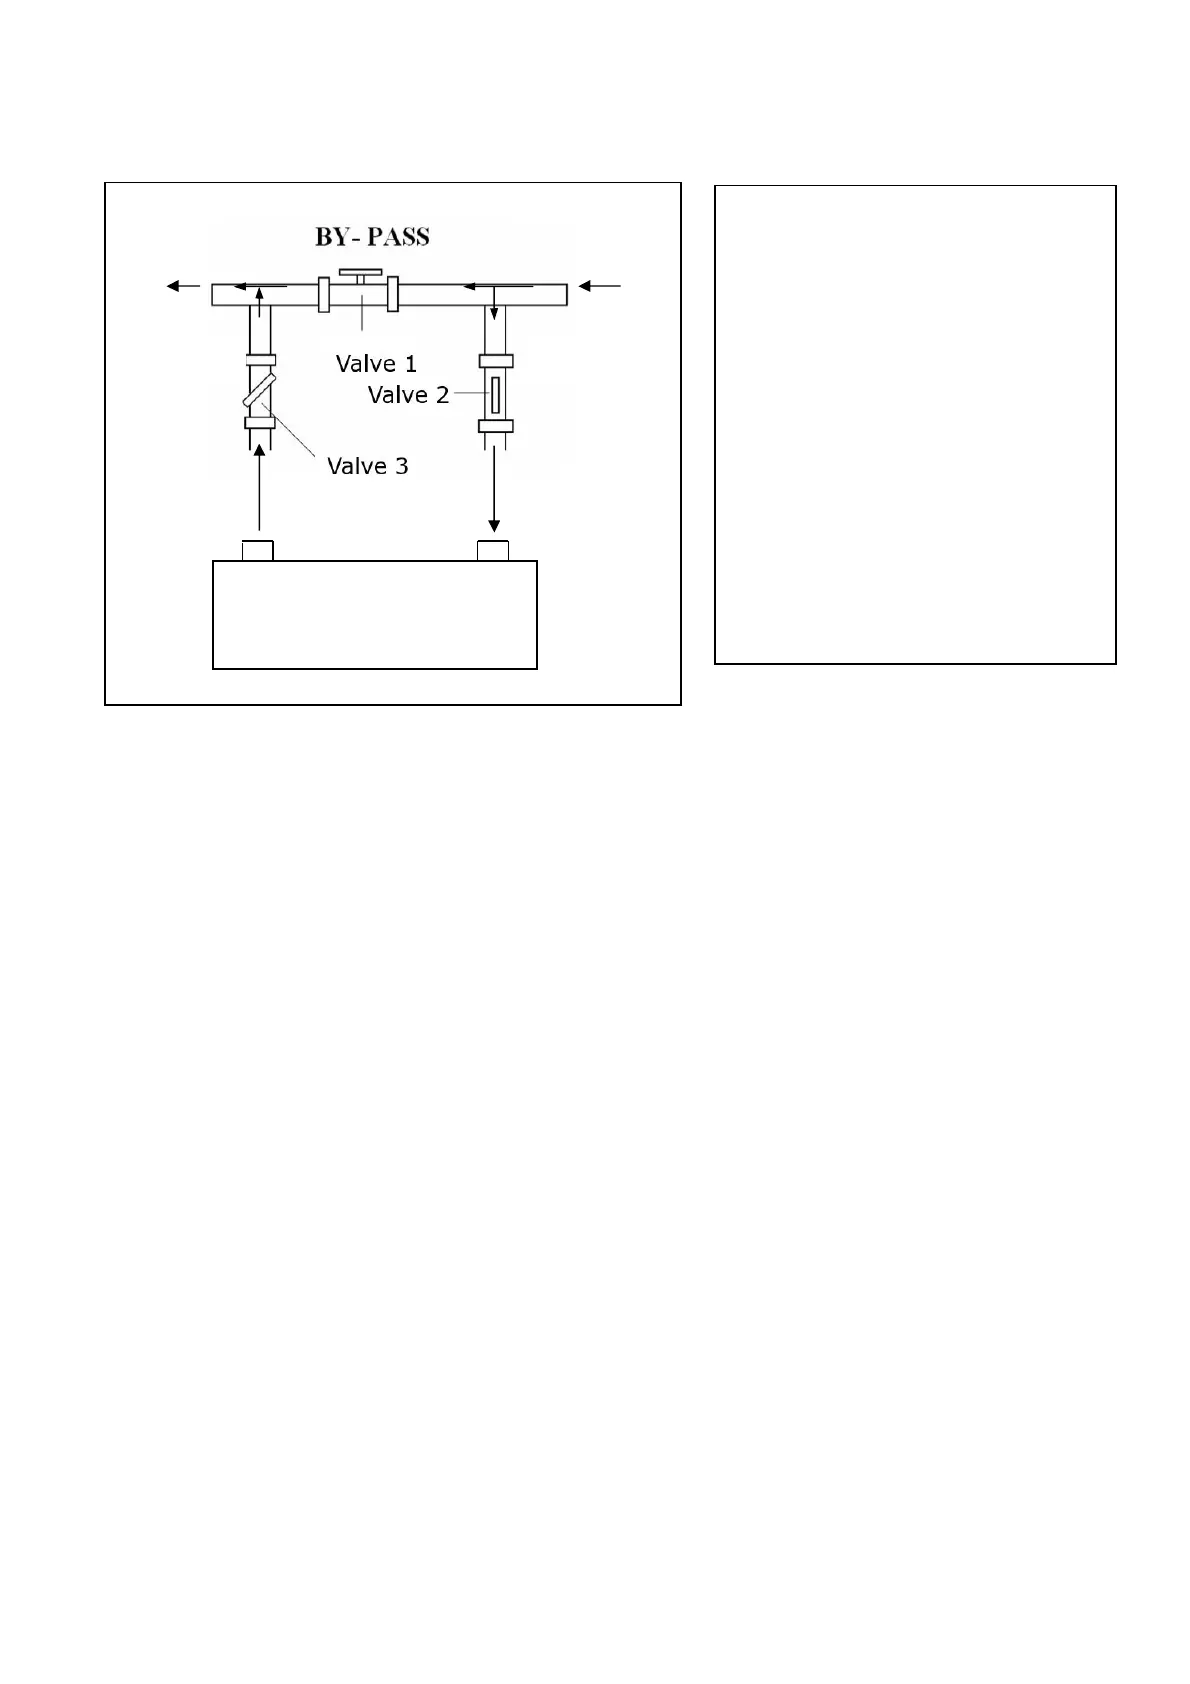
3.6 Adjusting the bypass
Note: Operation without a bypass or with improper bypass adjustment may result in sub-optimal
heat pump operation and possibly damage to the heat pump, which renders the warranty null and
void.
3.7 Electrical connection
Note: Although the heat pump is electrically isolated from the rest of the swimming pool system,
this only prevents the flow of electrical current to or from the water in the pool. Earthing is still
required for protection against short-circuits inside the unit. Always provide a good earth
connection.
We also recommend that electrical installation is conducted by a licensed electrician.
Before connecting the unit, verify that the supply voltage matches the operating voltage of the heat pump.
It is recommended to connect the heat pump to a circuit with its own fuse or circuit breaker and adequate
wiring.
Connection: Open the terminal box on the side panel.
Connect the electrical wires to the terminal block marked ‘POWER SUPPLY’
A second terminal block marked ‘WATER PUMP ’ is located next to the first one. If you are using a
secondary pump to circulate water from the pool to the heat pump this pump can be connected to the
second terminal block here. This allows the filter pump operation to be controlled by the heat pump.
3.8 Initial operation
Note: In order to heat the water in the pool (or spa), the filtration pump must be running to cause
the water to circulate through the heat pump. The heat pump will not start up if the water is not
circulating through it.
After all connections have been made and checked, carry out the following procedure:
Out In
Heat Pump
Use the following procedure to adjust the
bypass:
1. Valve 1 wide open. Valve 2 & valve 3
closed.
2. Slowly open valve 2 & valve 3 by
half, then close the valve 1 slowly to
increase the water flow to valve 2 &
valve 3.
3. If it shows ‘ON’ or ‘EE3’ on display, it
means the water flow into heat pump is
not enough, then you need adjust the
valves to increase the water flow
through the heat pump.
To pool From pool
 Loading...