4
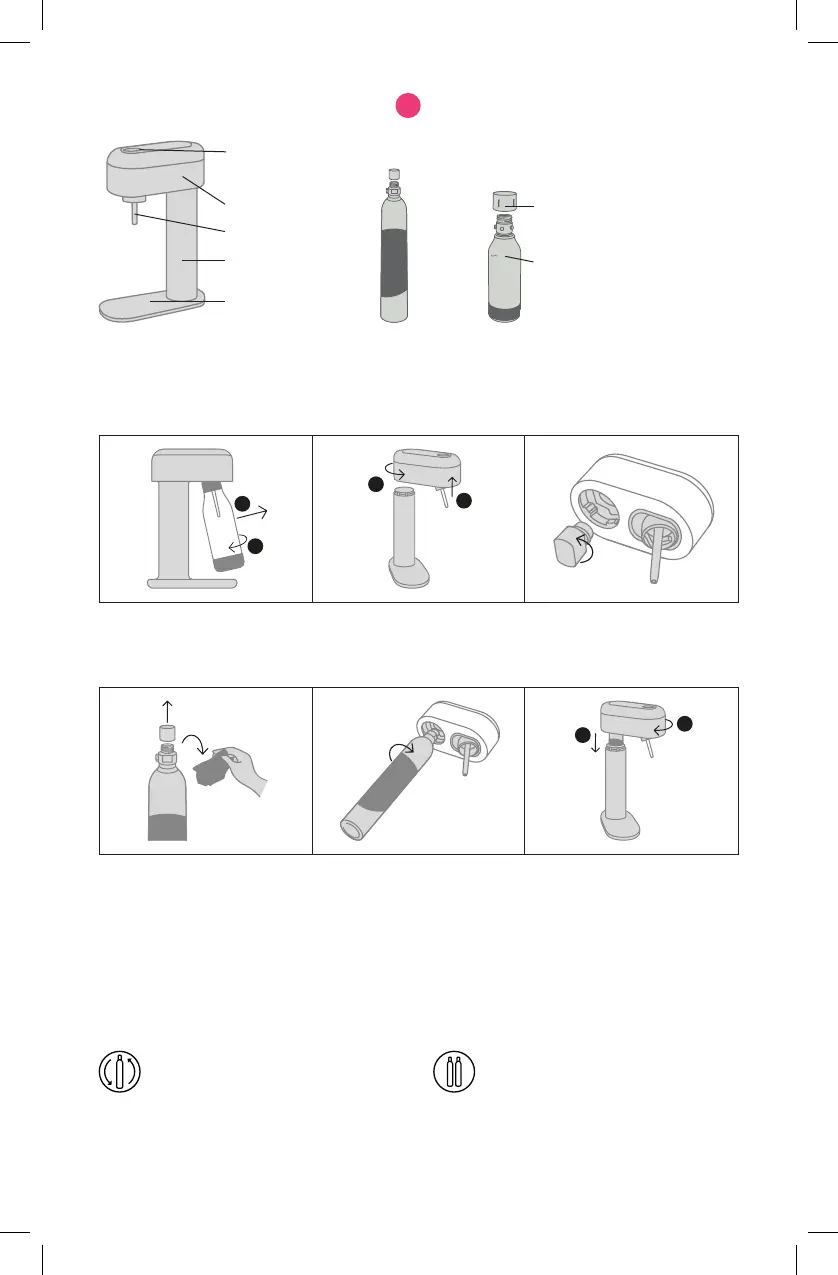
6. Carefully insert the attached CO2
cylinder and the top part into the bottom
part. Turn the top part clockwise until it
clicks into place.
5. Install the CO2 cylinder by
screwing it clockwise. Attach the
cylinder firmly enough, do not
tighten too firmly.
Mysoda Ruby, as well as all the other Mysoda machines, use the most common carbon dioxide cylinder with screw-in system, so
that you can always easily find an exchange for your empty cylinder at your nearest store.
4. Remove the seal and cap from the CO2
cylinder.
3. Unscrew the black thread protective cap
on the top part of the device body.
2. Uninstall the top part of the device
body by turning it anti-clockwise.
1. Remove the water bottle by pulling the
bottle and carbonation nozzle towards
yourself, and then unscrew it (one
quarter clockwise).
Bottle cap
Max fill level
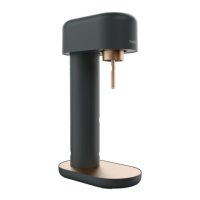
PARTS AND FEATURES
INSTALLING THE CO2 CYLINDER
COMPATIBLE CO2 CYLINDERS
SPARKLING WATER MAKER
BEFORE FIRST USE: Hand-wash the water bottle with
lukewarm water and hand dishwashing detergent. Rinse well
and wipe outside with a soft cloth to dry. WARNING: Never
wash plastic water bottles in a dishwasher or in hot water. Harsh
chemicals will damage the water bottle.
!
1L WATER BOTTLECO2 CYLINDER
Usage tip: A used CO2 cylinder can be exchanged
by a CO2 cylinder dealer near you. Return the
empty cylinder so that you only pay for the gas
refill.
Usage tip: Keep a spare CO2 cylinder in your home
so that you can replace it as soon as you run out of
gas. Extra cylinders are available from CO2 cylinder
dealers near you.
After the CO2 cylinder is empty, replace the CO2 cylinder in the same way as the first time you installed the cylinder.
1
2
1
2
1
2
Carbonating button
Carbonation nozzle
Device top part
Device bottom part
Drip cover