Do you have a question about the NAVAC NRP6Di and is the answer not in the manual?
NAVAC inverter drive vacuum pumps are used for evacuating sealed HVACR systems with various refrigerants.
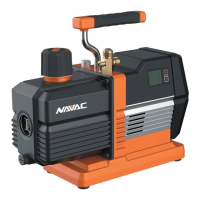
Lighter, solenoid isolation valve, integrated gauge, and non-sparking design for R-32/1234yf.
The NAVAC Smart Vacuum Pump is a sophisticated tool designed to enhance the efficiency and enjoyment of HVACR professionals. These pumps, including the NRP6D, NRP8D, NRP6DV, and NRP8DV models, represent the industry's first smart vacuum pumps, integrating inverter drive, precise vacuum measurement, and intelligent control technologies. They are specifically engineered to remove air, moisture, and other non-condensable gases from sealed HVACR systems, making them ideal for both repair and new installations involving a wide range of refrigerants such as R-12, R-22, R-410A, R-404A, R-32, R-134A, and 1234yf.
The core function of the NAVAC Smart Vacuum Pump is to create a deep vacuum within HVACR systems. This is achieved through an inverter-driven twin-cylinder rotary vane pump, which provides powerful and efficient evacuation. The inverter drive technology allows the pump to operate at varying speeds, optimizing performance and reducing energy consumption. The smart control technology, powered by a pre-programmed computer chip, ensures that moisture removal is thorough by automatically extending the evacuation time until the desired vacuum level is achieved.
For the Di-series models (NRP6Di and NRP8Di), a digital vacuum gauge is integrated, offering high-precision real-time vacuum level display. This allows technicians to monitor the system's internal evacuation condition comprehensively. Once the set evacuation level is reached, these models emit an audible beep to signal completion, enabling technicians to proceed with charging the system. The DV-series models (NRP6DV and NRP8DV) also utilize DC inverter drive motors but employ a mechanical vacuum gauge to confirm proper vacuum attainment.
A crucial safety feature is the built-in solenoid isolation valve. This valve automatically closes upon shutdown or loss of power, preventing oil backflow into the system and protecting the integrity of the HVACR system. The forced oil lubrication system ensures optimal vane sealing, efficient cooling, and high reliability of the pump. The non-sparking design makes these pumps suitable for use with flammable refrigerants like R-32 and 1234yf, enhancing safety in various working environments.
Operating the NAVAC Smart Vacuum Pump involves several user-friendly features designed for convenience and effectiveness. Before use, it's essential to verify the power supply matches the pump's voltage and ensure the pump is switched off before connecting to the power source. Checking and maintaining the proper oil level is critical, with oil added slowly to prevent spillage, filling to a level between the two oil sight glass lines. The pump is designed to operate within an ambient temperature range of 30 to 104°F (-1°C to 40°C), with provisions for warming up the oil in colder conditions.
Connecting the pump to the HVACR system involves removing the inlet protection cap from the desired connecting port (1/4", 3/8", or 1/2") and using the shortest possible hoses for faster and more thorough evacuation. It is vital to inspect all hose connections for proper sealing to prevent leaks that could hinder deep vacuum achievement. At the start of evacuation, the GAS BALLAST screw should be opened one full turn counter-clockwise. Once the vacuum gauge reaches 2000 microns, it should be retightened to achieve the desired vacuum level.
For Di-series pumps, after powering on, the start button on the display panel initiates the pump. The pump runs at a reduced speed when the vacuum reaches 500 microns, and a buzz alarm indicates completion after 30 minutes. For standard inverter drive pumps, it is recommended to use a micron vacuum gauge, such as the NAVAC NMV1, for precise measurement and display of system evacuation. Technicians should pay close attention to the oil level during operation, adding more oil if it falls below the center line to prevent damage. If residual refrigerant affects the vacuum gauge sensor, the digital display may temporarily malfunction but will self-correct once the refrigerant is evacuated.
Safety warnings are paramount during usage. Users must never connect the vacuum pump to a pressurized system and should always ensure system and piping pressure is below atmospheric pressure. Eye protection, such as safety glasses or goggles, should be worn when handling refrigerants to avoid direct physical contact and burns. All equipment must be grounded to prevent electrical hazards. The pump's enclosure surfaces can become hot during operation, so adequate ventilation space for heat dissipation is necessary, and direct contact with the oil box or motor case should be avoided. The pump is not allowed for use with A3 or flammable refrigerants and must be kept dry and away from water, mud, and dirt. Operating the pump with intake fittings open to the atmosphere should not exceed 3 minutes.
Proper maintenance is crucial for the longevity and optimal performance of the NAVAC Smart Vacuum Pump. Vacuum pump oil serves three vital functions: lubrication, cooling, and sealing. During evacuation, the oil absorbs moisture, which can reduce its effectiveness and potentially lead to pump overheating and extended evacuation times. Therefore, it is recommended to change the oil just before evacuating each A/C-R system to ensure it is clean and effective. NAVAC vacuum pump oil is specifically formulated to maintain proper viscosity and aid in cold starts, but other reputable brands of special-purpose vacuum pump oil can be used if NAVAC oil is unavailable.
The oil should be promptly changed if it becomes opaque, dirty, or full of moisture, as this significantly speeds up evacuation, especially when the system piping has been exposed to the atmosphere for an extended period. The oil change procedure involves running the pump for approximately one minute to warm the pump and oil, but not longer to avoid damage. While the pump is running, one inlet port should be opened to allow oil to drain. After turning off the pump, the oil drain plug should be opened, and the used oil drained into an appropriate vessel for proper disposal. Tipping the pump helps drain any remaining oil. After replacing and tightening the oil drain plug, new oil should be poured in until it reaches the proper level in the sight glass.
Troubleshooting guidance is provided for common issues. For low vacuum, solutions include tightening the secondary air inlet connection cap, replacing damaged rubber rings, adding oil to the center line of the oil display, replacing opaque or impure oil, cleaning the oil entry hole and filter, inspecting connecting hose gaskets and the system for leaks, and selecting an appropriate pump model for the container size. If oil leaks occur, replacing the oil seal or tightening oil box connections and replacing O-rings are recommended. Excessive oil volume can lead to oil spray, which can be resolved by removing oil until the proper level is reached. If the inlet port pressure is excessively high, selecting an appropriate pump and increasing the pumping speed are suggested.
Start-up problems can arise from low oil temperature, motor/power source/circuit board malfunctions, foreign objects in the pump, excessively low or high voltage supply, or overload trips. Solutions include exposing the air entry hole to the atmosphere, removing the oil fume filtration device, turning the engine axle anti-clockwise with a screwdriver for low oil temperature; inspecting and repairing for motor/power source/circuit board malfunctions; inspecting and removing foreign objects; inspecting the power source voltage; and for overload trips, switching the pump off, removing the power plug, and waiting approximately 30 seconds before inspecting and repairing. The pump's inverter-driven motor includes over-current/overload protection, so troubleshooting should occur after the overload resets. If problems persist, contacting a distributor or repair center is advised for further assistance.
| Weight | 24.3 lbs |
|---|---|
| Model | NRP6Di |
| Power Source | Electric |
| Current | 6A |
| Free Air Displacement | 6 CFM |
| Inlet Fitting | 1/4″ & 3/8″ SAE |