8
4
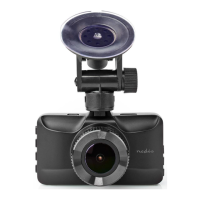
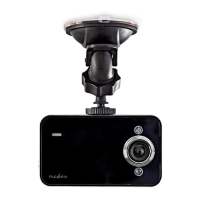
Place the product just behind or below the rearview mirror.
2. Place suction x A
9
on the windshield.
3. Use the suction x clip A
8
to x the product to the windshield.
4. Insert a microSD card (not included) into the microSD card slot A
3
.
5. Adjust the position of the lens A
4
for optimal view of the road.
4
Ensure the product and the power cable are installed and do not interfere
with the sight of the driver or impede with the operation of any driving
controls.
4
Always focus your attention on the road.
Connecting the product to the power supply
Option 1:
1. Plug the auxiliary power plug A
u
into the mini USB port A
1
.
2. Plug the other end of A
u
into an auxiliary power outlet.
Option 2:
1. Charge the product using the USB port A
2
.
4
While charging a green LED lights up, when fully charged the light is o.
4
The product automatically switches on and starts recording when you switch
on your car engine.
4
The camera switches o 5 seconds after the engine is o.
Using the product
Menu
1. Press menu A
6
to enter the setup menu interface.
2. Press A
5
or A
7
to navigate through the menu.
3. Press OK A
w
to conrm a selection.
4. Press A
6
to exit the menu.
Press Ar to toggle between video mode, photo mode and playback mode.
Video mode
1. Press A
r
to enter the video mode.
2. Press A
w
to start or stop recording.
4
The indicator LED will blink blue.
Press Aw to switch o the LED.
4
The product automatically saves recordings on the SD card.