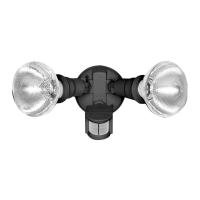
Understanding the controls
ADJUSTING THE DURATION TIME:
The length of time that remains switched on after activation can be
adjusted from (10±5) seconds to (3±1) minutes. Rotating the TIME
knob clockwise from (+) to (-) will reduce the duration time.
Note:
Once the light has been triggered by the PIR sensor any
subsequent detection will start the timed period again from the
beginning.
ADJUSTING THE LUX CONTROL LEVEL:
The Lux control module has a built-in sensing device (photocell) that
+.
detects dayli ht and darkness. Rotating the LUX knob clockwise is
from light (
) to dark ( >. The (* ) position denotes that the
floodlights wi I work at day and night, and the (
p)
position will only
work at night. You can set the unit to operate at the desired level by
adjusting the LUX knob.
Setting the controls
1.
Turn the Lux control knob to light (
) position, turn the wall
switch on and wait half a minute for the control circuit to stabilize.
At this stage ensure that the TIME control knob is set at minimum
(-). The floodlights on the security light will now switch on and
will remain on for about 30 seconds (within 60 seconds).
2.
Direct the sensor toward the desired area to be scanned by
adjusting the elbow joint and the swivel joint on the sensor arm.
Important: loosen all lock nuts and screws on sensor and lamp
holders before making any adjustments.
3.
Have another person move across the centre of the area to be
scanned and slowly adjust the angle of the sensor arm until the
unit senses the presence of the moving person, causing the
floodlights to switch on. (Refer Fig.1B)
4.
Adjust time control to required setting.
5.
To set the light level at which the floodlights will automatically
switch "on" at night, turn the LUX control knob from daylight to
night. If the floodlights are required to switch on earlier, e.g. Dusk,
wait for the desired light level, then Slowly turn the LUX control
knob towards daylight while someone walks across the centre of
the area to be detected. When the floodlights switch on, release
the LUX control knob. You may need to make further adjustments
to achieve your ideal light level setting.
How to change into MANUAL CONTROL MODE
POWER ON
0,
*I
AUTO MODE
MANUAL MODE
1.
When power is first switched on, the PIR detector enters into the
" WARM-UP" . period for about 1 minute, then automatically
changes into AUTO MODE.
2.
During AUTO MODE, by switching off the ON/OFF main switch for
about 4 seconds
then switching on, the PIR detector will
automatically change into MANUAL MODE from AUTO MODE. In
MANUAL MODE, the floodlights will remain ON, not affected by
duration time and Lux control level.
TROUBLE SHOOTING AND USER HINTS
3. During MANUAL MODE or AUTO MODE, by switching off the
ON/OFF main switch over 30 seconds and then on again, the PIR
detector will reset to WARM-UP period.
Important: when adjusting lamp holders, ensure that the PAR38
lamps are not touching or in close proximity to sensor head, heat
from the PAR38 lamps may distort the unit.
To avoid dust build-up and ensure proper functioning of the
security light, wipe the sensor lens lightly with a damp cloth every
3 months. But never modify the unit, there are not any user
serviceable parts inside.
SPECIFICATIONS:
Detection range: Max. 12 metres at 180 scan.
Duration Time adjustment: (10±5) seconds to (3±1)minutes.
Detection circuitry: Passive Infra Red (PIR).
Power required:230- 240V-50Hz, 4 watt consumption (sensor head
only).
Maximum load: 2x 150 Watt PAR38 bulbs.
Weatherproof: Model MPES69BWP and MPES69WWP =Sensor Head
IP44 and Lamp Holder IP44.
PROBLEM
POSSIBLE CAUSE
SUGGESTED REMEDY
Light does not switch on
when there is movement
in the detection area.
1.
No mains voltage.
Check all connections, and fuses/switches.
2.
Globes faulty or missing.
Check. Replace.
3.
Nearby lighting is too bright.
Redirect sensor or relocate the unit.
4.
Controls set incorrectly.
Readjust sensor angle or control knob.c
5.
Sensor positioned in wrong direction.
Redirect sensor and/or adjust.
Light switches on for no
apparent reason.
(False triggering)
1. Heat from globe activating sensor.
Adjust lamp holders to allow a minimum
gap of 40mm between PAR38 globe and
sensor head.
2. Heat sources such as air con, vents, heater flues,
barbecues, other outside lighting, moving cars are
activating sensor.
Adjust direction of sensor head away
from these sources.
3. Animals/birds e.g. possums or domestic animals.
Redirecting sensor head may help.
4. Interference from on/off switching of electric fans
or lights on the same circuit as your security floodlight.
(this problem does not always occur but a faulty switch
or noisy fluorescent light may cause the security
floodlight to switch on.
Should the false triggering become troublesome, consider:
(a)
Replacing a faulty switch.
(b)
Replacing noisy fluorescent tubes or starters.
(c)
Connecting the security floodlight to a separate circuit
(in most cases where one or more of the above suggestions
have been carried out, false triggering has been reduced).
5. Reflection from swimming pool or reflective surface.
Redirect sensor.
Light remains on.
1.
Continuously false triggered.
Redirecting sensor head may help.
2.
Time is set too long.
Reduce time.
Light switches on during
daylight hours.
1. LUX control knob is set to daylight position.
Turn the LUX control knob to desired light setting.
When setting controls in
daylight the detection
,
distance becomes shorter.
1. Interference by sunlight.
Re-test at night.
NOTE: ALL PASSIVE INFRA RED DETECTORS ARE MORE SENSITIVE IN COLD WEATHER THAN WARM WEATHER.

 Loading...