way.
To avoid damaging the internal connector, do not use excessive force when sliding
the PSU into the system.
6. Reconnect the PSU cabling:
a. Reconnect the power cable to the PSU and the power source.
b. Secure the power cable to the PSU using the power cable retainer.
Once power is restored to the PSU, the status LED should be green.
7. Return the failed part to NetApp, as described in the RMA instructions shipped with the kit. See the
Part Return & Replacements page for further information.
Option 2: Replace a DC PSU
To replace a DC PSU, complete the following steps.
1. If you are not already grounded, properly ground yourself.
2. Identify the PSU you want to replace, based on console error messages or through the red Fault LED
on the PSU.
3. Disconnect the PSU:
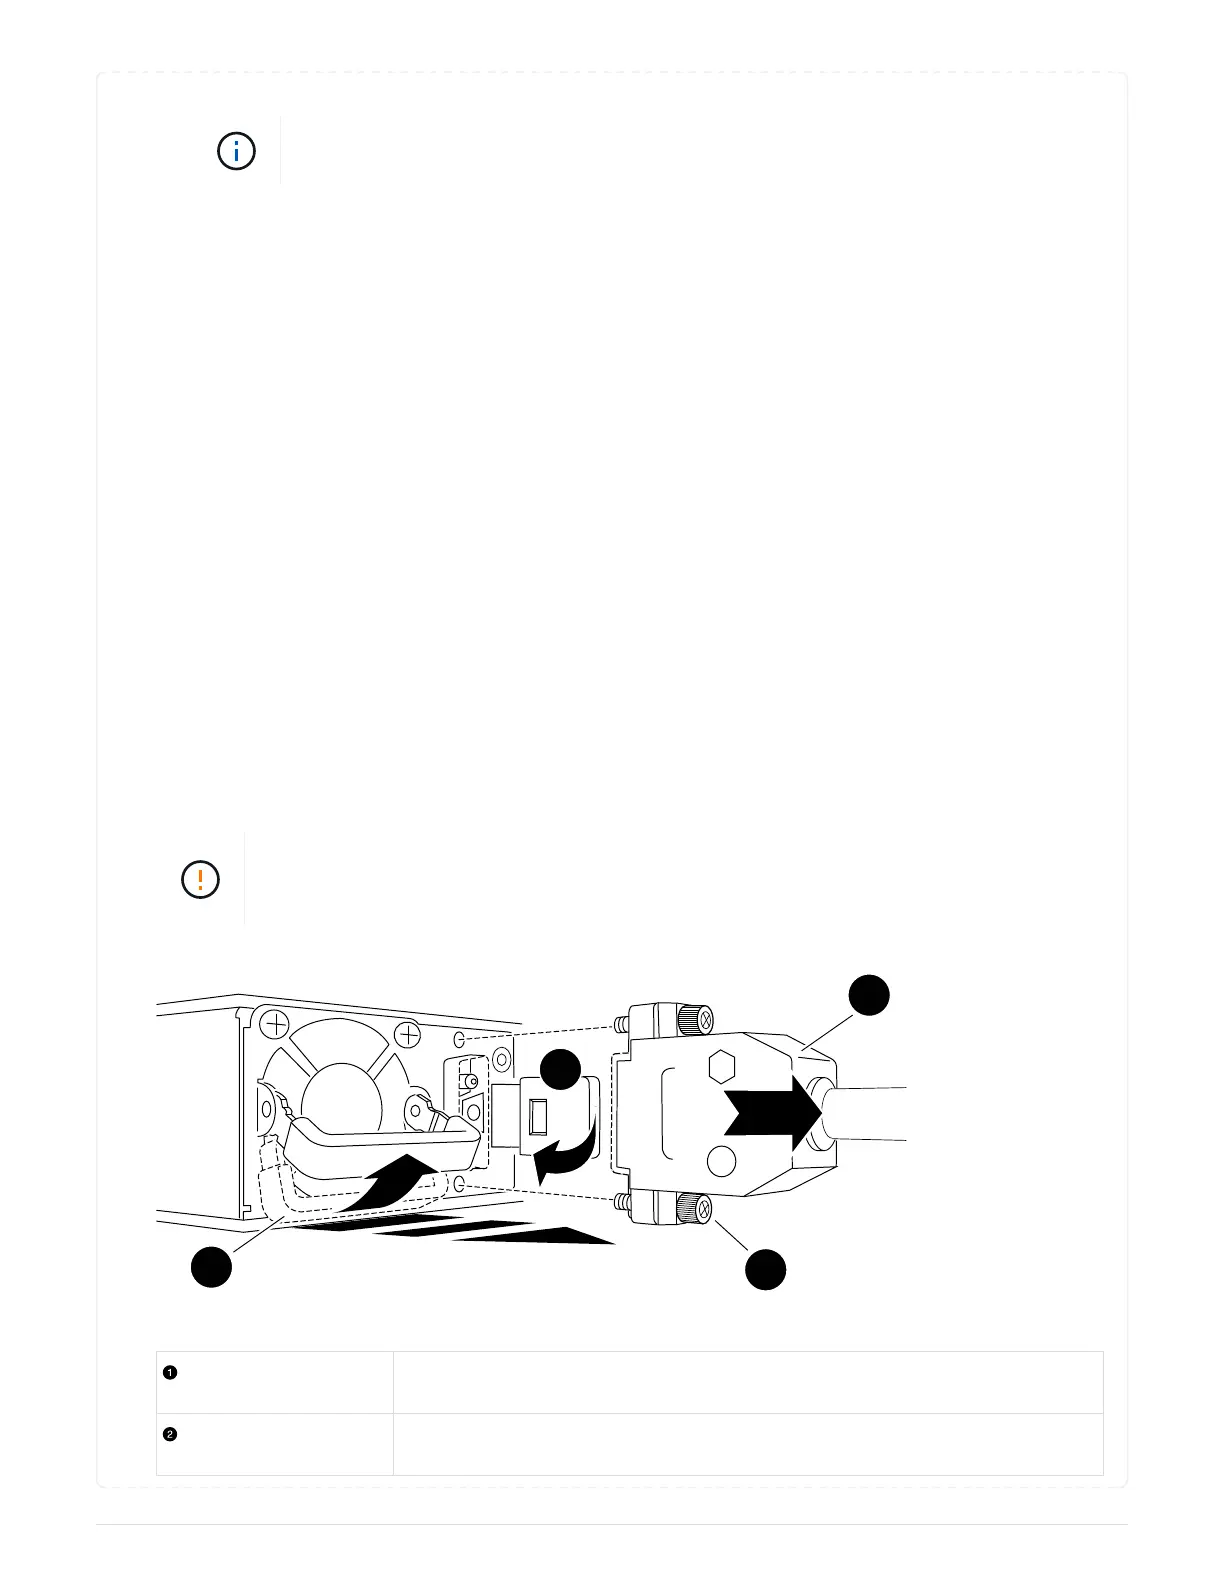
a. Unscrew the D-SUB DC cable connector using the thumb screws on the plug.
b. Unplug the cable from the PSU and set it aside.
4. Remove the PSU by rotating the handle up, press the locking tab, and then pull the PSU out of the
controller module.
The PSU is short. Always use two hands to support it when removing it from the
controller module so that it does not suddenly swing free from the controller module
and injure you.
Thumb screws
D-SUB DC power PSU cable connector
675

 Loading...