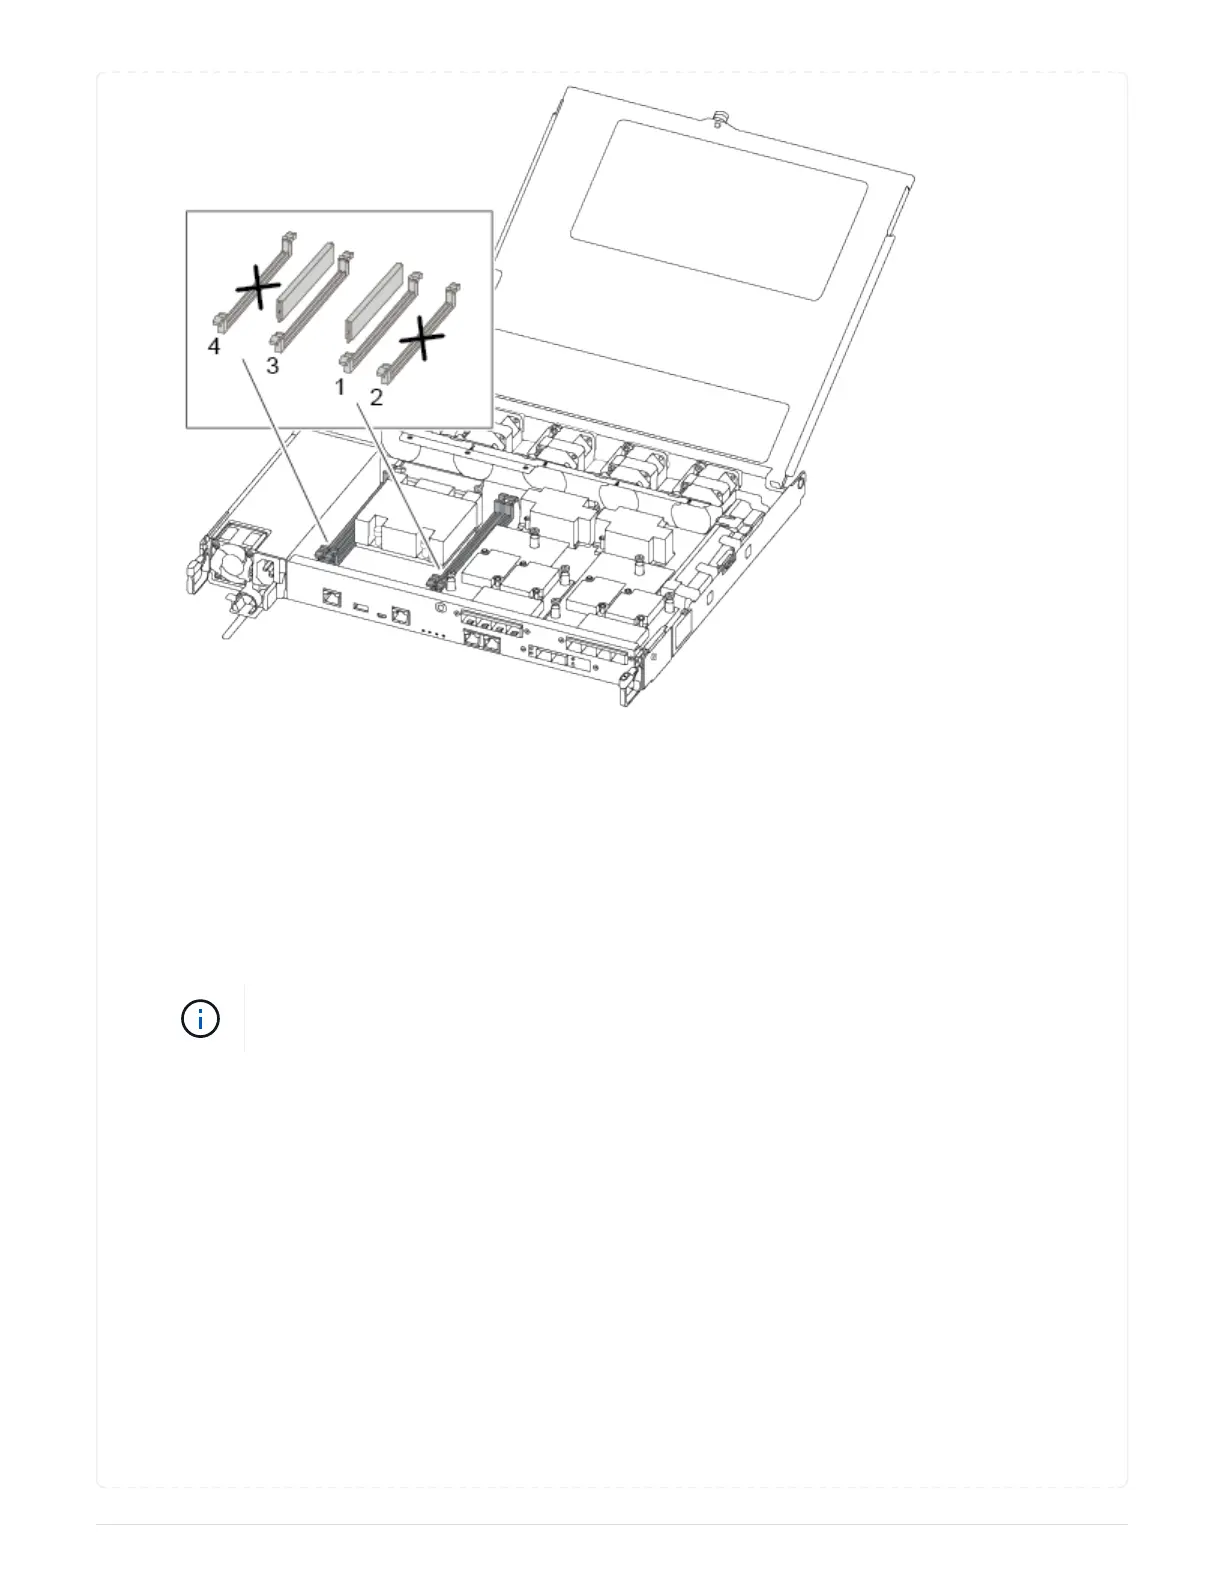
2. Note the orientation of the DIMM in the socket so that you can insert the replacement DIMM in the
proper orientation.
3. Slowly push apart the DIMM ejector tabs on either side of the DIMM, and slide the DIMM out of the
slot.
4. Leave DIMM ejector tabs on the connector in the open position.
5. Remove the replacement DIMM from the antistatic shipping bag, hold the DIMM by the corners, and
align it to the slot.
Hold the DIMM by the edges to avoid pressure on the components on the DIMM circuit
board.
6. Insert the replacement DIMM squarely into the slot.
The DIMMs fit tightly in the socket. If not, reinsert the DIMM to realign it with the socket.
7. Visually inspect the DIMM to verify that it is evenly aligned and fully inserted into the socket.
== Step 4: Install the controller module
After you have replaced the component in the controller module, you must reinstall the controller module
into the chassis, and then boot it.
You can use the following illustrations or the written steps to install the replacement controller module in
the chassis.
1. If you have not already done so, install the air duct.
64